
Learn how to sew a lined drawstring dice bag with a circular bottom with this free sewing pattern and tutorial. A great DIY project to improve your sewing skills and learn how to sew around curves.
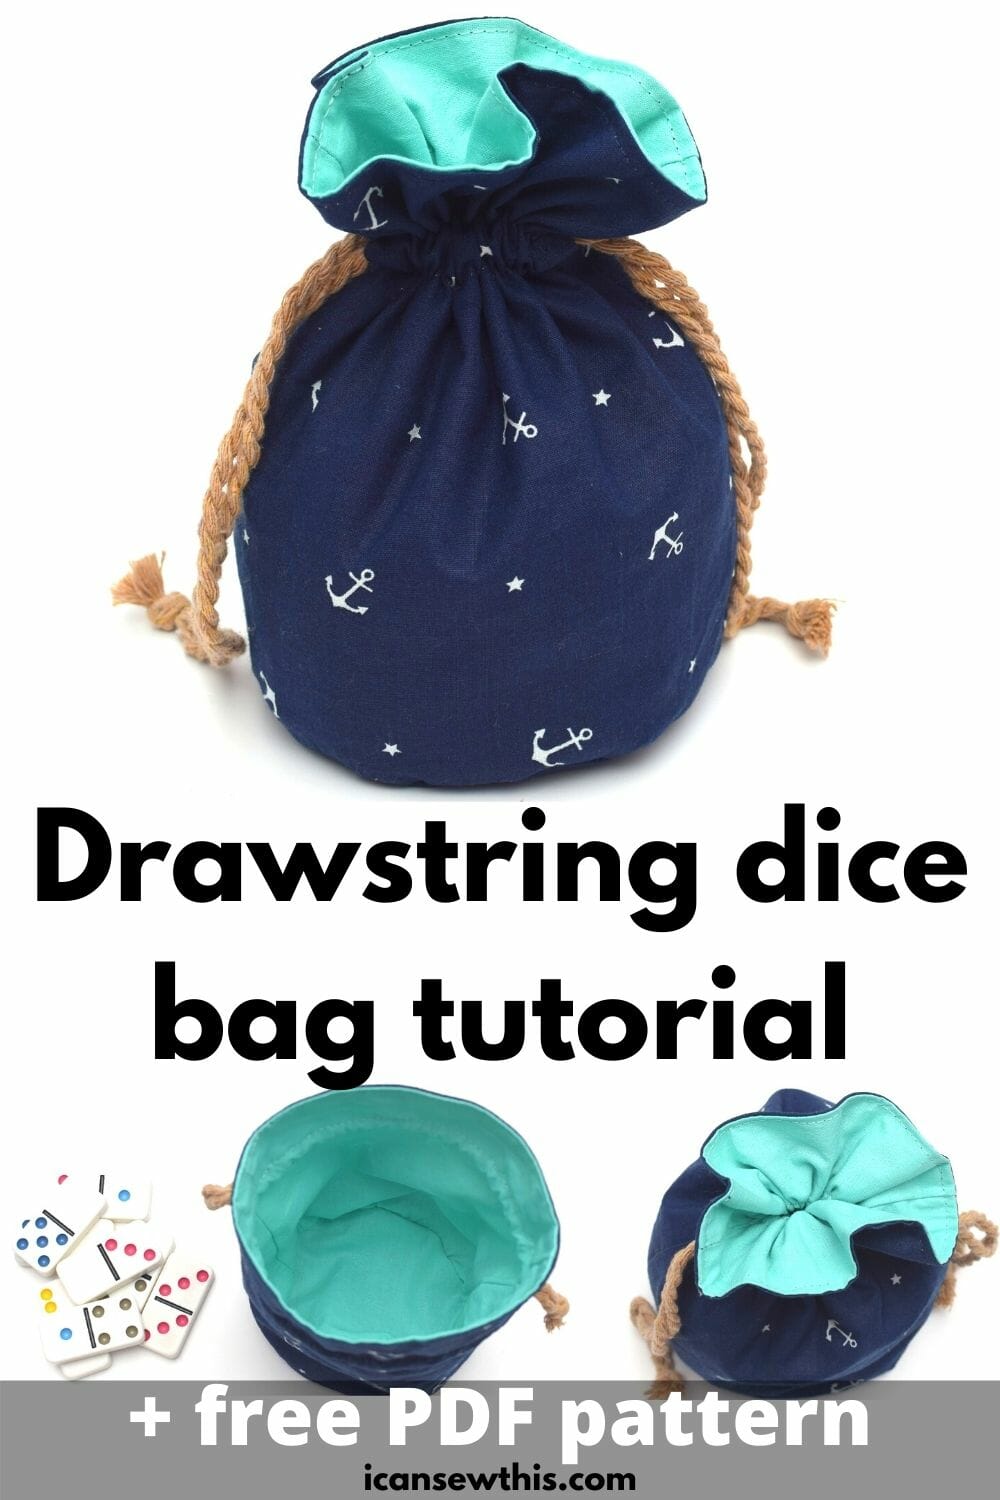
Last week I shared this simple round bottom bag tutorial, and many people wondered if that would be suitable as a dice bag for wargaming and board games.
Did I tell you how much I love getting feedback about my tutorials?
But, here’s the truth – if you plan to store heavy items in your drawstring bag, it would be better to make it lined, to be more durable and sturdy.
Free drawstring dice bag pattern and tutorial
So I decided to come up with this new pattern and tutorial for a lined drawstring dice bag with a flat bottom. Easy peasy, since I had the math part already figured out.
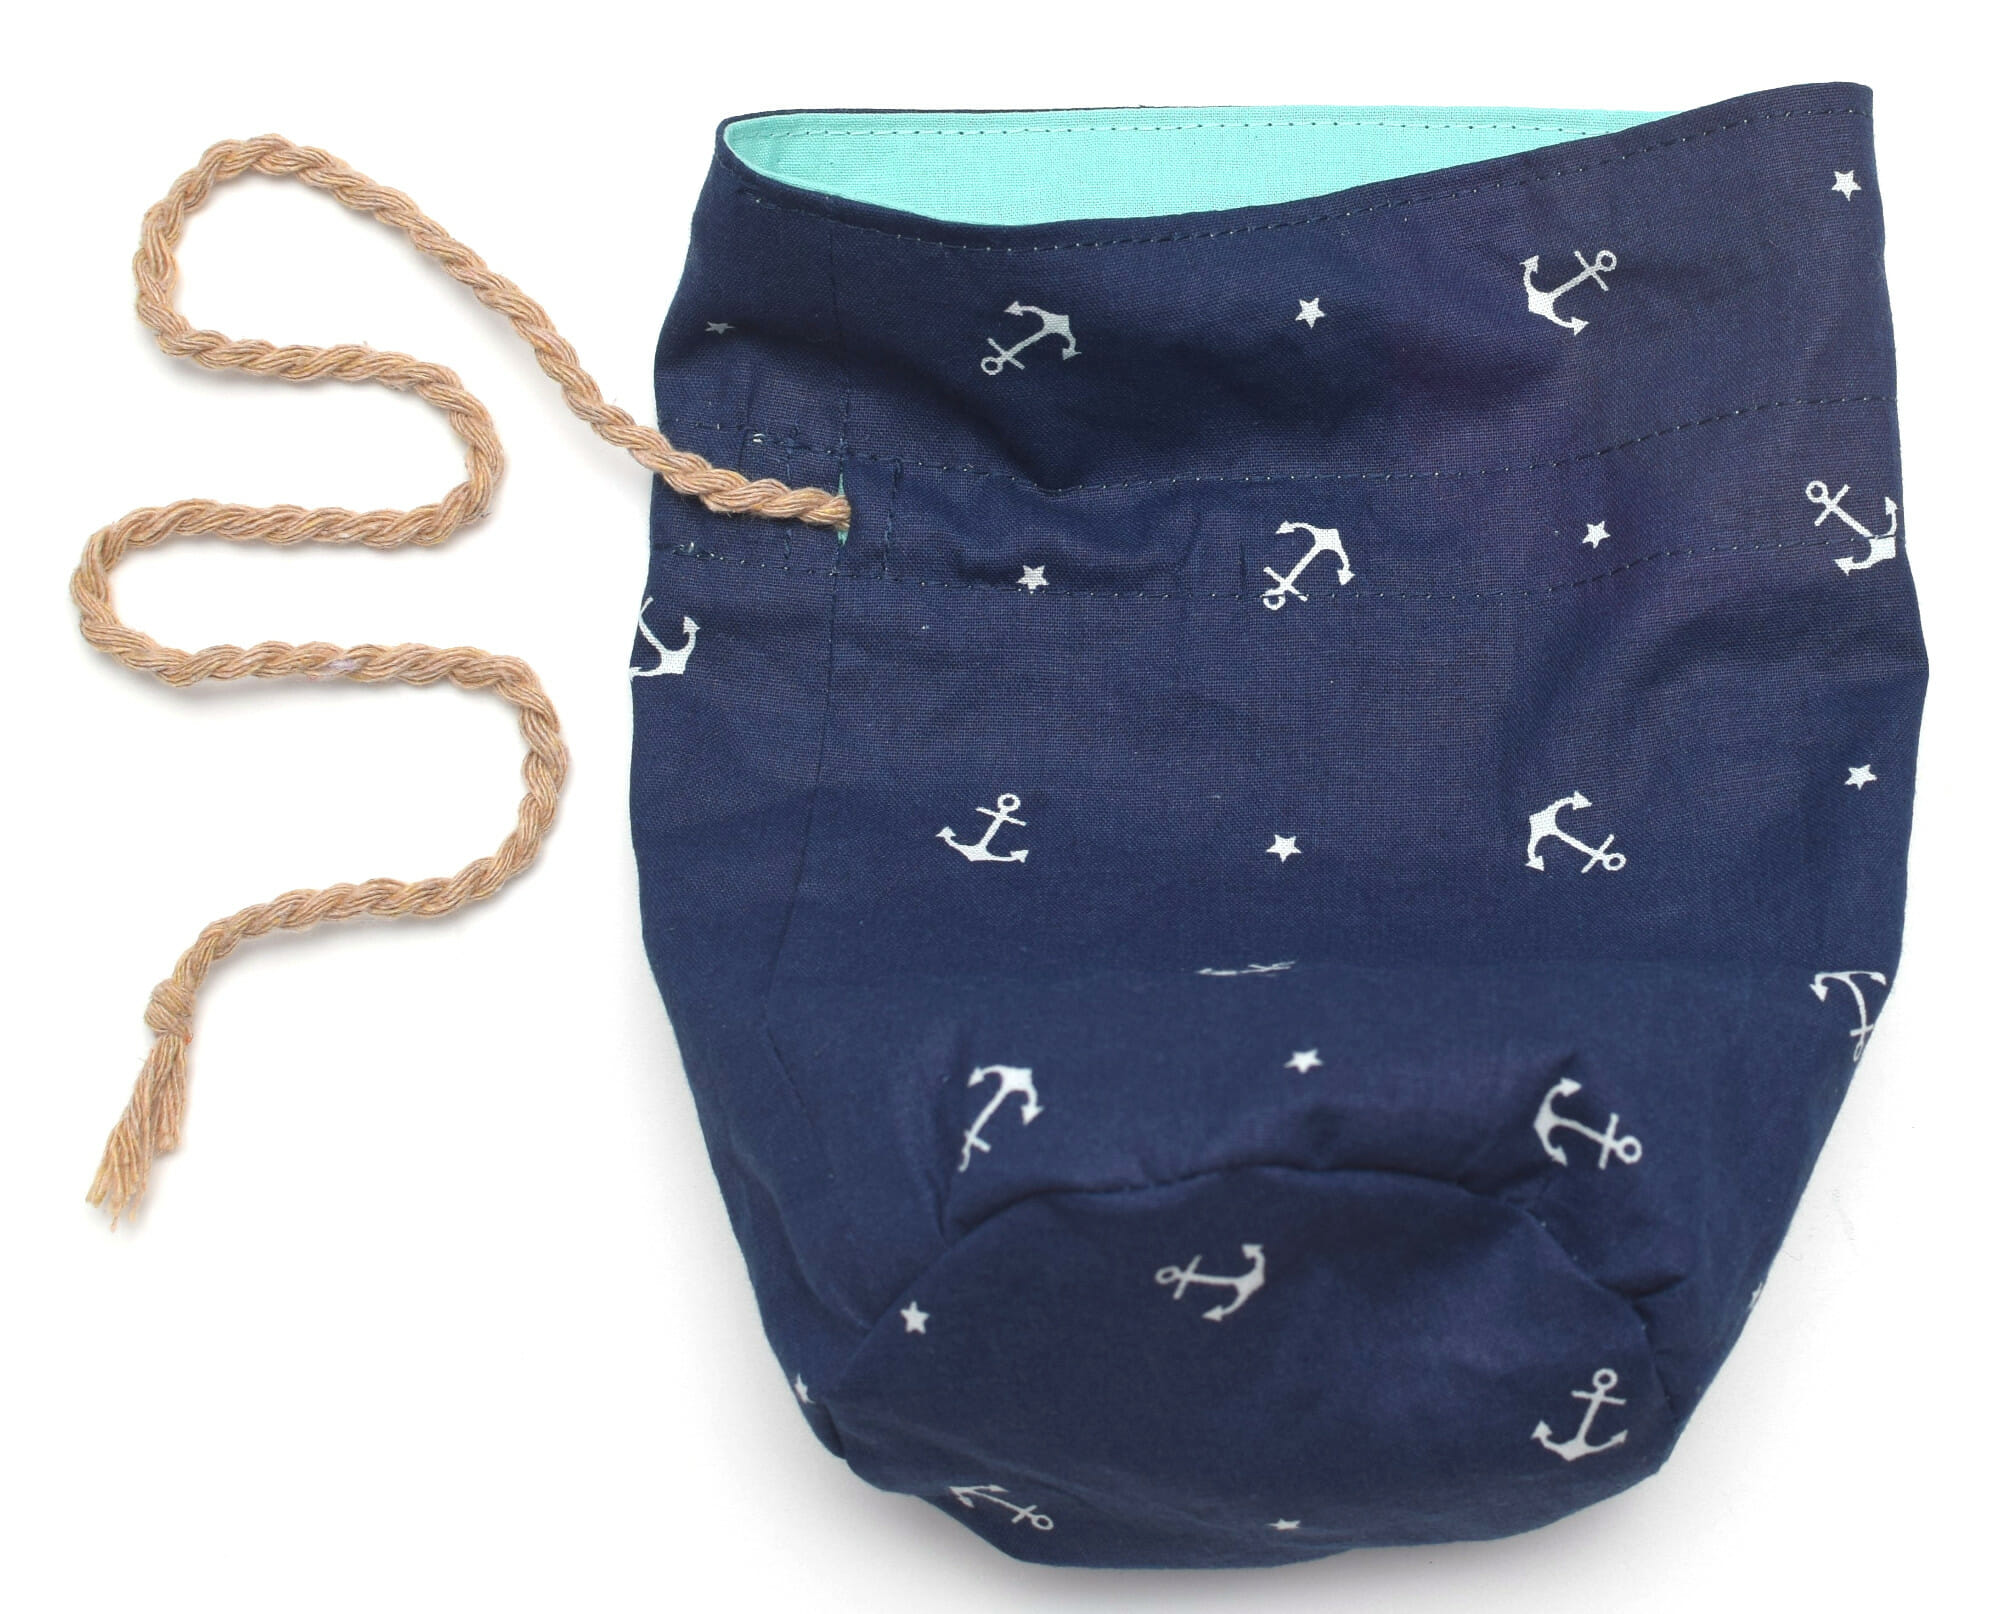
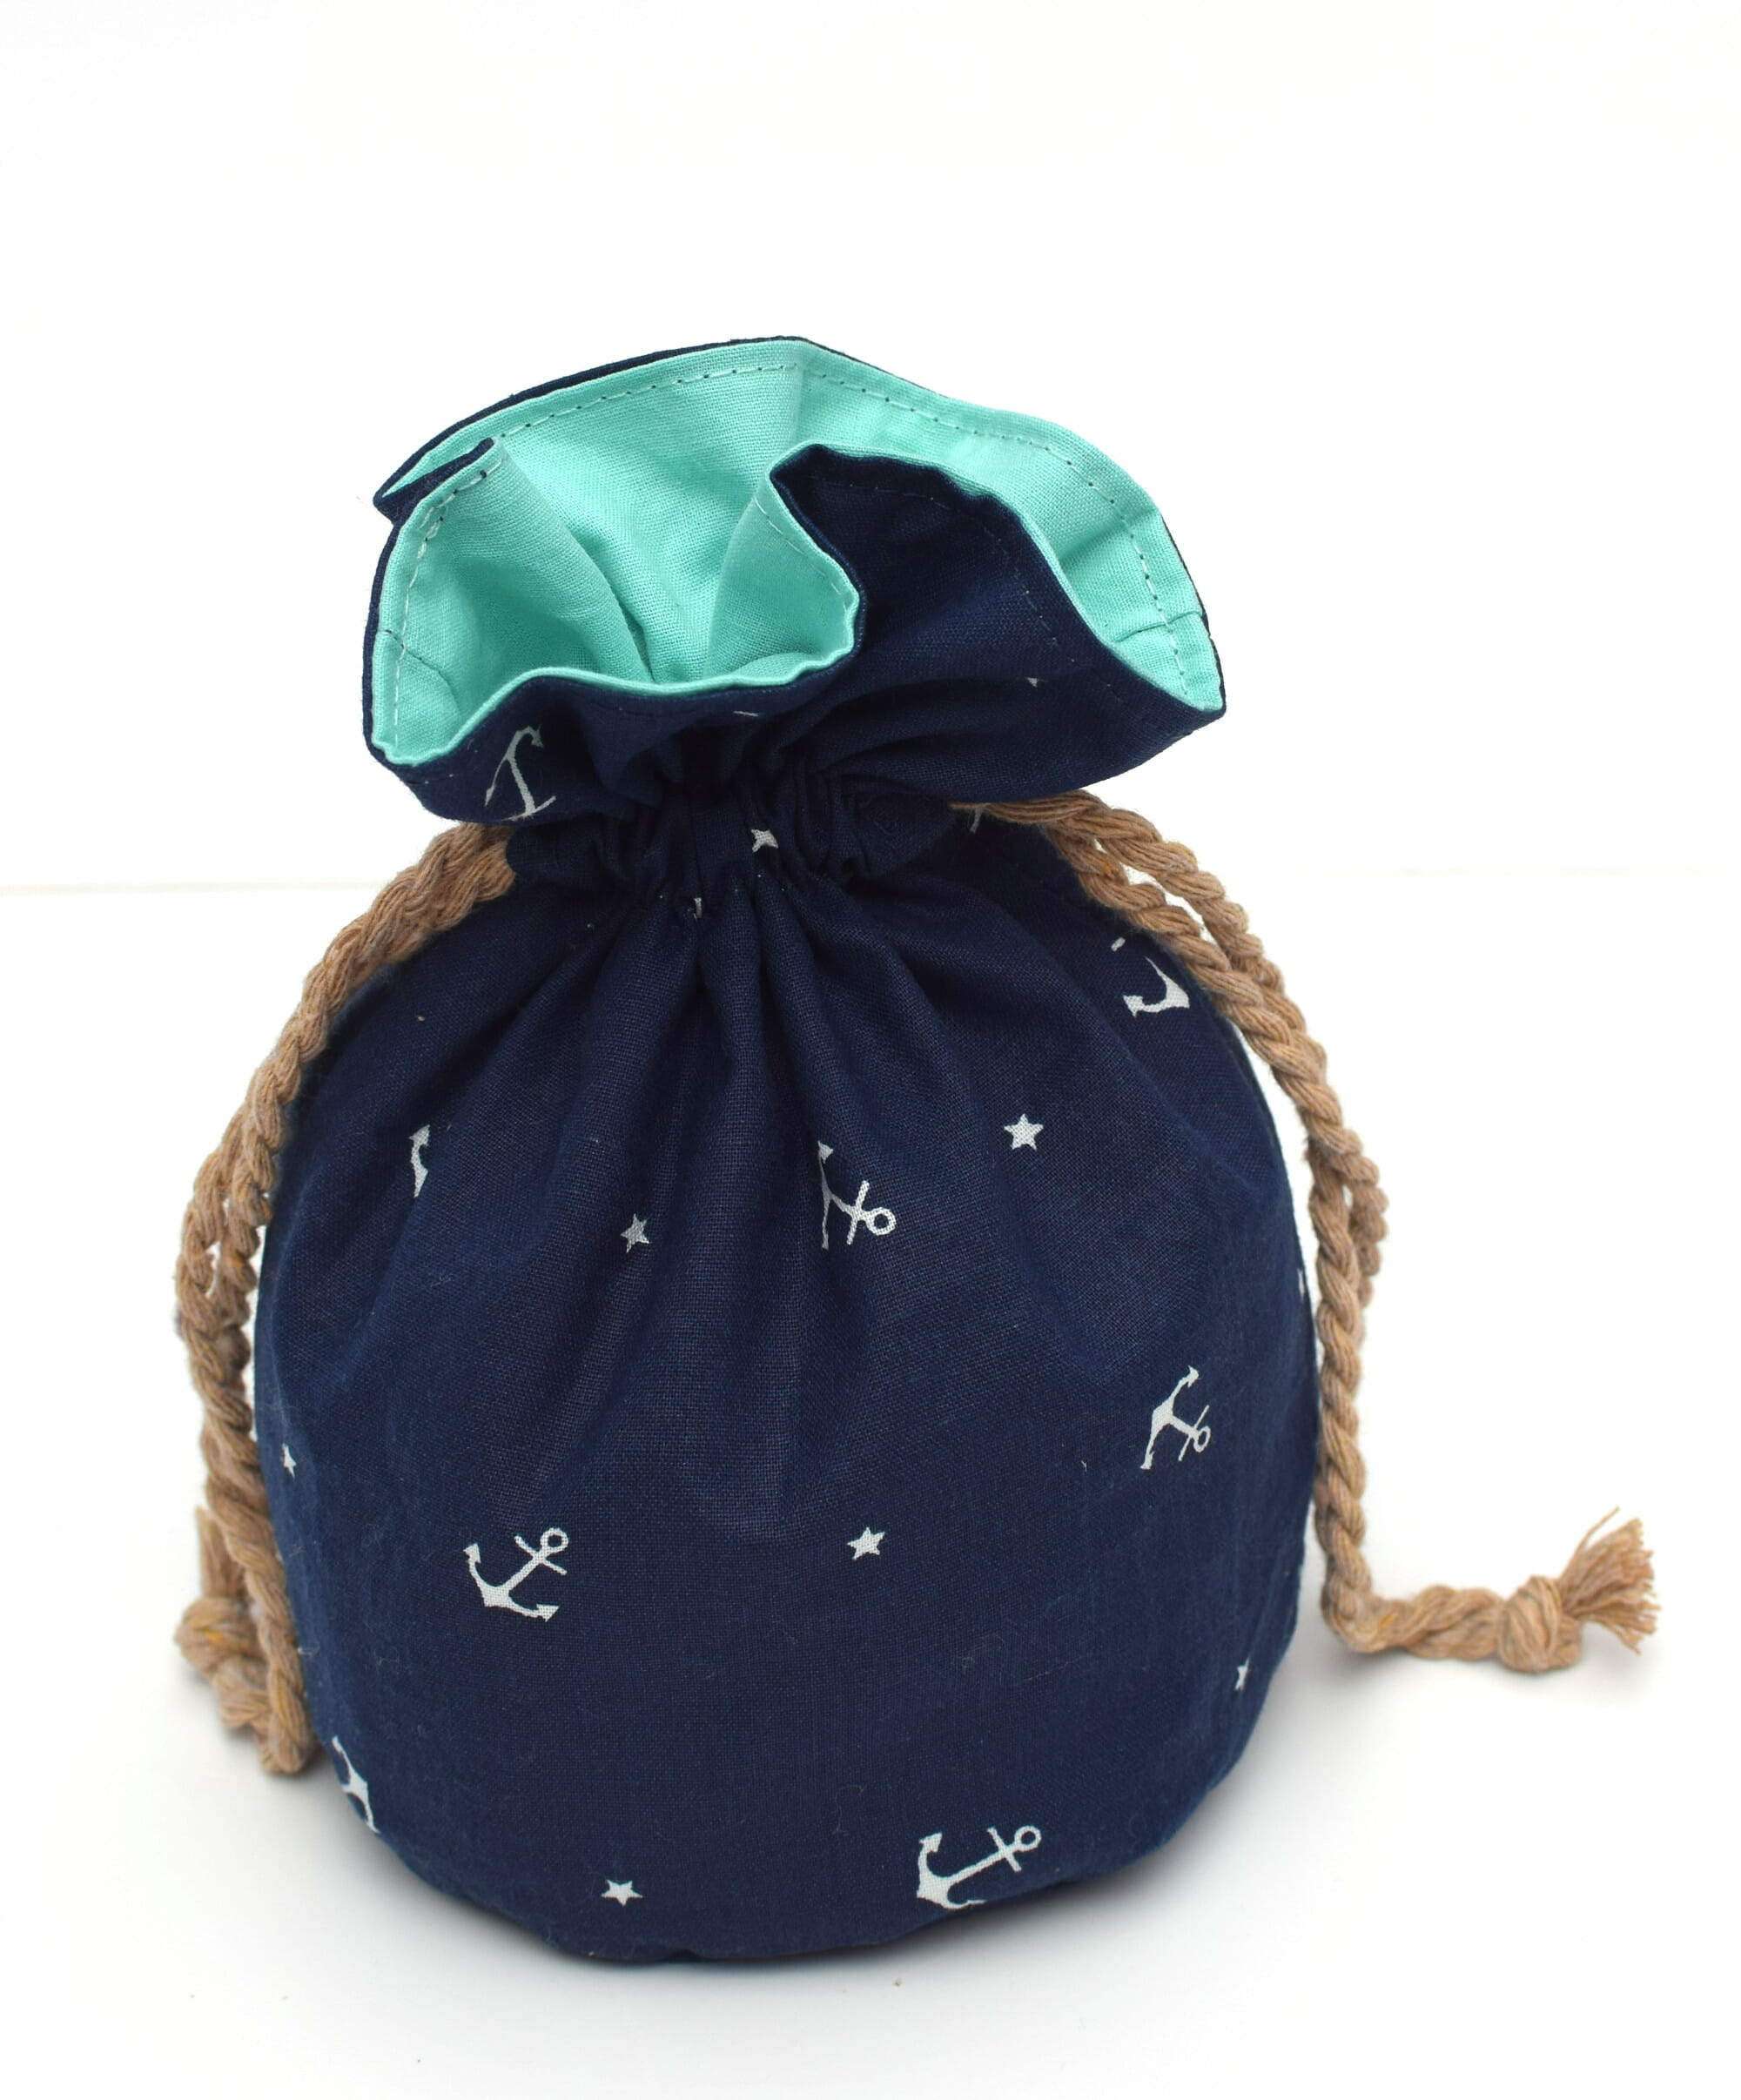
The finished bag measures approx 4.5 inches in diameter at the bottom and stands approx. 7 inches tall.
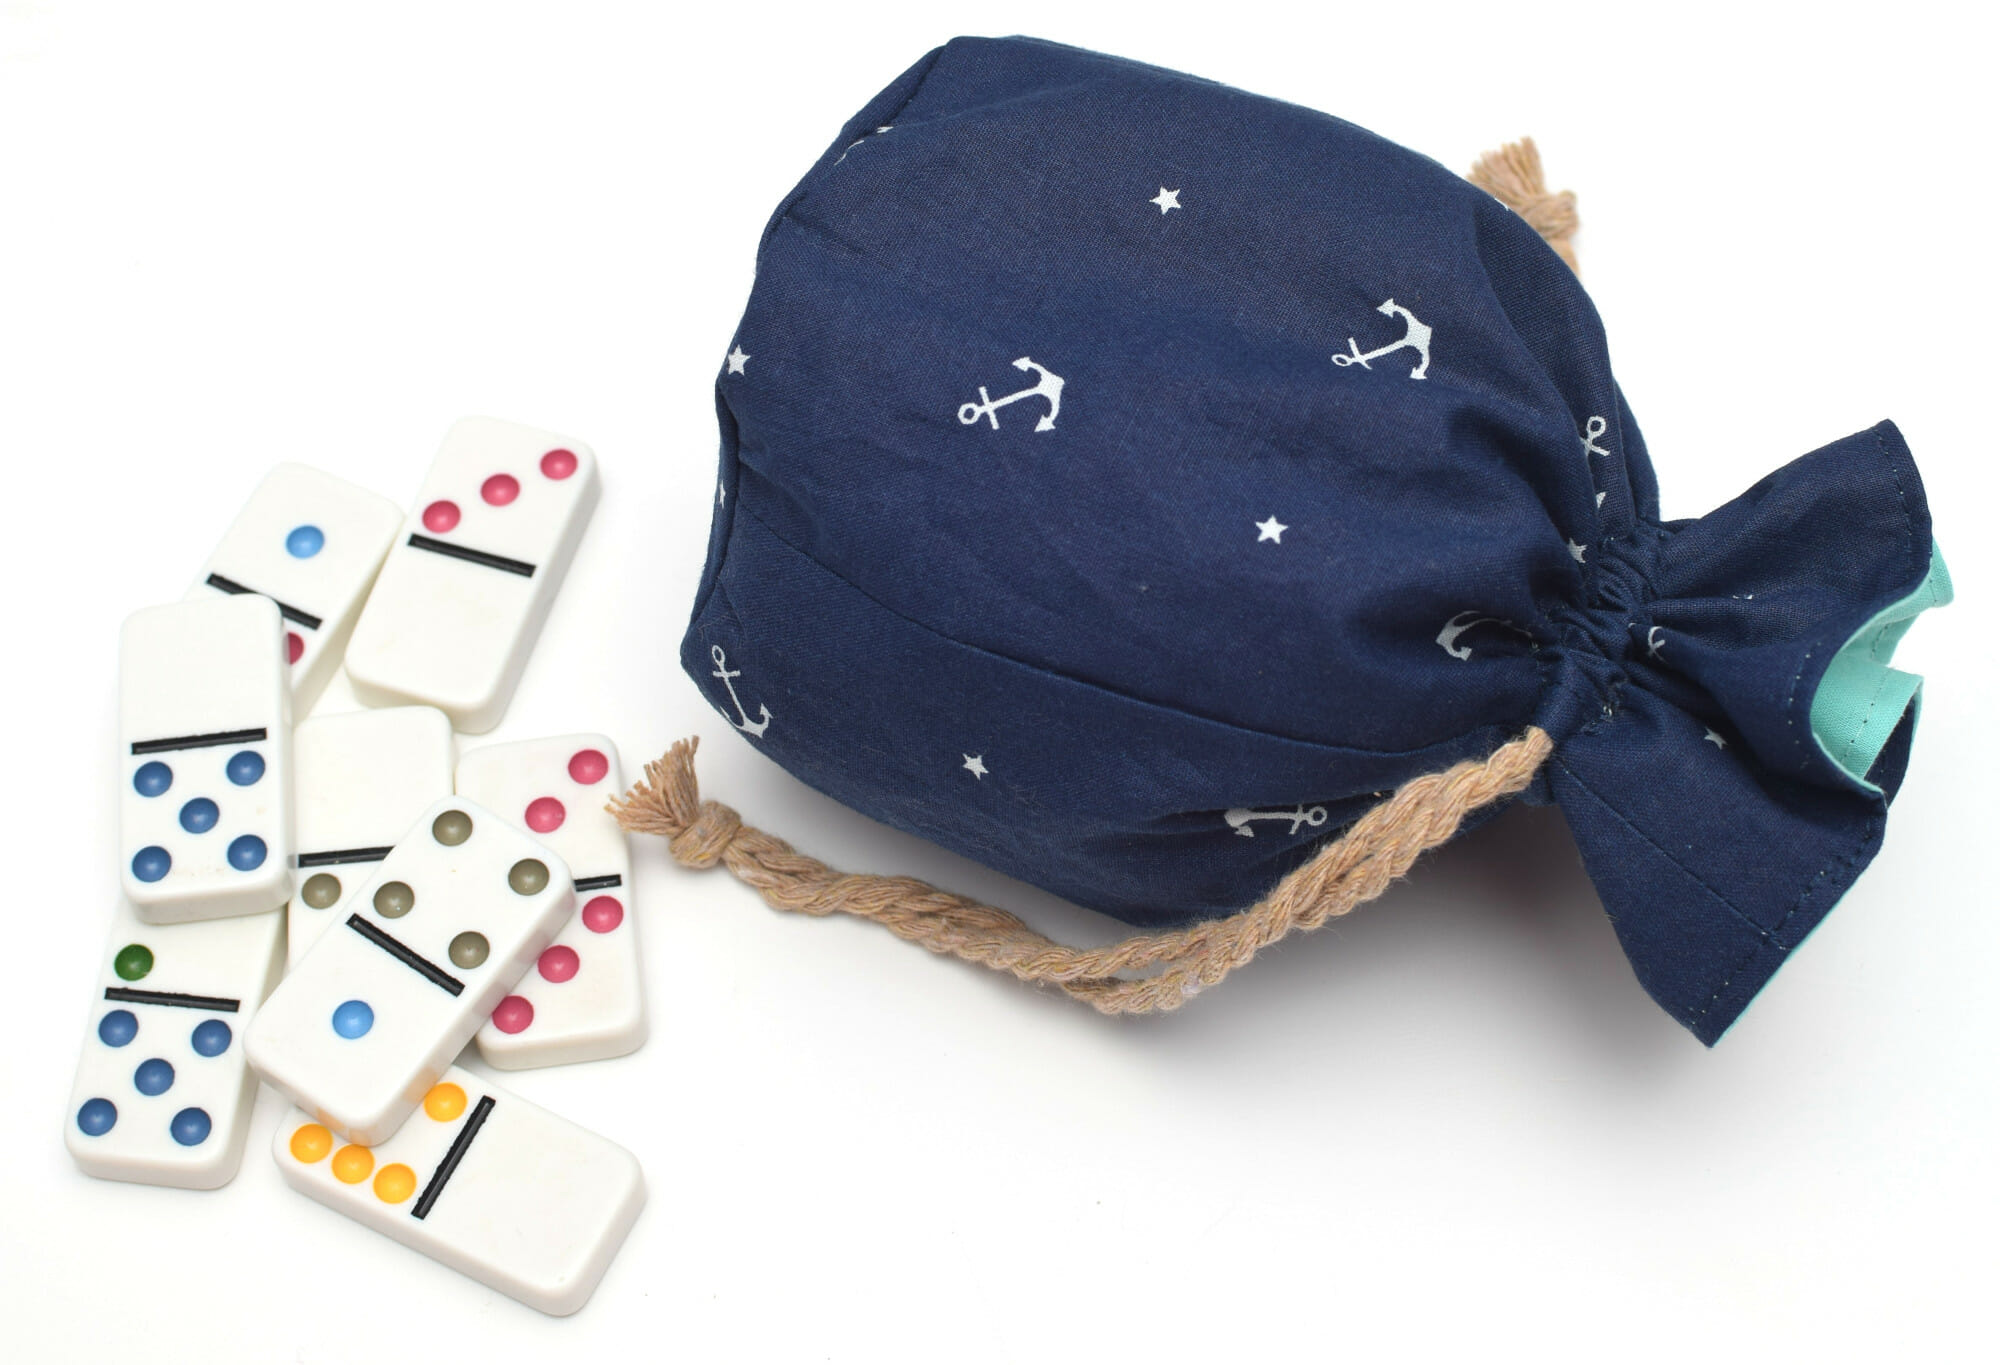
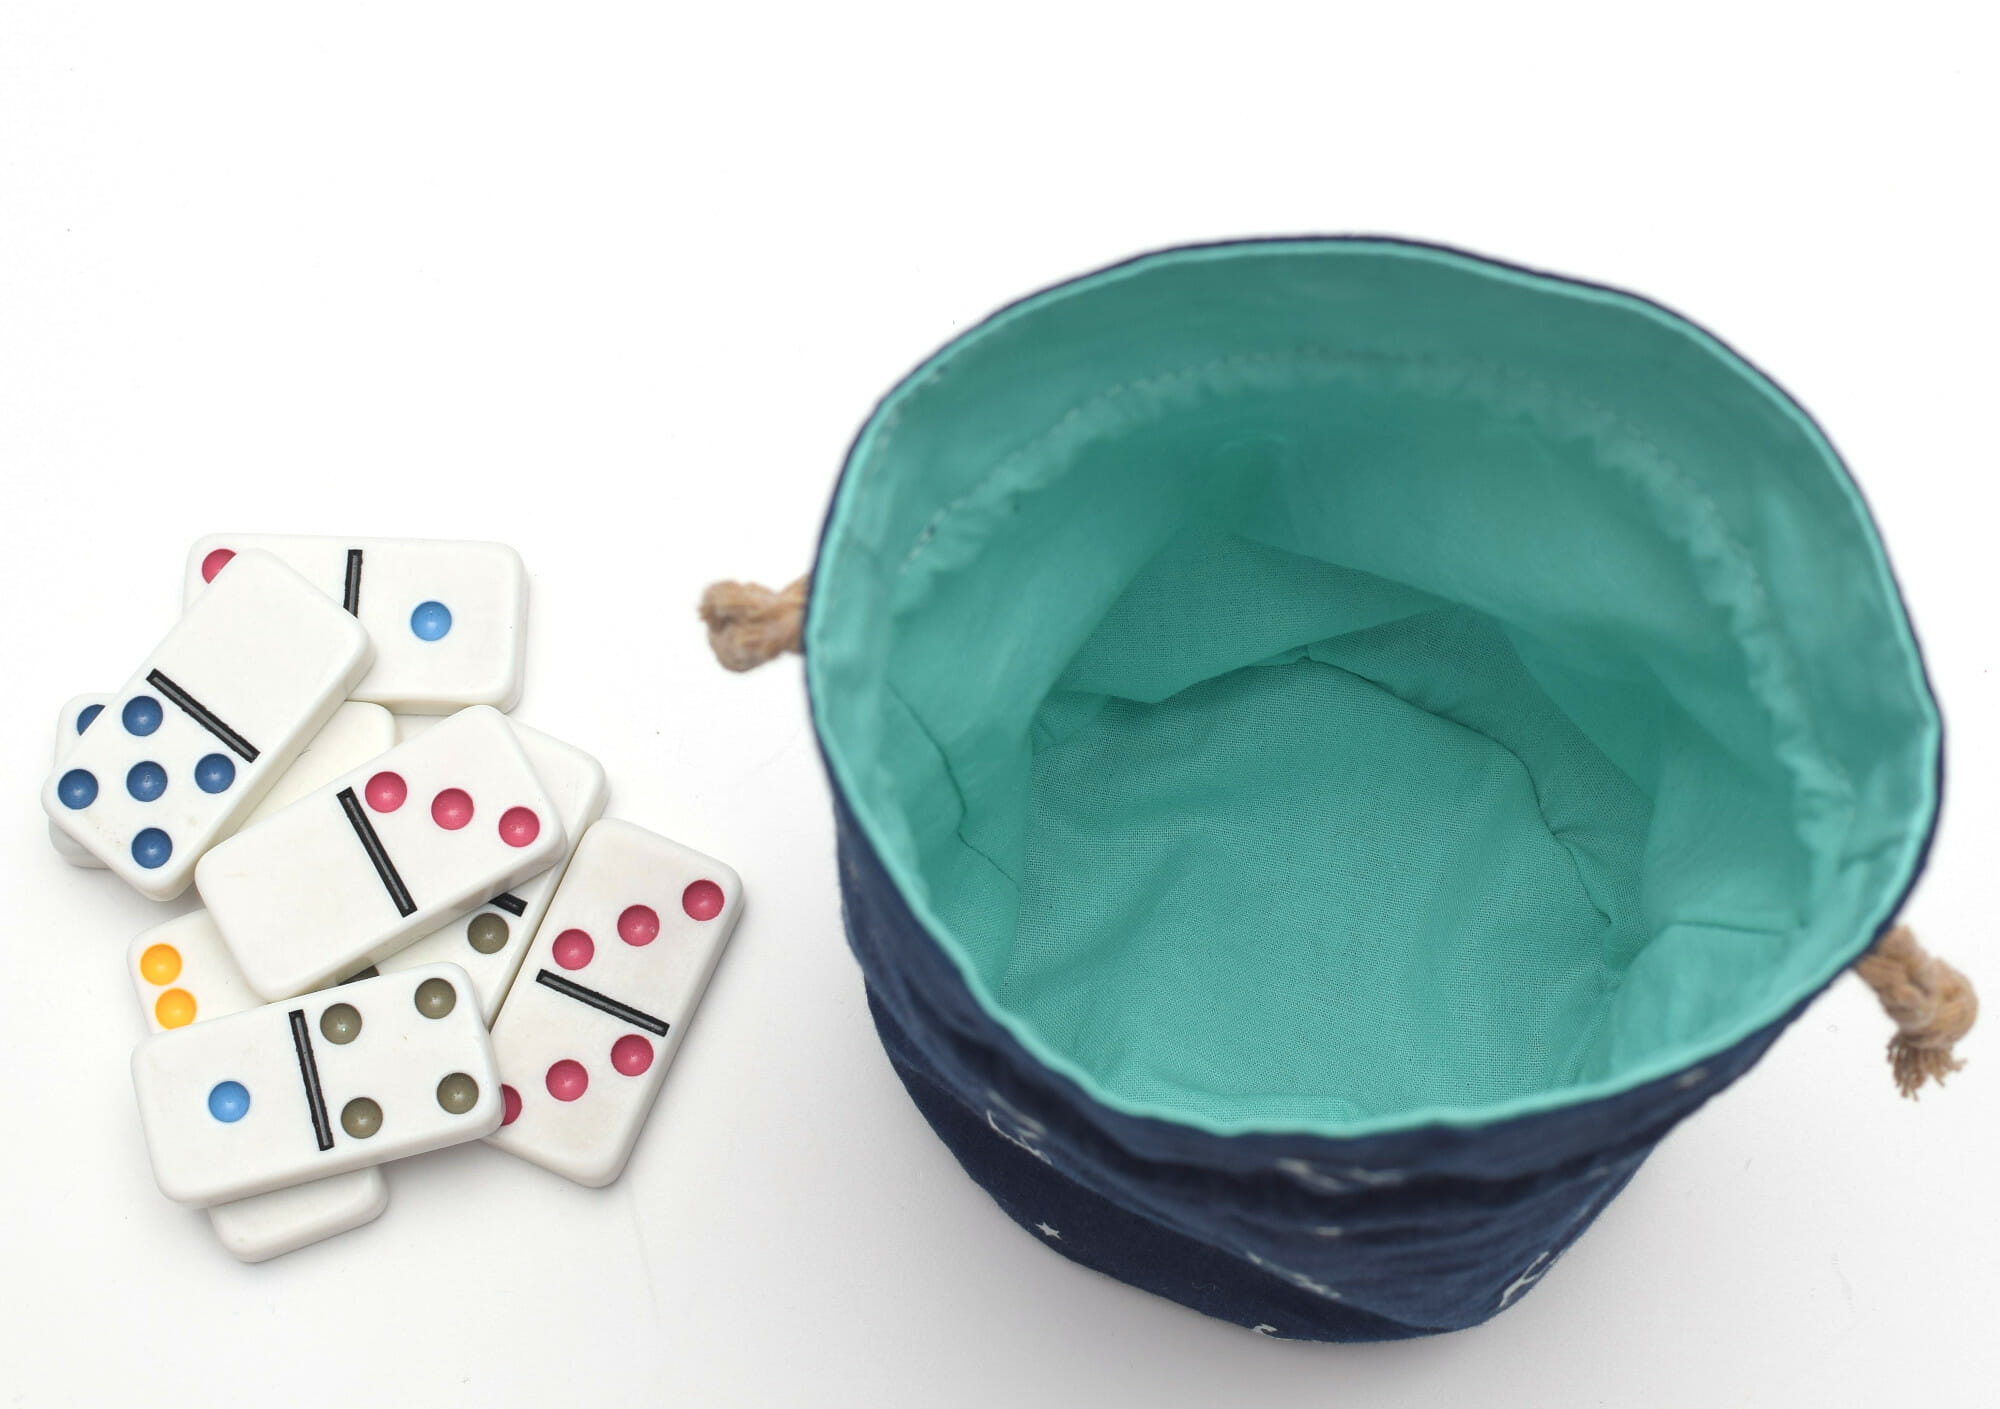
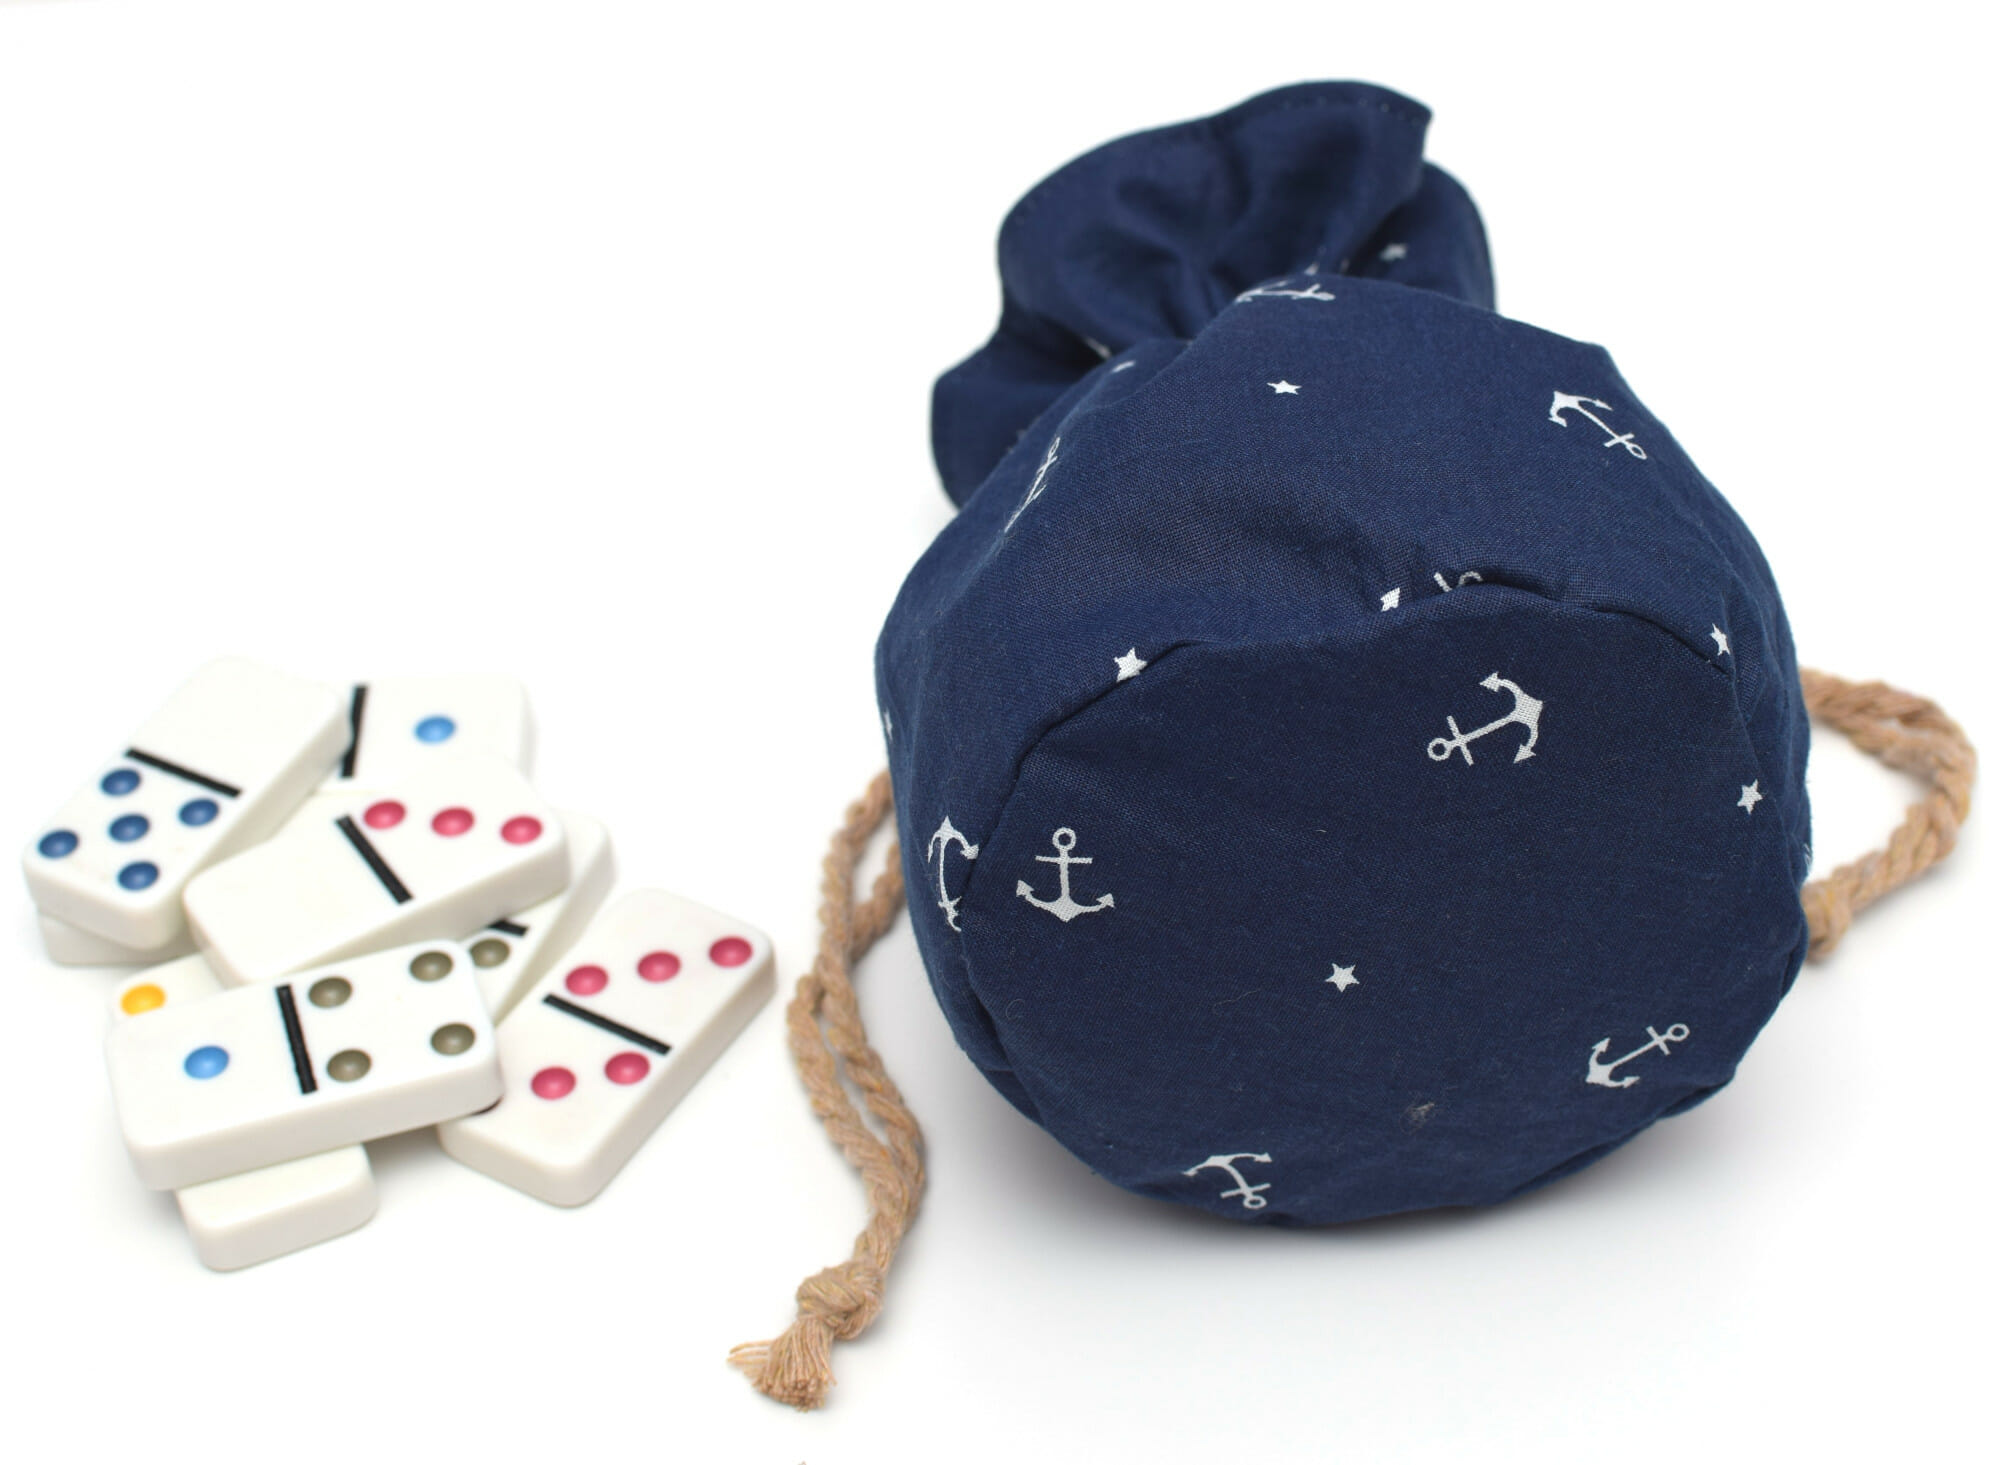
Probably can hold up tens of dice – but I can’t say how many for sure since I don’t have that many dice in my house. I photographed the dice bag with some domino tiles for scale.
Round bottom lined drawstring bag – Use it for everything!
These lined drawstring bags are ideal to use as a gift bag or to store charms, toiletries, jewelry, candles, yarn skeins, gaming dice, or coins. Actually, you can use them for just about everything!
I love the fact that the bag is looking on the inside as neat as on the outside. The drawstring cords keep it securely closed and make it easy to close and open.
Due to the flat round bottom, the bag stands on its own as well when it’s empty as when it’s full.
It took me about half an hour to make it from scratch (roughly the same as with the simple round bottom drawstring bag), but if you are a complete beginner take your eyes off the clock!
Just take your time and don’t rush the process, it will come up much faster the second time.
Related: 50 easy sewing projects for beginners

Sewing supplies – lined drawstring dice bag
- free PDF pattern – ad-free version. Download below
- fabric – cotton, canvas, denim
- ribbon or cord – 2 pieces, each one measuring approximately 16 inches
- sewing machine
- needle
- matching thread
- sewing pins
- sewing gauge
- fabric scissors or rotary cutter
- iron
Finished drawstring dice bag size
Circle bottom – 4.5” diameter
5” tall from the bottom to the cords’ casing – and 7” tall in total
Note: All seam allowances are 3/8″ (unless otherwise noted) and are included in this pattern.
How to make a drawstring dice bag – simple step-by-step guide with pictures
Step 1
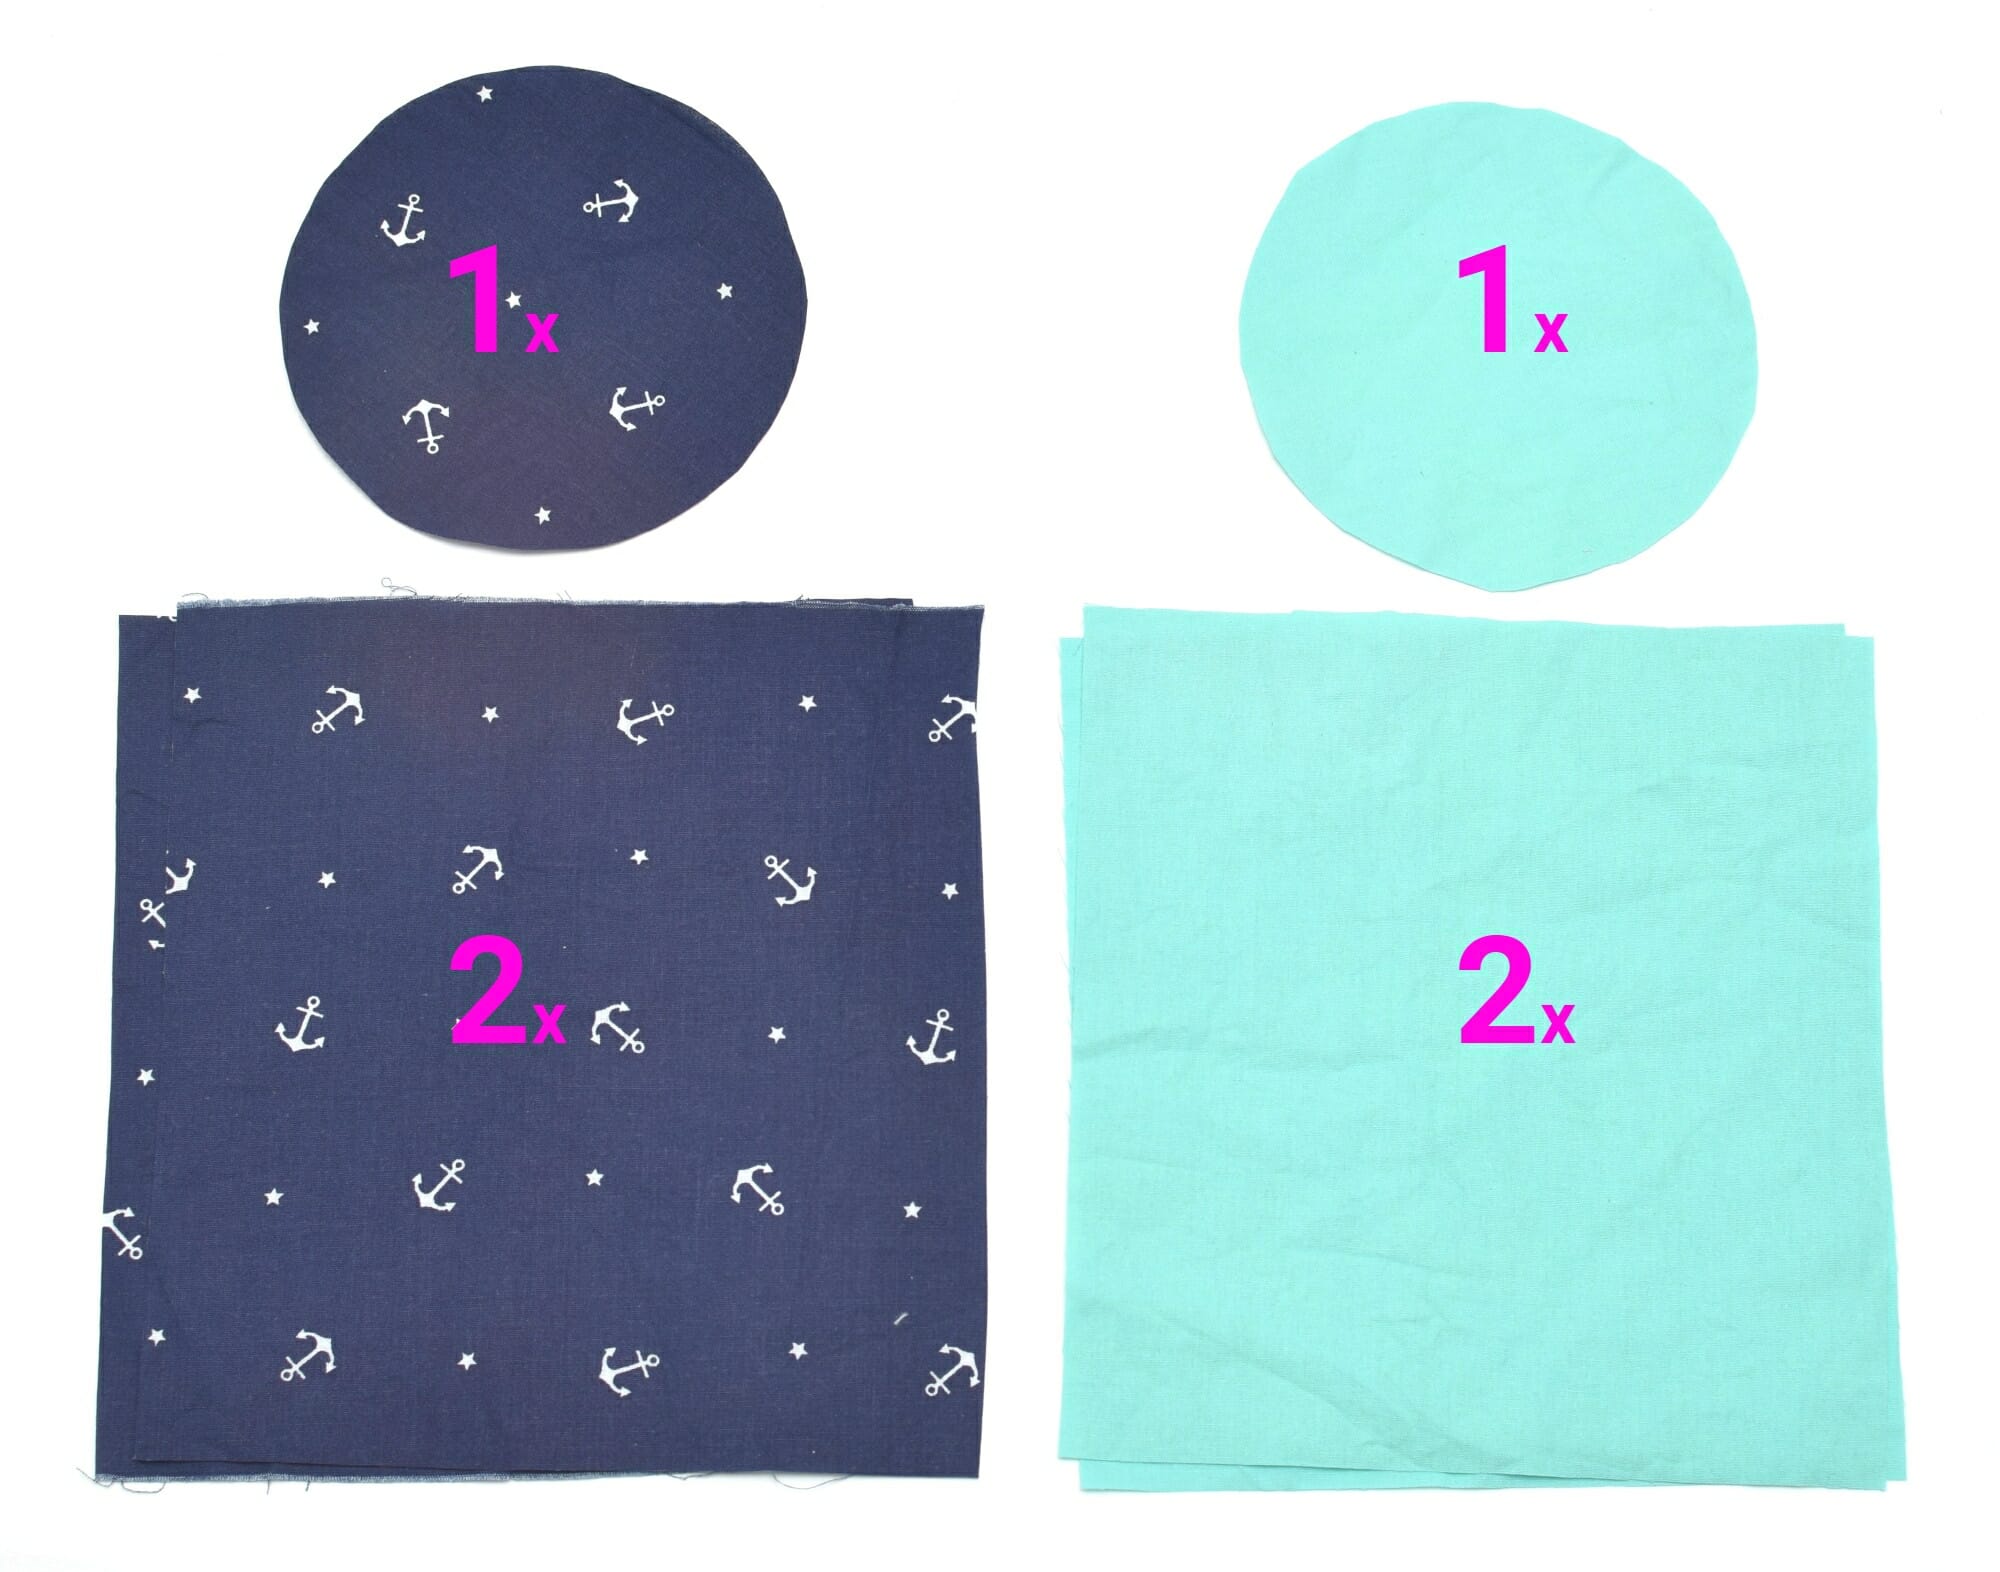
Please cut out the following pieces:
– 2 circles with a 5” diameter (1 main fabric, 1 lining)
– 4 rectangles measuring 8.17 inches (approximately 8 1/8″) in width by 8 inches in length (2 main fabric, 2 lining)
As a matter of fact, you can make your bag as tall or as short as you like it – just change the length of your rectangular fabric pieces accordingly.
When you have finished cutting, you should have the pieces shown below:
Related: How to make round fabric baskets (free pattern)
Step 2
Before you start sewing – If you want to make your bag more durable, you can apply batting or interfacing to the main circle bottom piece (I did not, however I think my drawstring bag is solid enough).
Now, place the lining pieces with the right sides together and sew along the long side (8.17 inches) with a 3/8″ seam allowance.
If you use non-directional fabrics (like I did) it’s best to mark each side with a fabric pencil – W for width and H for height – immediately after cutting the pieces to avoid confusion. The difference between width and height is otherwise unnoticeable, but it will matter eventually, when you’ll attach the bottom circle.
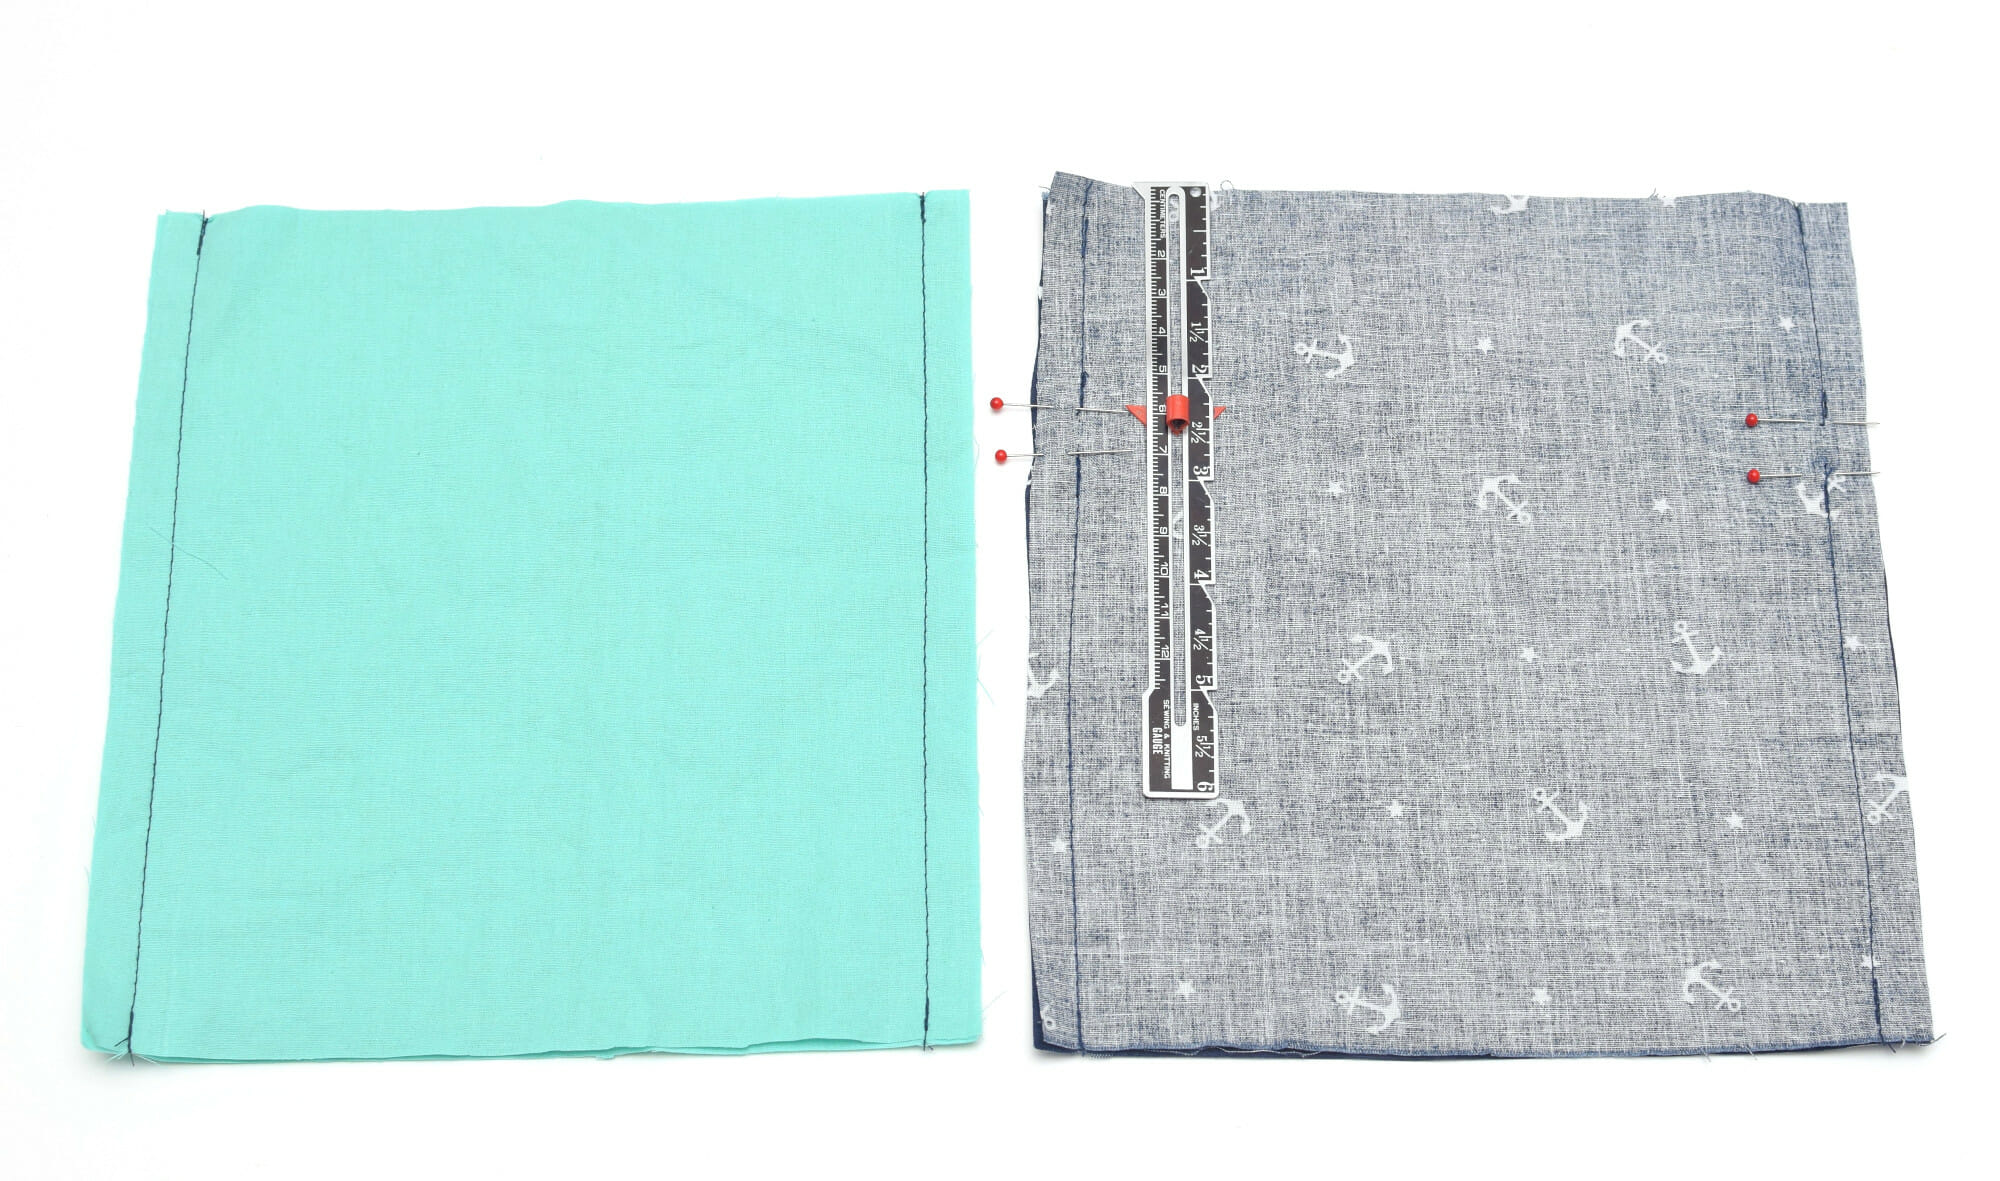
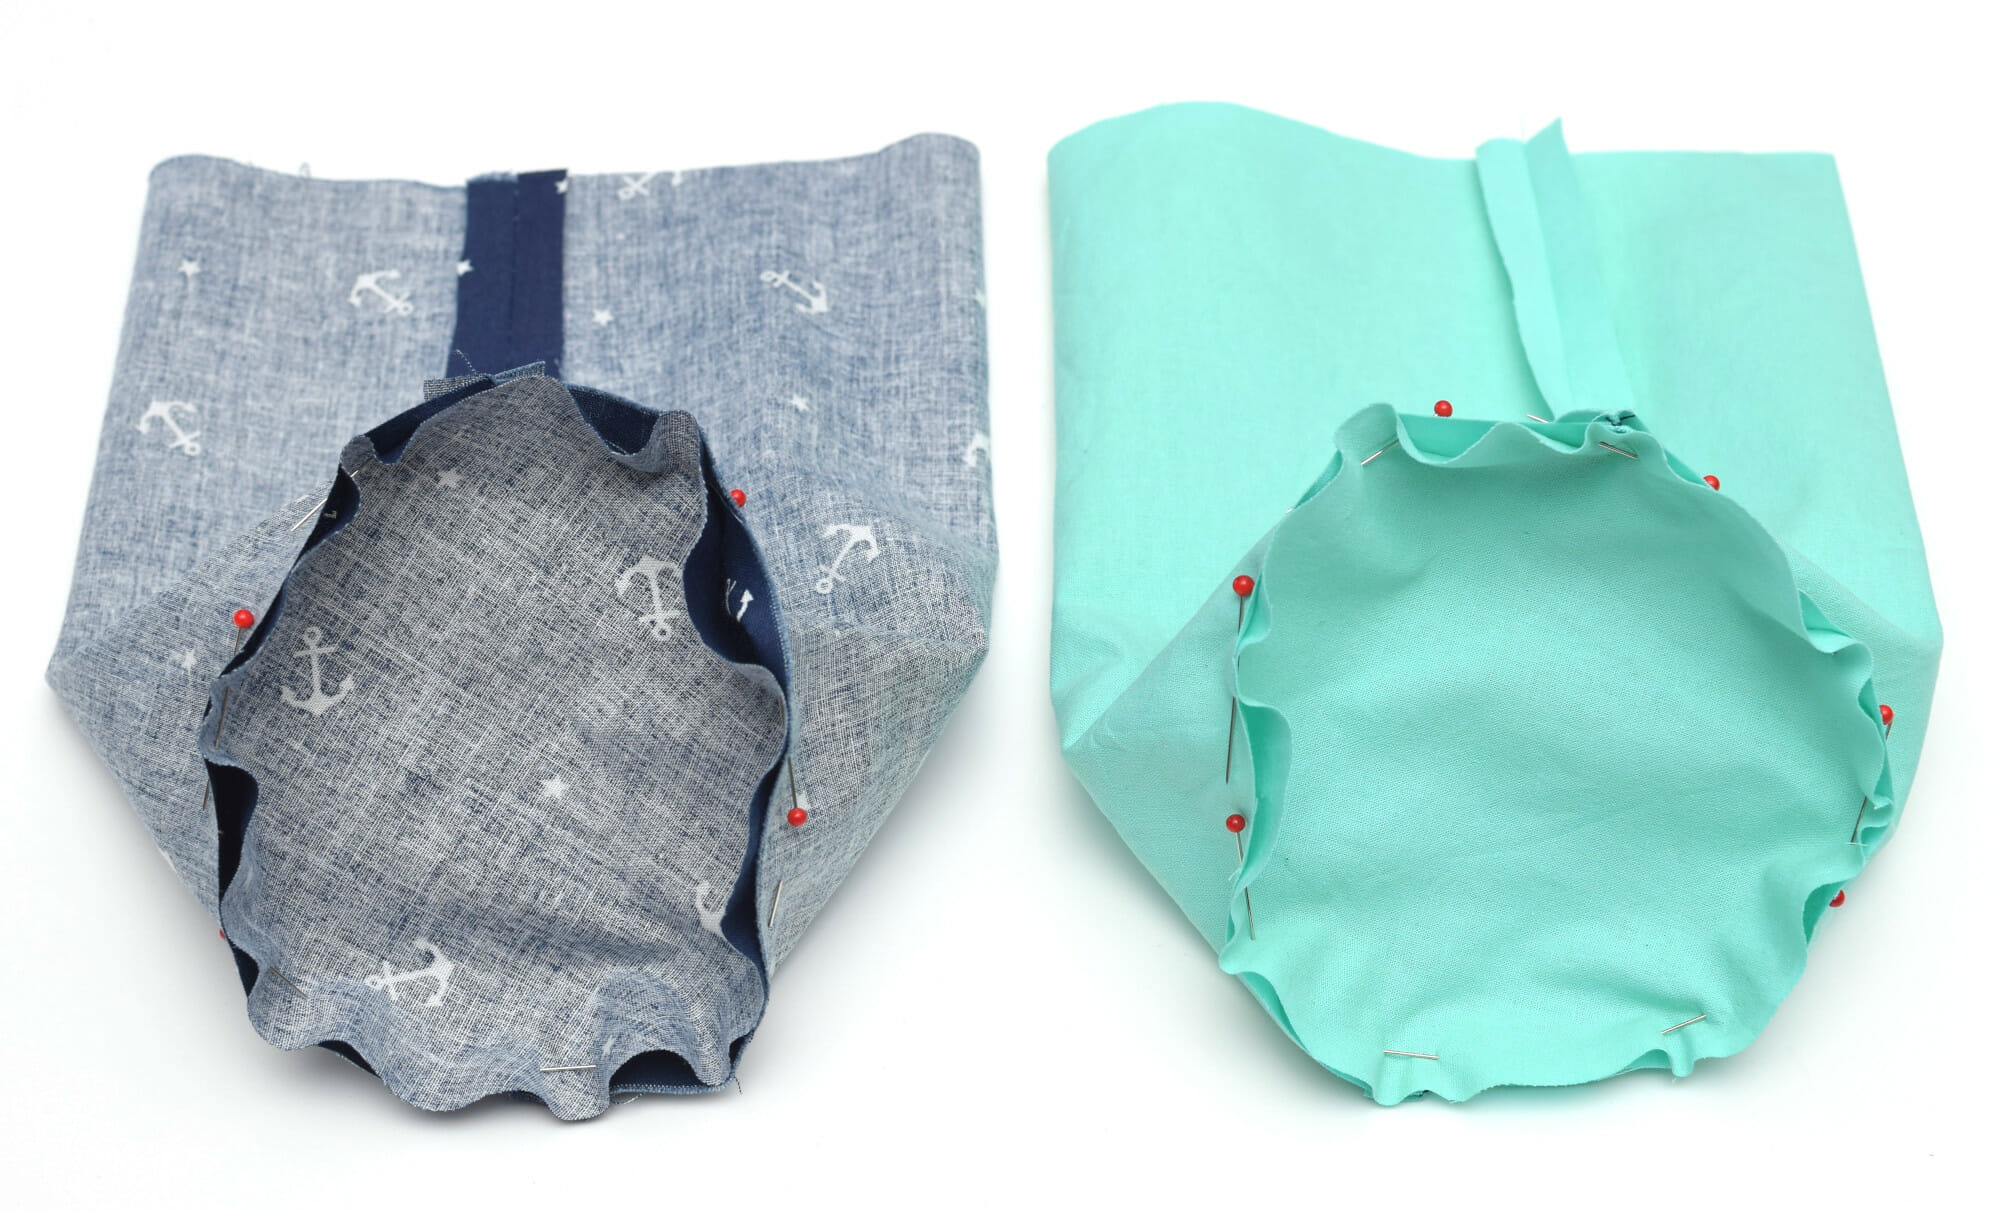
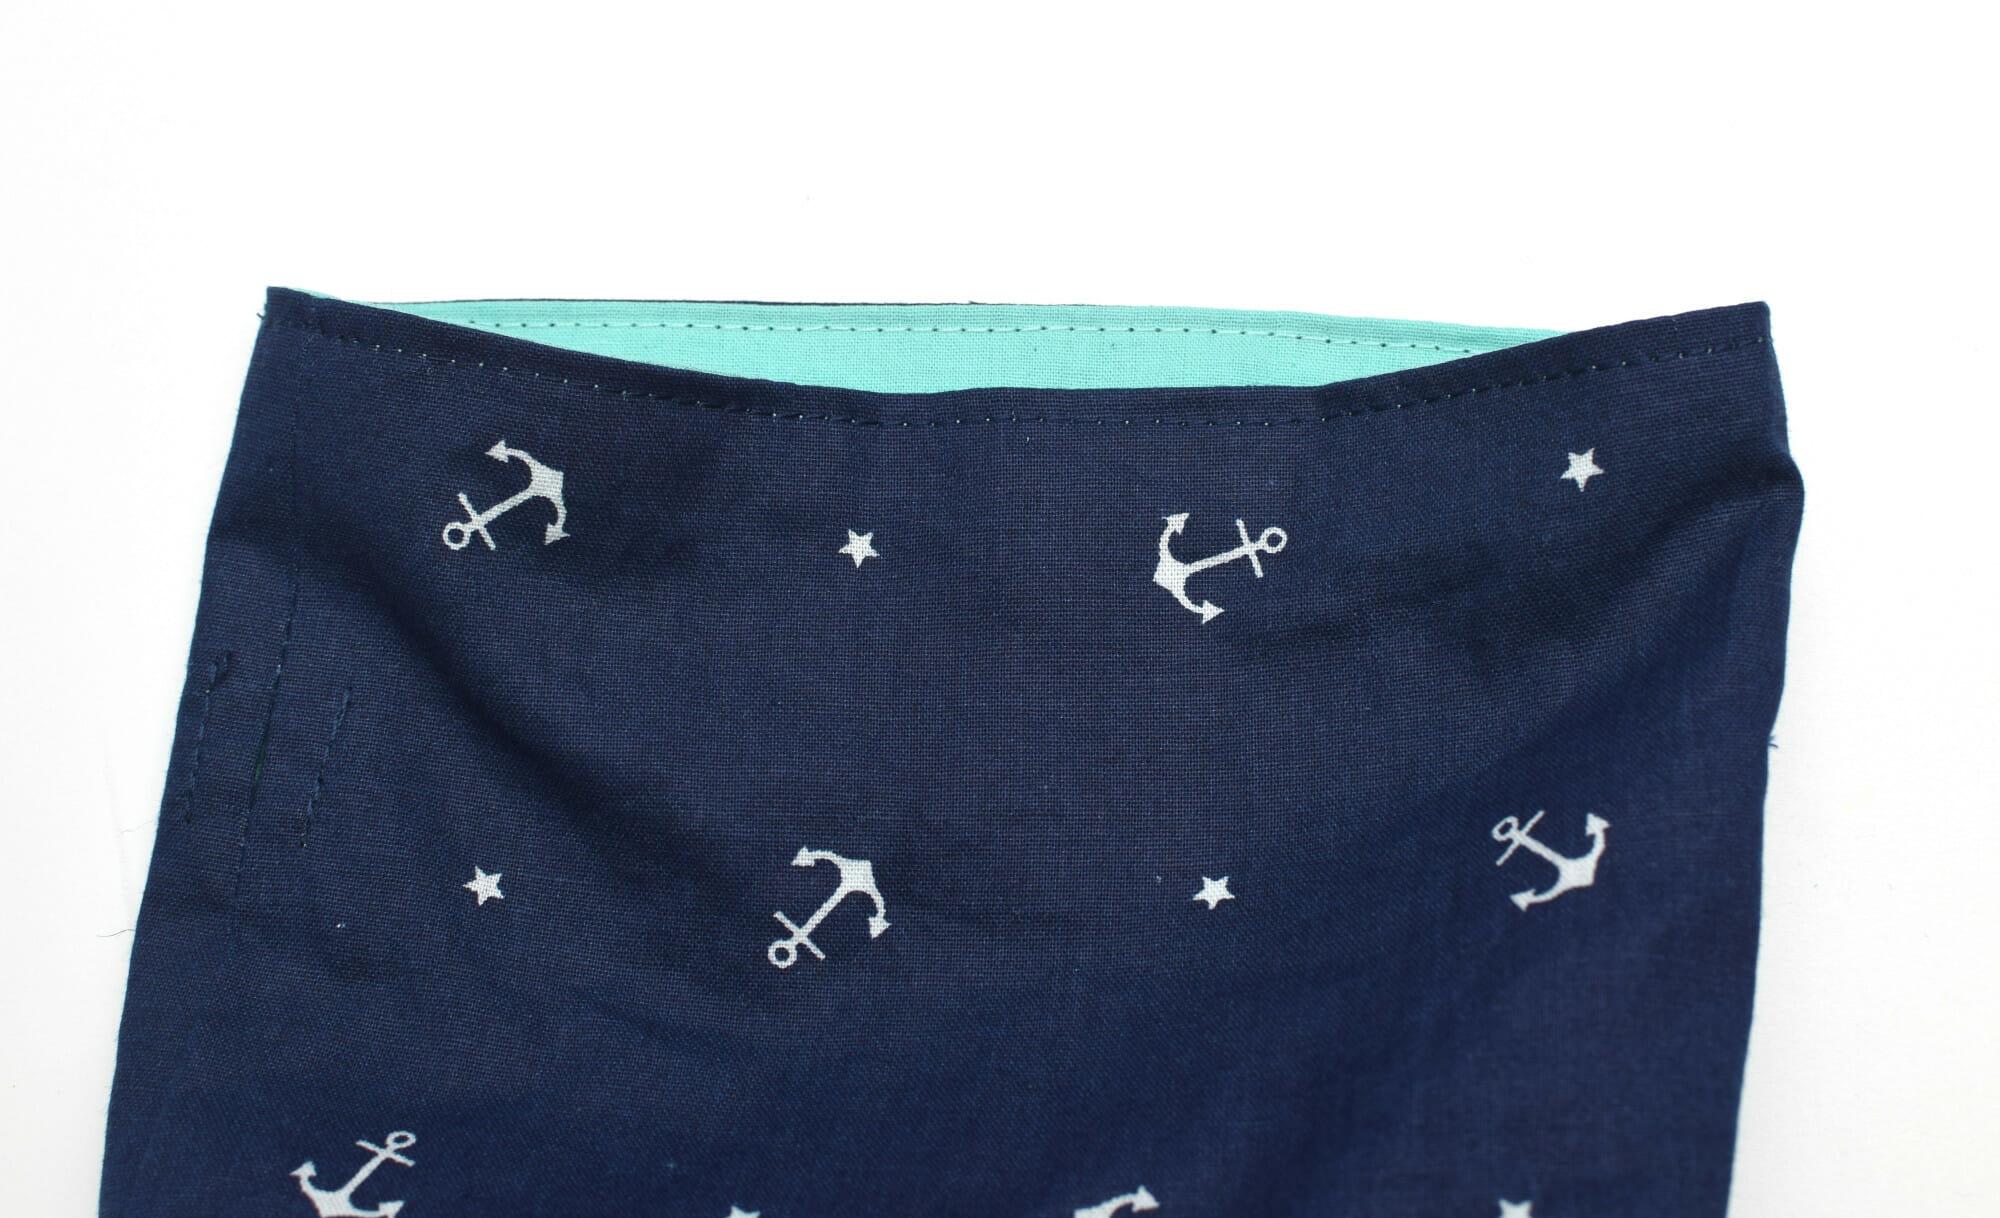
For the main fabric pieces, do the same, but leave a small opening – the first 2 1/4” and the second 2 3/4” from the top of the bag. Backstitch at the beginning and end of your stitches.
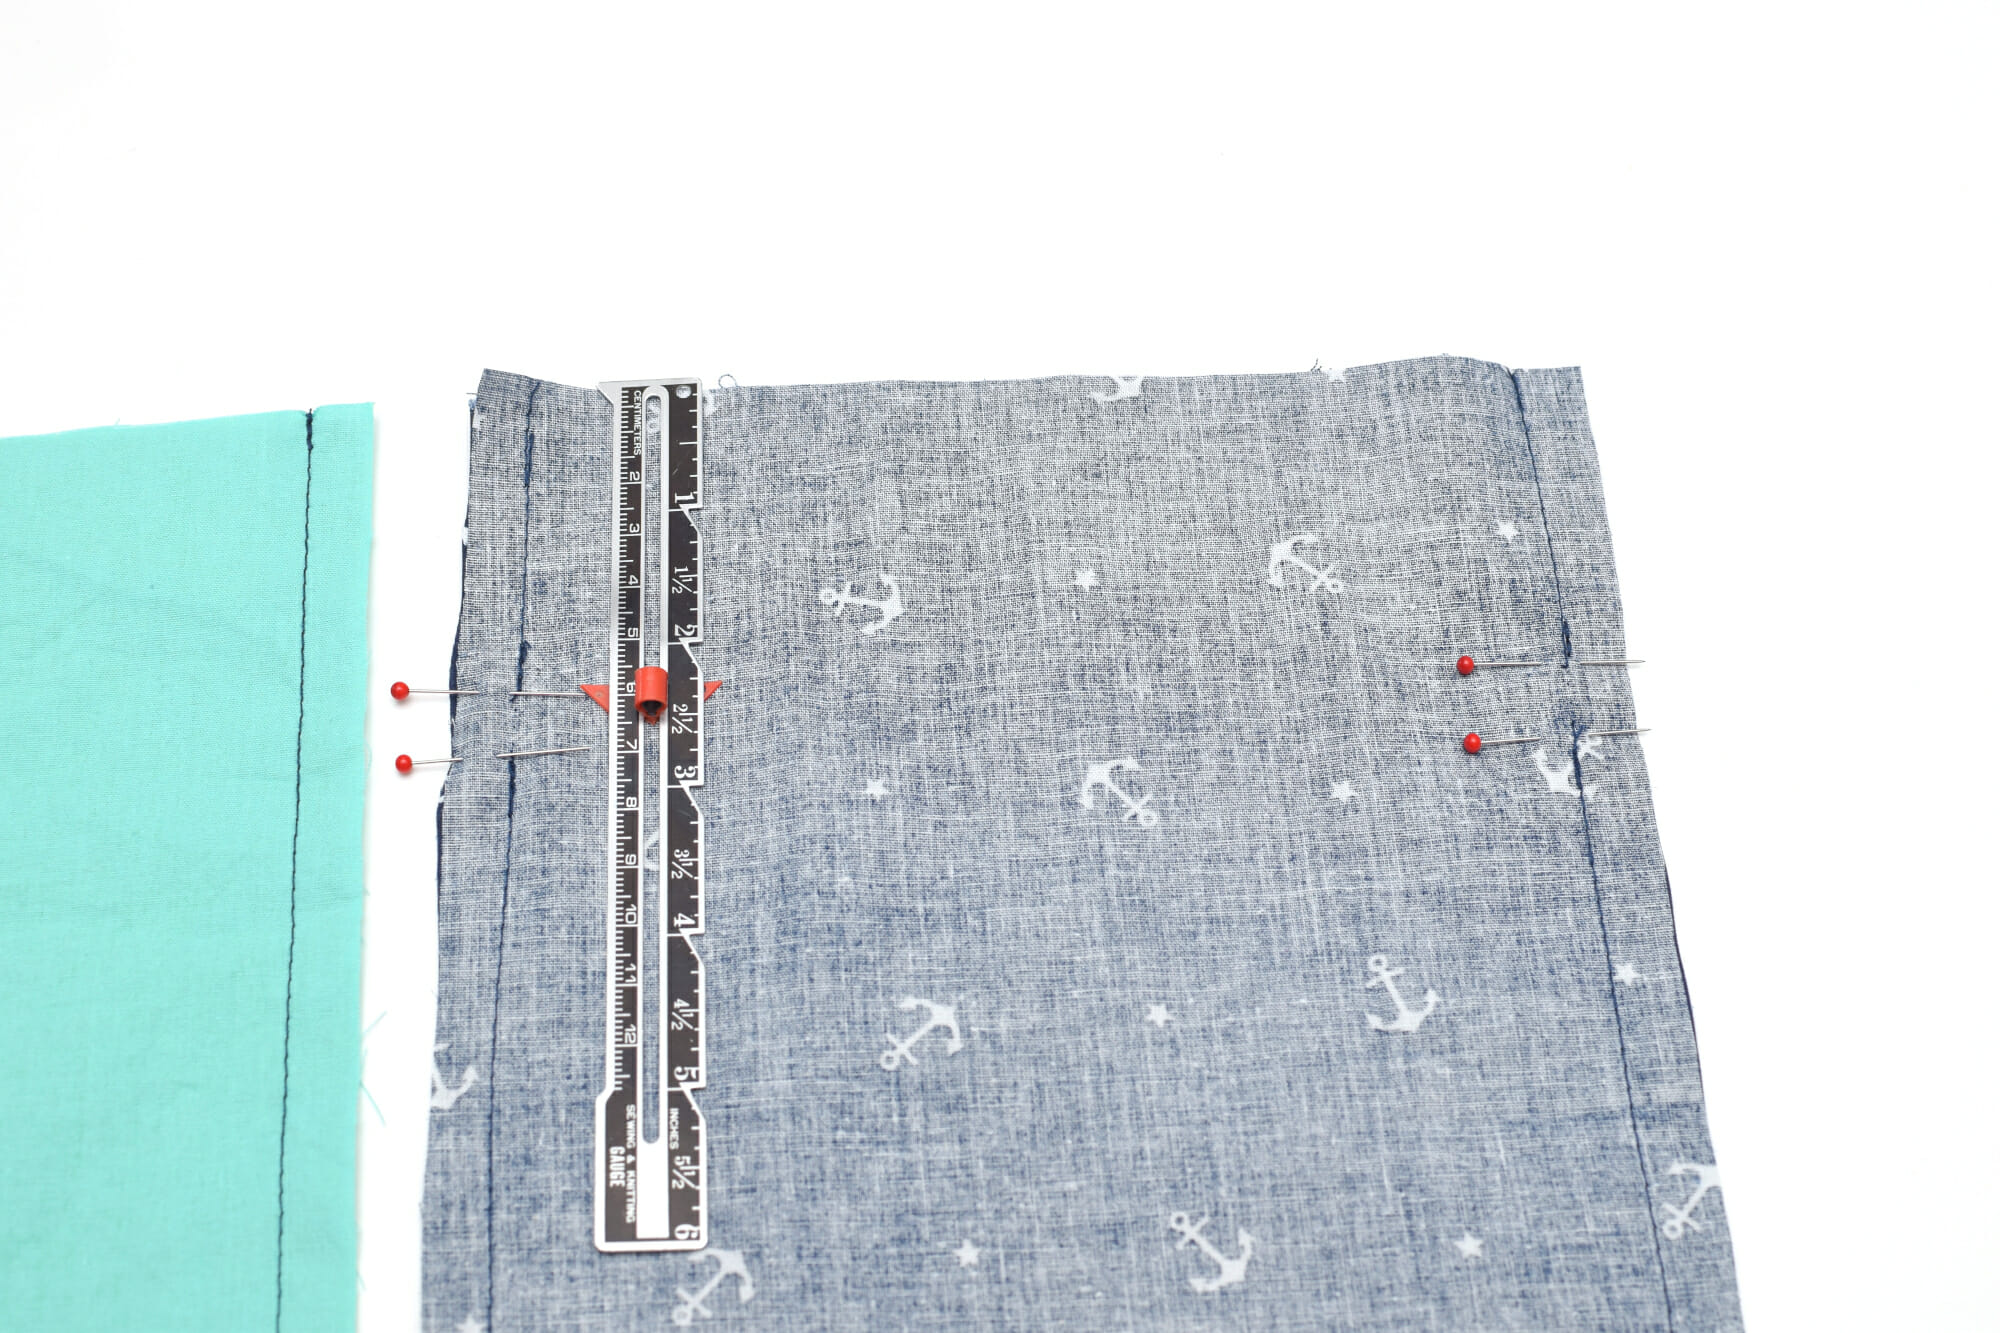
Step 3
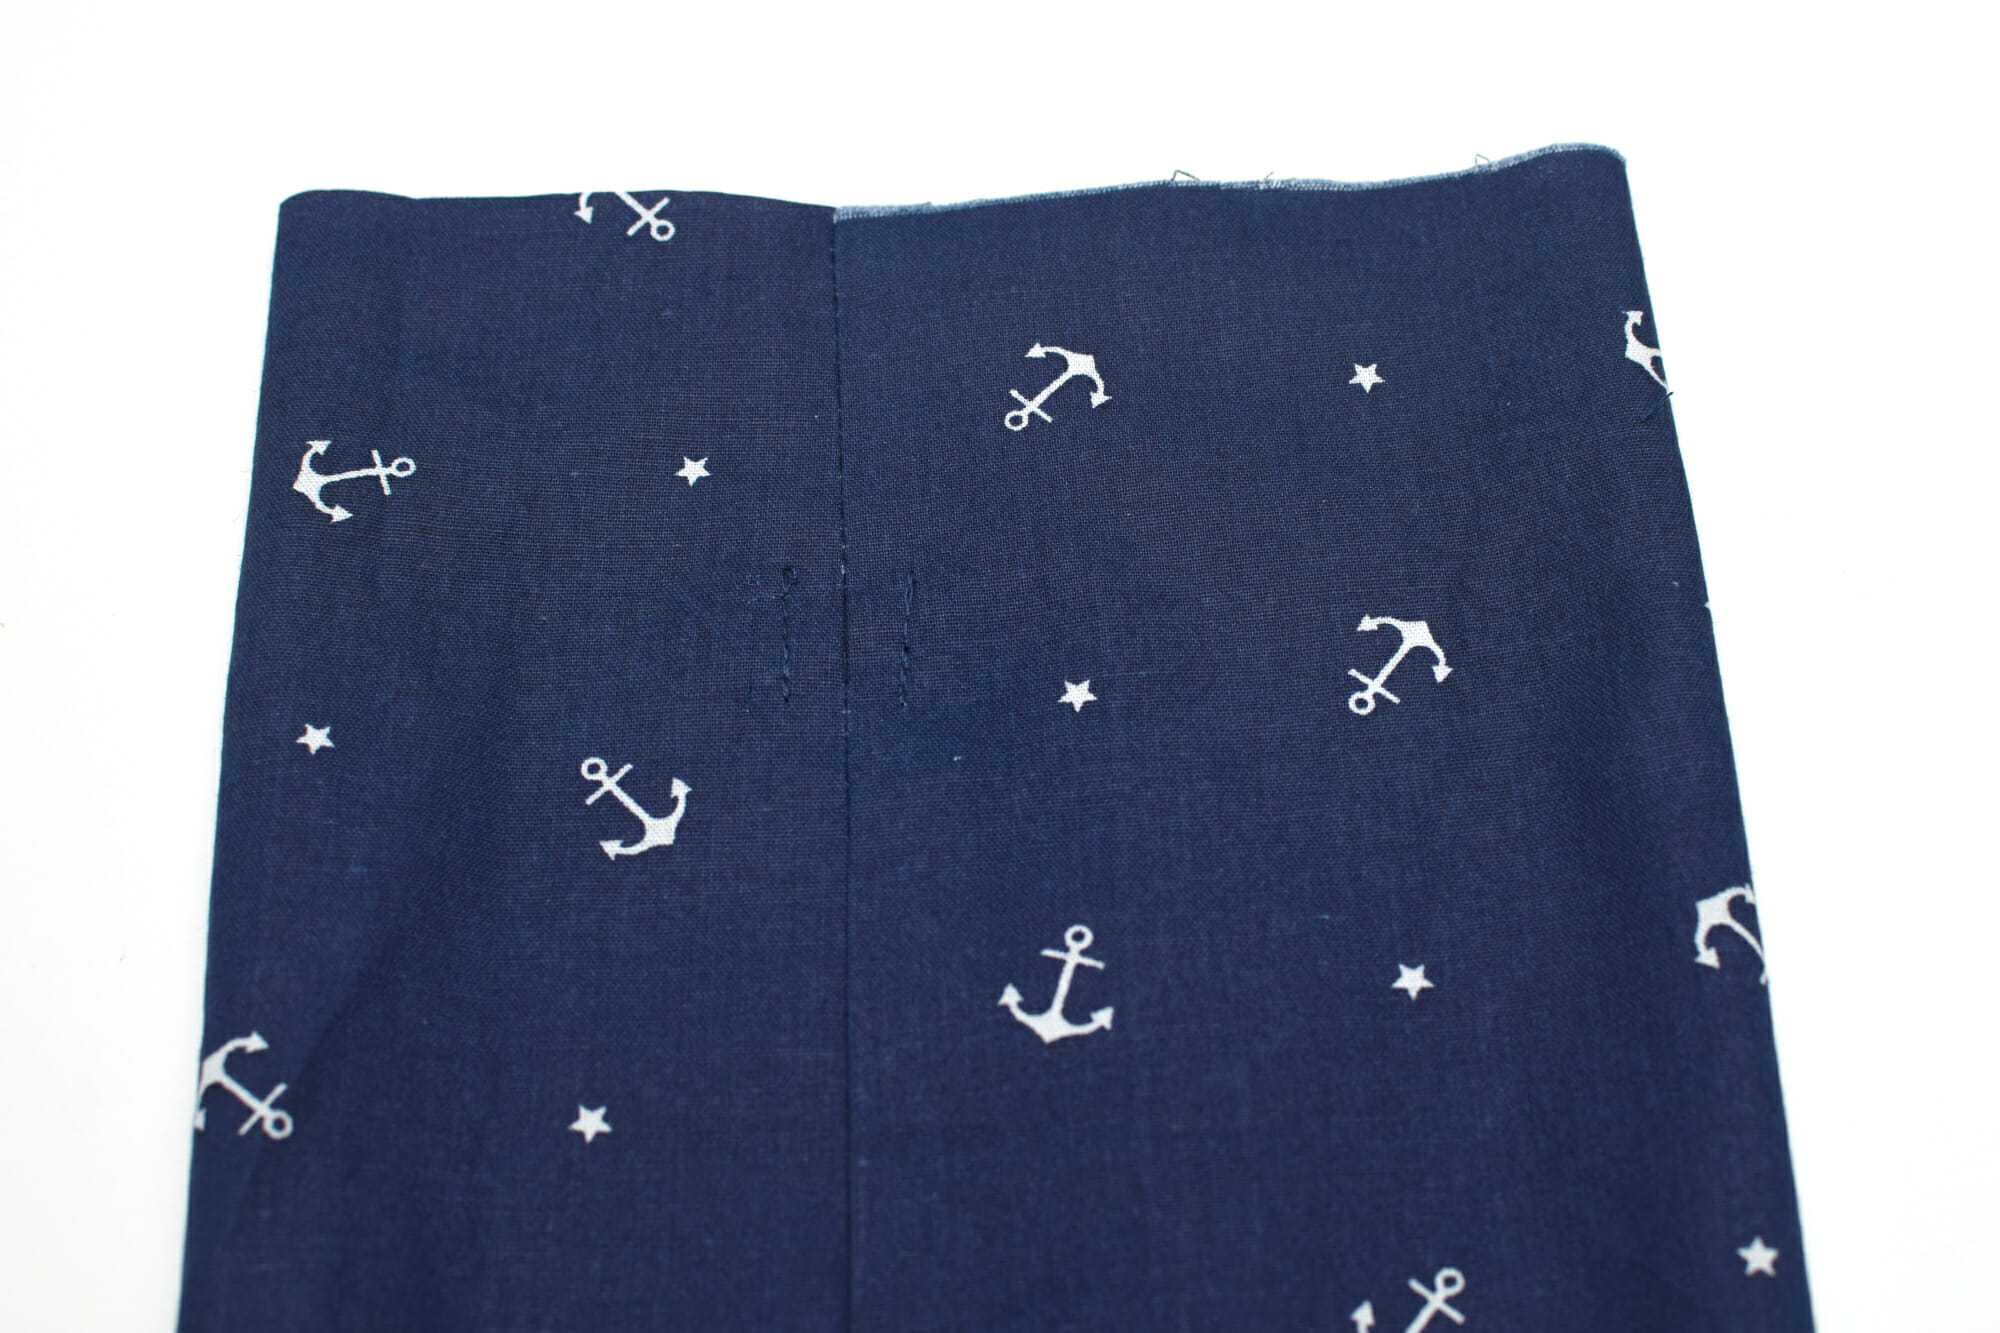
Press the seam allowances open and stitch into place around that small opening.
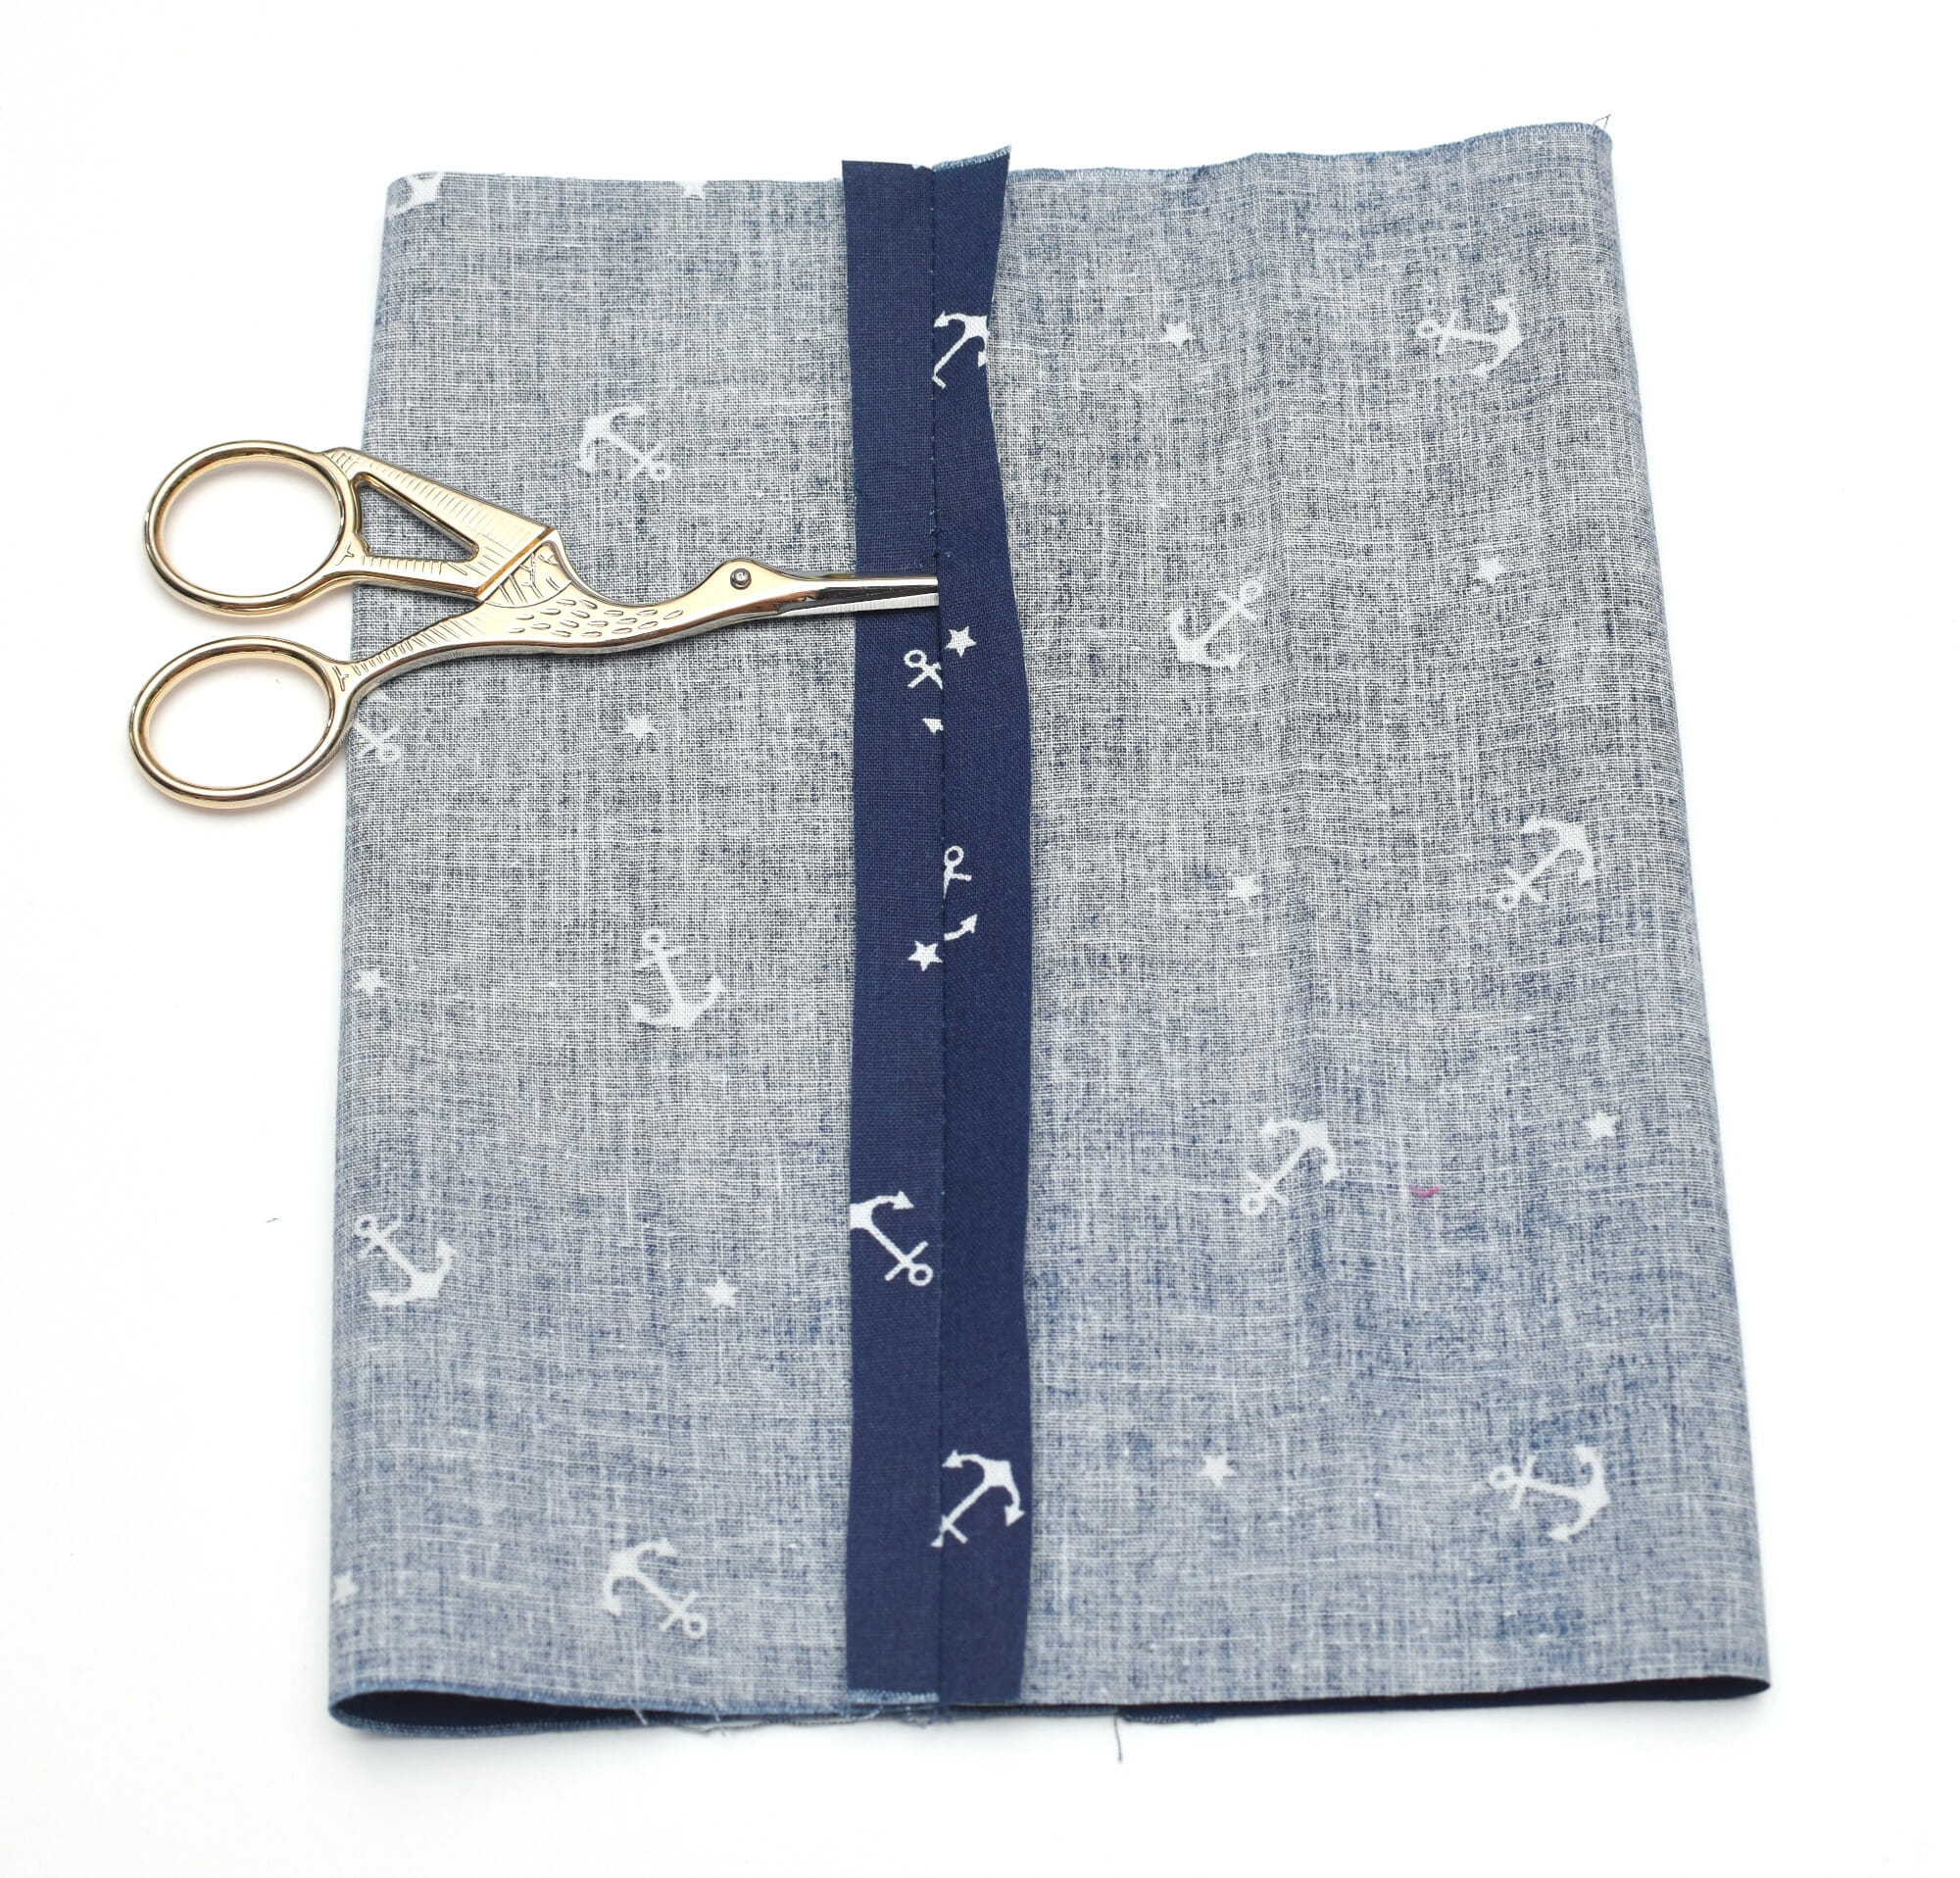
Sewing the seam allowance in place is our best chance of getting it out of the way. Otherwise, the safety pin will most likely get stuck in there while trying to insert the cords into the casing.
Step 4
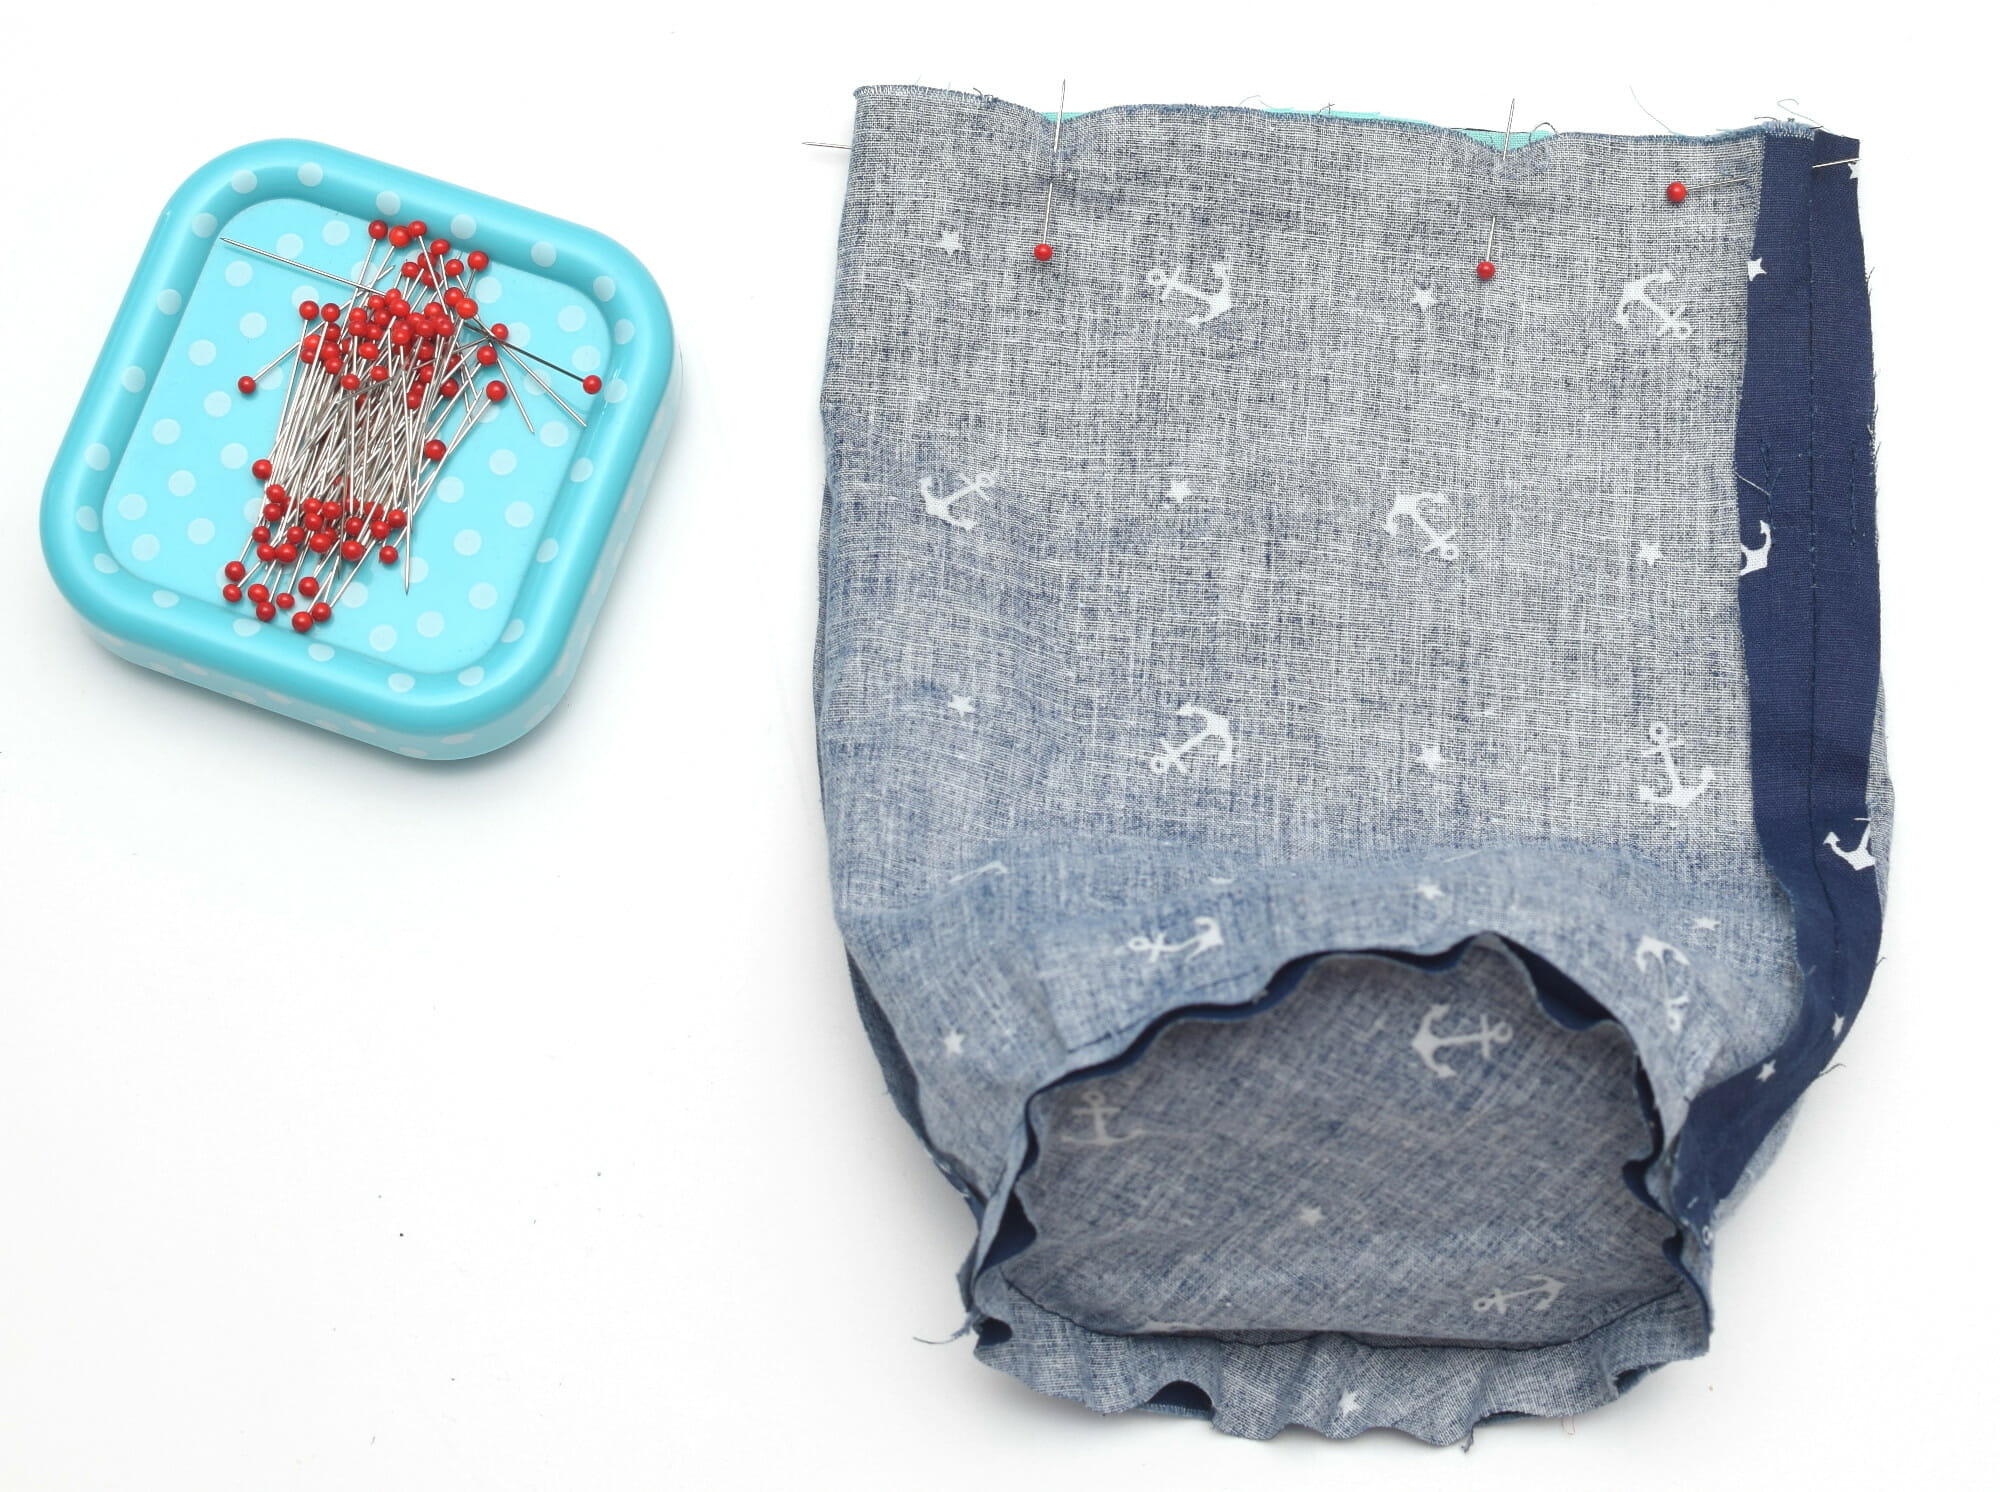
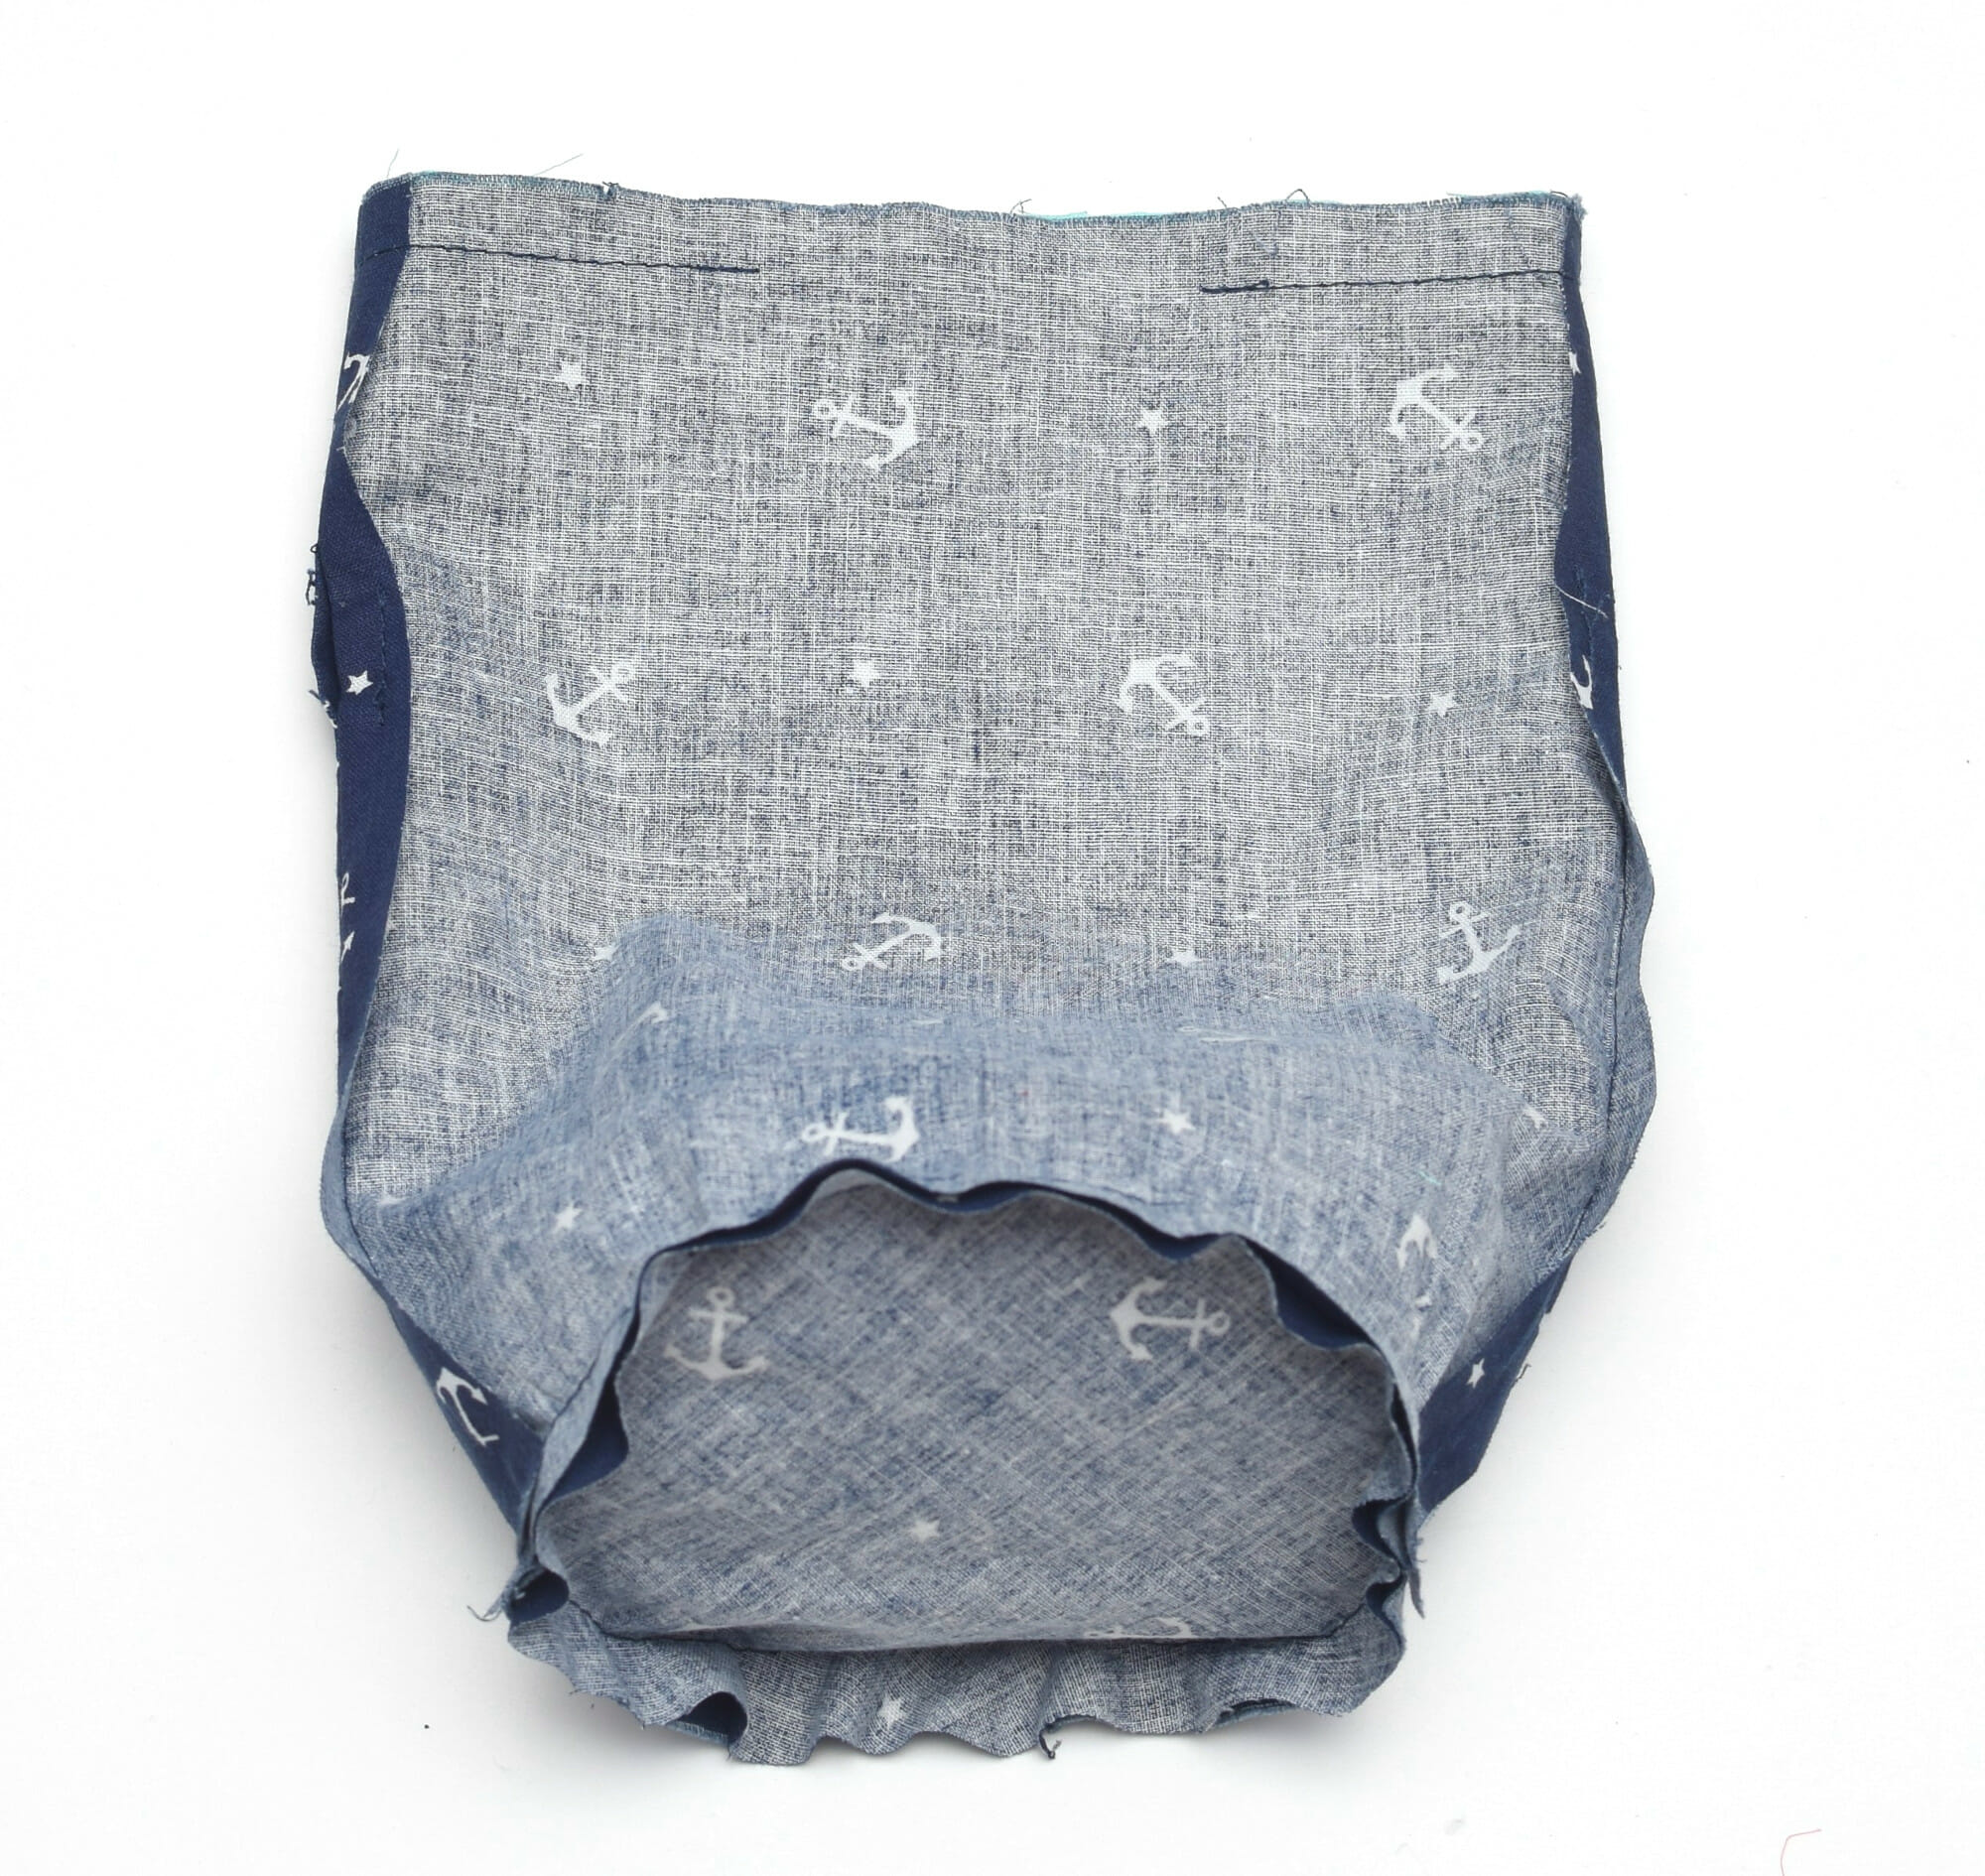
Align and pin the fabric circle to the bottom of the bag (double-check the position of that opening! don’t sew the top of the bag to the bottom circle!) and sew it with a 3/8” seam allowance, for both main fabric and lining.
It should be a perfect fit – or close enough, at least – if you cut your fabric pieces correctly.
Cut small snips around circle bottoms (not pictured here, sorry!). This step will make your curved seam to sit nice and flat after you turn the bag right side out.

Also, no need to finish the seams, since this is a lined bag and there will be no visible raw edges in the end.
TIP:
Sewing a curve is not hard if you think of the curve as a number of small straight stitches. It’s useful to adjust the stitch length to 2.00 or 2.5 mm so you can sew more slowly.
Every third or fourth stitch or so, you have to lift the presser foot and pivot the fabric slightly before putting the foot back down as you sew. This helps you guide the needle around the curve. If you’ve never sewed around a curve, here’s a useful Youtube tutorial that can help you.
Step 5
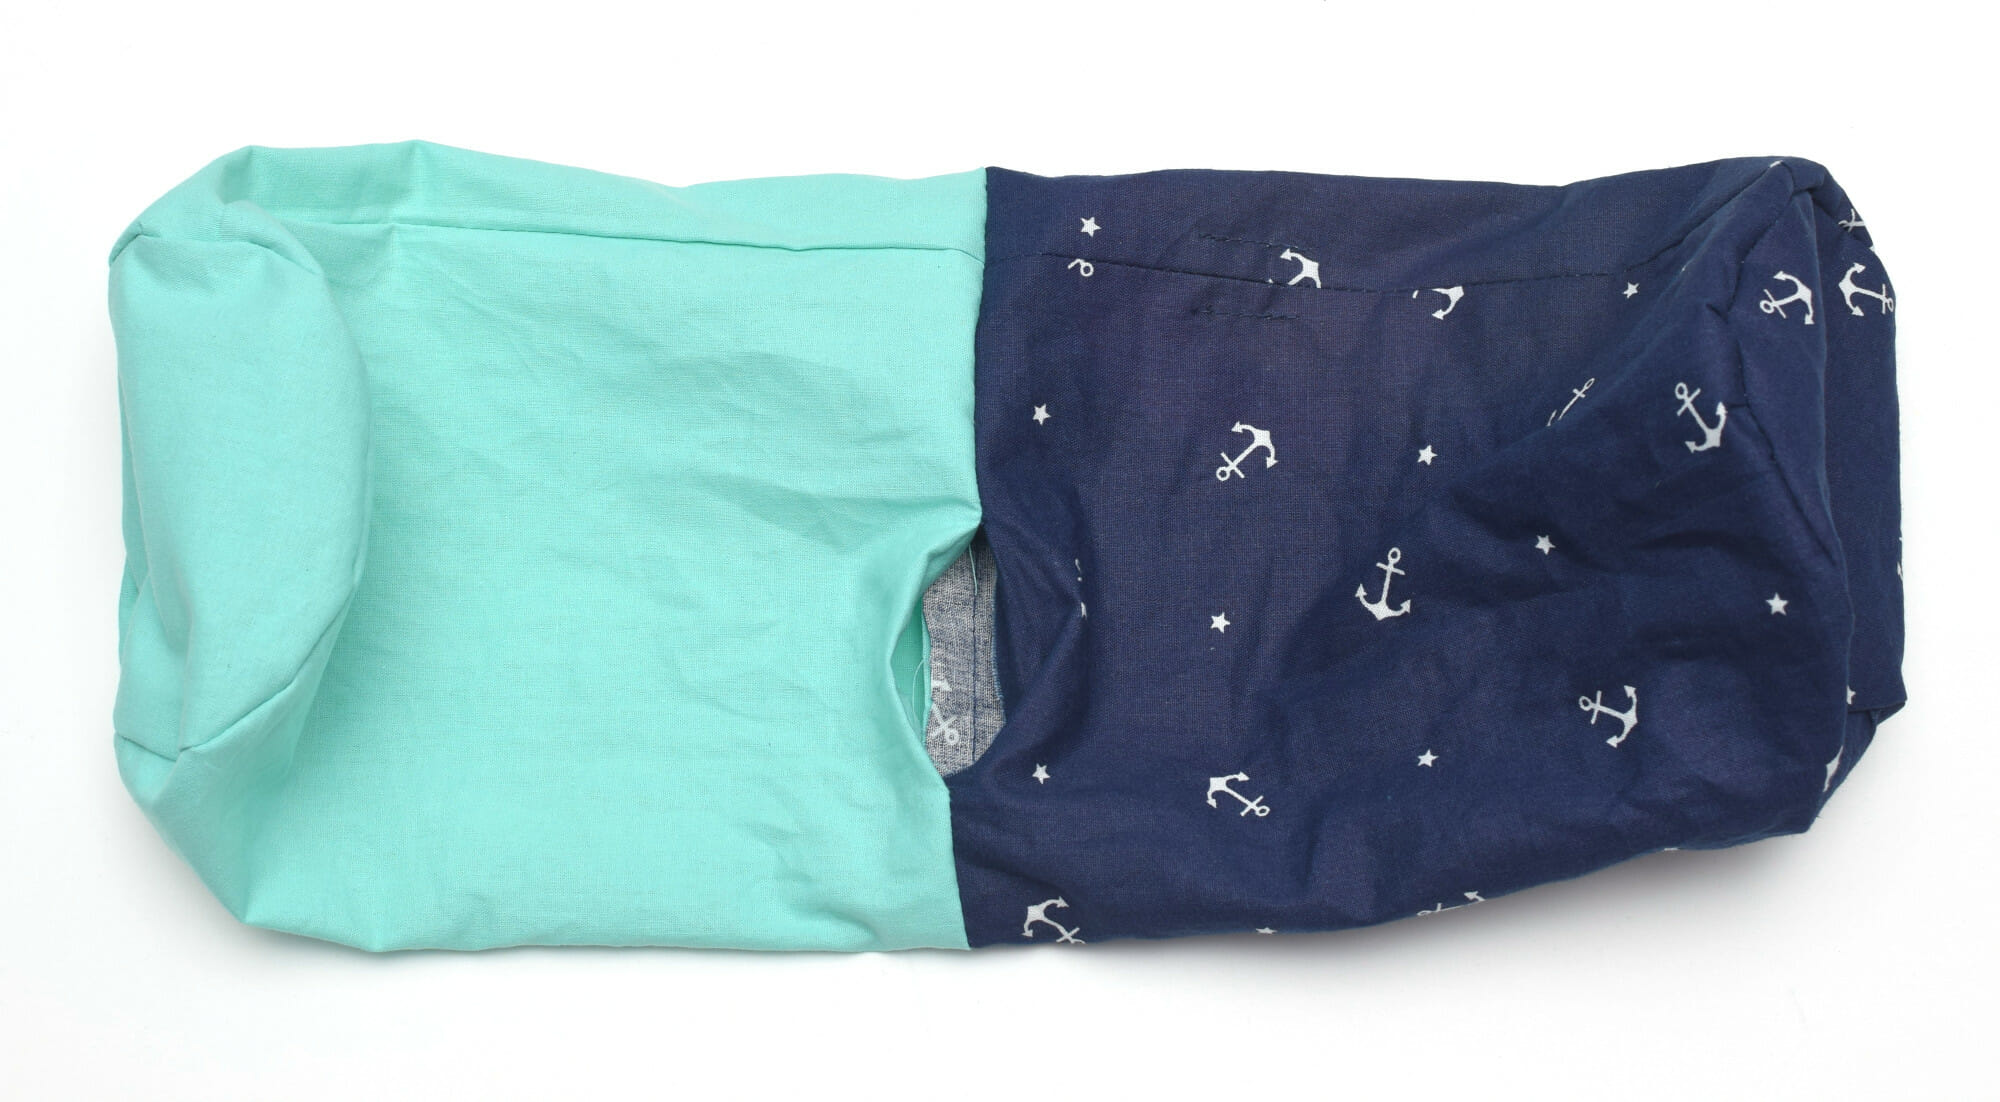
Putting the lining into the bag, right sides together. Align the lining seams with the outer fabric seams.
Stitch along the top edge with a 3/8″ seam allowance, and leave a generous 3” opening in the center.
Step 6
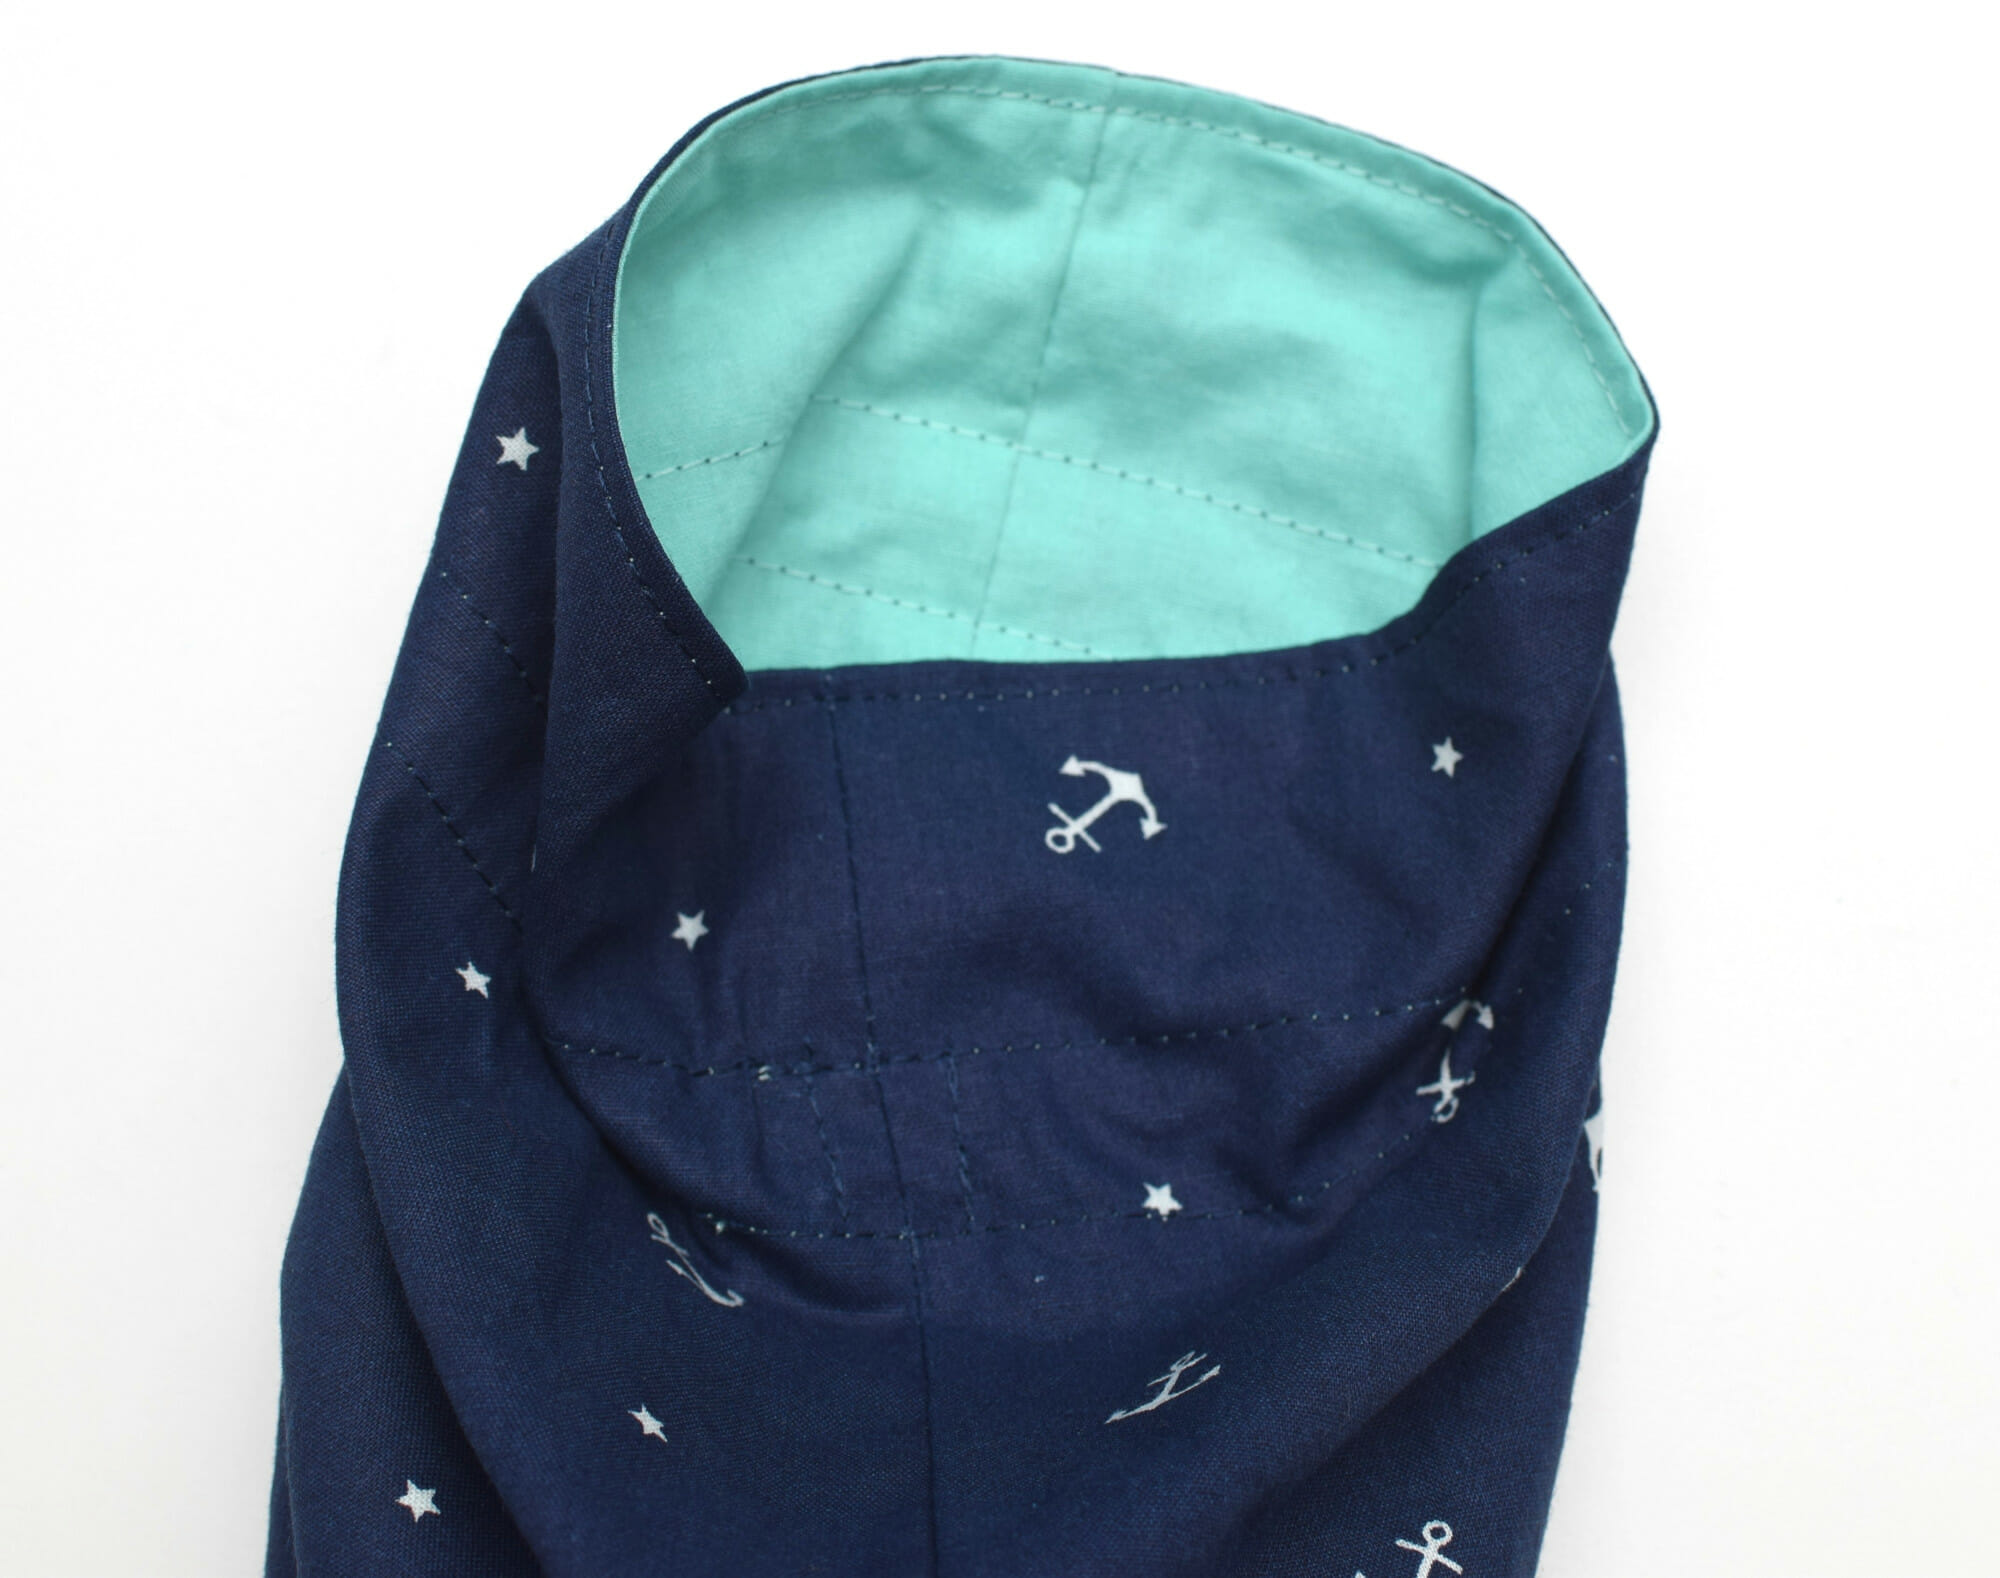
Reach through the opening at the top and turn the bag right side out.
Step 7
Tuck in the raw edges of the opening and topstitch 1/4″ away from the top edge. You may want to use a bobbin thread that matches the color of the lining.
Step 8
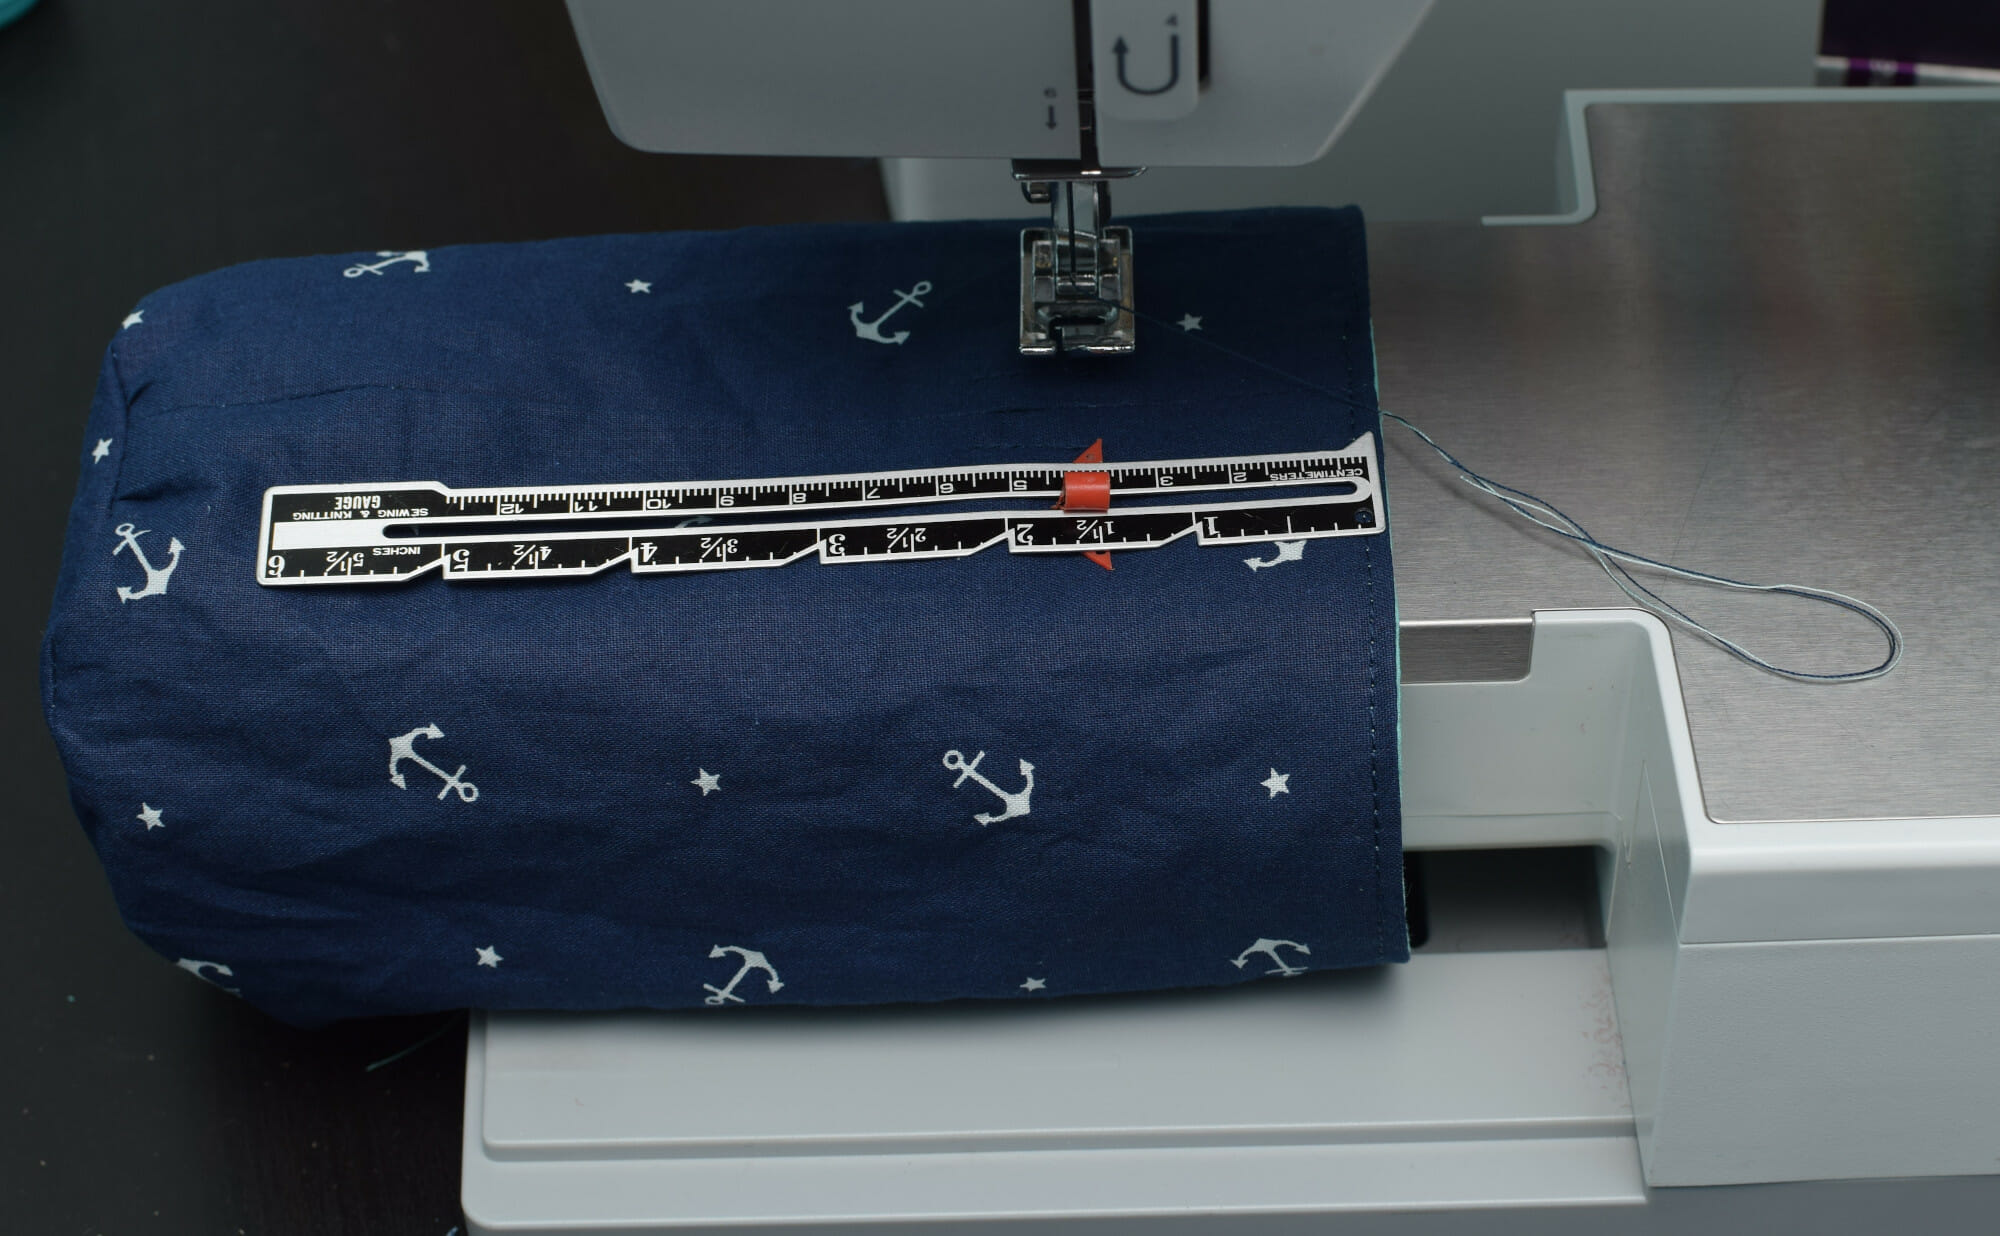
Let’s make the channel for the drawstring cords. On the right side, I sewed around the top of the bag about 1 1/2″ from the top edge.
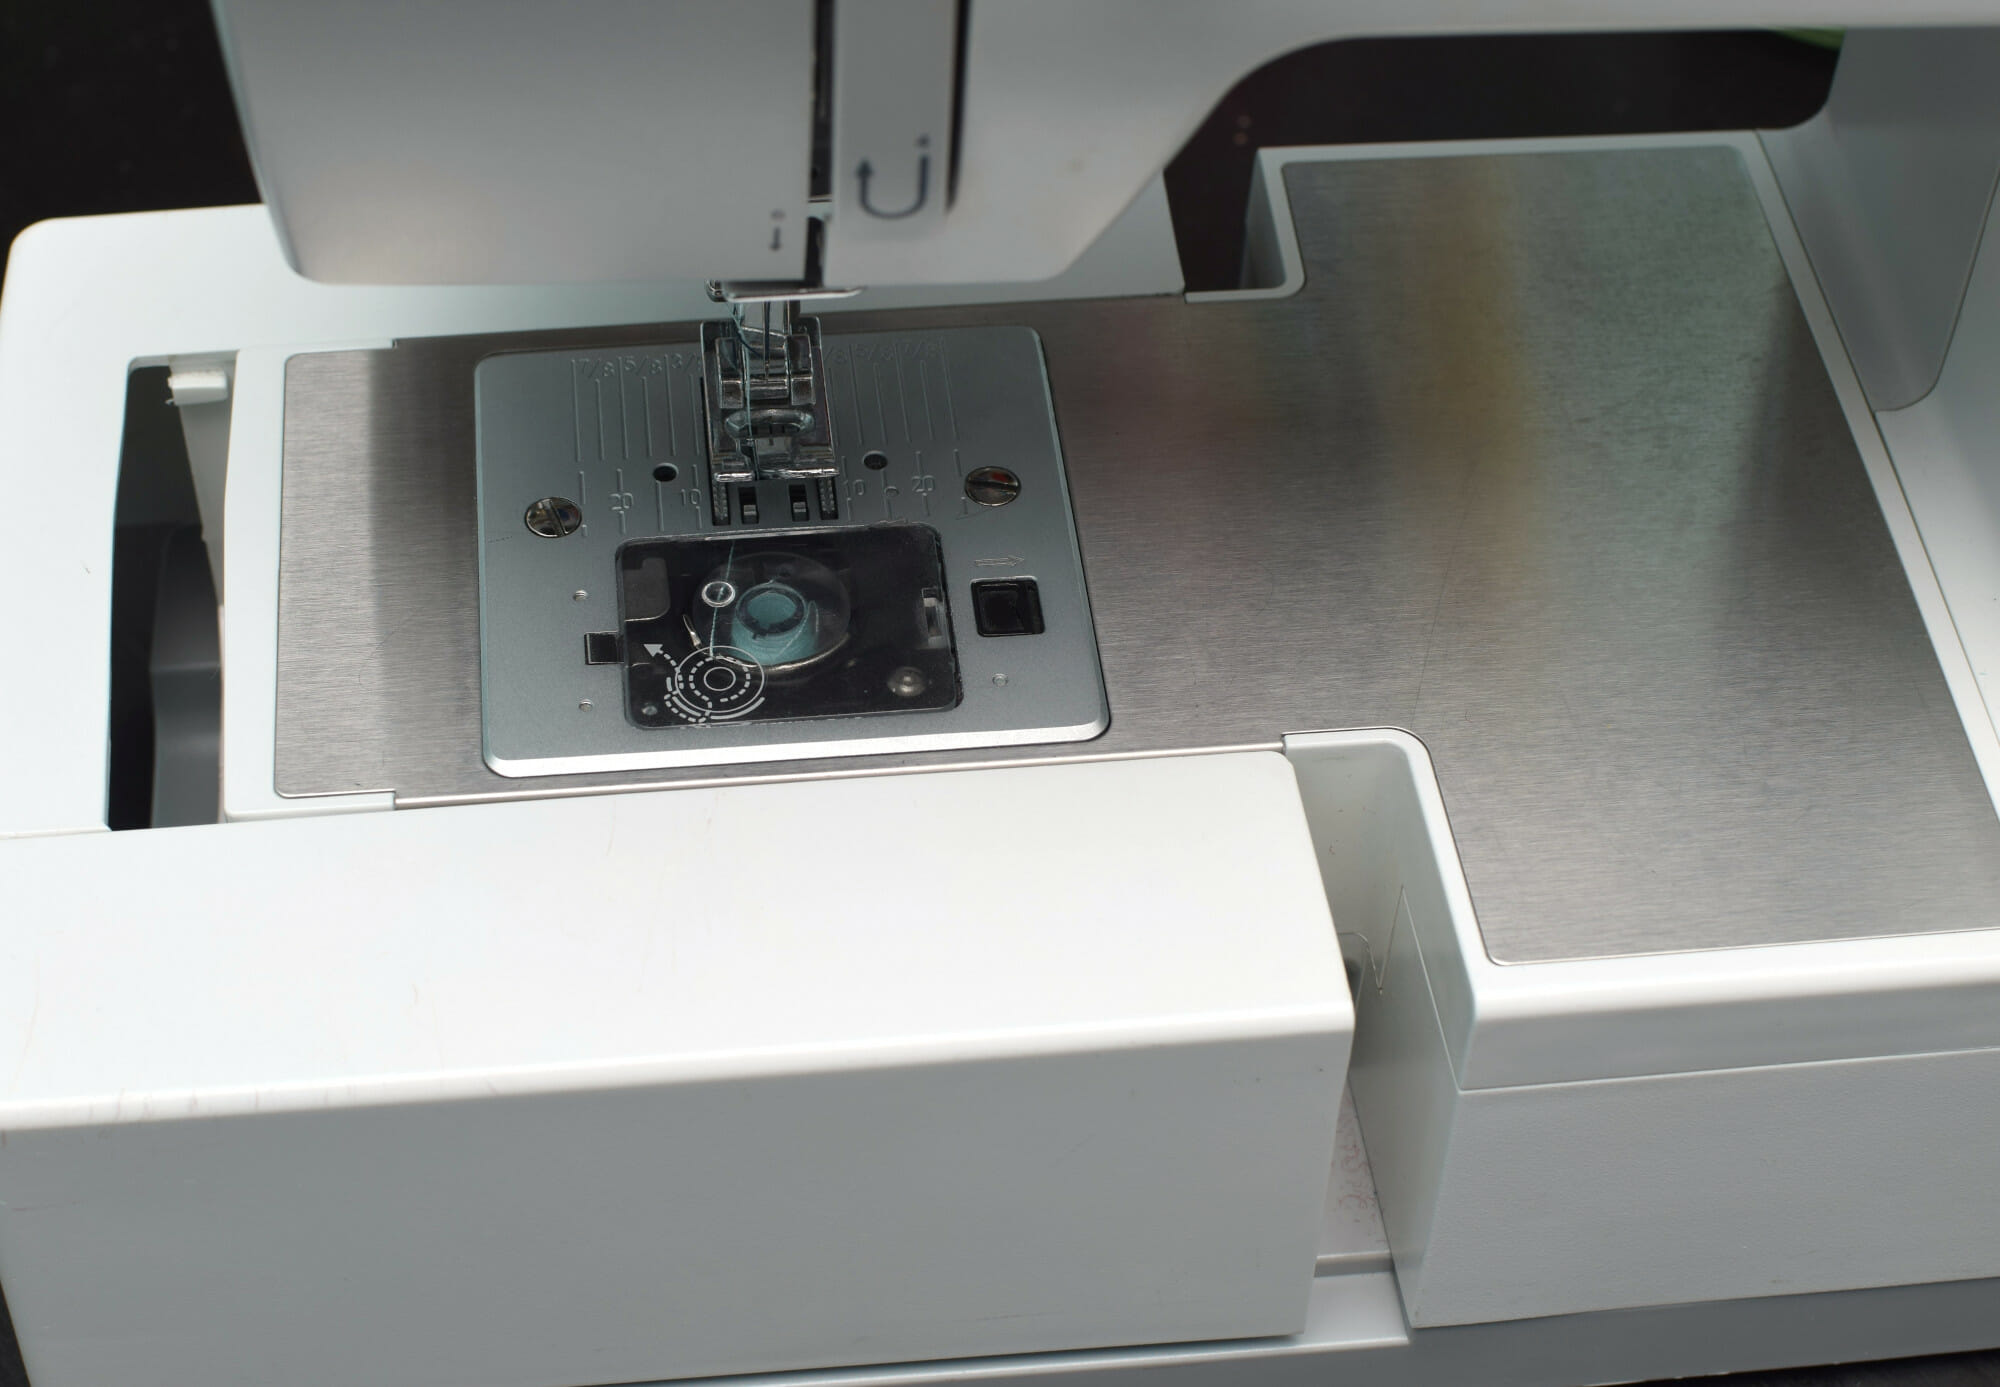
Use the free arm on your sewing machine, it makes things much easier!
If you’re a beginner and you’re not sure what a free arm means, take a look at this picture. Chances are that your sewing machine has one, too.
Then I did the same, this time 2 1/4″ away from the top edge. The spacing will depend on how wide your drawstring cords are.
Step 9
For this step, you need two drawstring cords, and each of them should be twice bigger than the bag’s width, plus 2 or 3 additional inches.
Attach a safety pin to one end of the first drawstring cord, and feed it through the casing. Tie the ends of the cord in a simple knot. Then, start on the opposite side of the bag, and repeat with the other cord.
The whole idea is to have one loop and two ends of the drawstring on each side so that when you pull them both simultaneously, the drawstring bag will close.
How to make a BIGGER lined dice bag
Cut out the following pieces:
– 2 circles with a 7” diameter (1 main fabric, 1 lining)
– 4 rectangles measuring 11.31″ in width by 11″ in length (2 main fabric, 2 lining)
Repeat steps 1-9.
That’s all!
I hope you find this lined drawstring dice bag pattern useful! Happy sewing!
Let’s keep in touch! You can find me on Facebook, Instagram, and Pinterest.


Hi Violet, thanks for posting this! I’m a relatively inexperienced sewist and I’m excited to try this pattern.
Could you clarify how the opening 2 1/2 – 2/ 3/4 in from the top of the bag relates to the channel for the cord that is 1 1/2 – 2 1/4 inches from the top of the bag? It seems like those two areas wouldn’t overlap…Does the top of the bag get closer to the opening due to connecting the lining to the main fabric?
Hiya! I think the commonality between the 2 measurements is that the first set given (~2 3/4) is before sewing in the other seams. After accounting what you lose from seam allowance, it’s drops down to the other measurement (~2 1/2 “depending how big your cord is”)
Hope this makes sense!
great guide! made a beautiful and sturdy bag! will be making one for everyone on the table
I am going to use this pattern for holding potatoes during our Raclette dinners. It will need to be a little bit larger but your instructions will help me make one. Thank you!
Hi. What do you mean by “right sides together” in step 5? What is “right” supposed to mean. I have both the main fabric and the lining ready to go for the step, but I don’t understand which way the lining goes in.
Hi Lindsey,
The right side of the lining has to touch the right side of the main fabric at Step 5. In the end, when the bag is finished, both fabrics (main & lining) will be visible from the outside.
Think of “right” as in “right and wrong”. Not left and right. Another way to think about it is “pretty” and “ugly” sides. Your “right/pretty” side will be the side with the pattern you want to be seen. (As this is a layered piece) the “wrong/ugly” side will not be visible even from inside the bag if you do it correctly.
Hope this makes sense!
So dumb question, but do you sew around the whole bag (main fabric) where the drawstring goes, if you don’t, wont the drawstrings just go anywhere?
Hi Christina,
There is no such thing as a dumb question!
At Step 8, I sew around the whole bag, through both main fabric and lining, to make a casing for the drawstring cords. If I skipped that, I think the overall result would be subpar – aesthetically and functionally as well.
This was my very first sewing project on my very first sewing machine and I wanted to say thank you for making this so beginner friendly! I only had to redo one part (misunderstood how the lining was to fit into the outer fabric and had to fix that) but overall very pleased with this tutorial and now this beginner has a gorgeous dice bag for D&D games ☺️
I may be stupid, but how do you measure .17 or .31 of an inch?
Hi Lee,
This is a great & valid question, sorry for responding so late!
So, here’s why I used these odd numbers 8.17″ and 11.31″ >> my starting point for each bag is always the bottom circle – 5″, 6″ etc. When I do the math, it’s almost impossible to get nice round numbers for the bag walls.
I’m not a big fan of the imperial system and I’m actually using the metric system in my home country, but I’m writing these tutorials for English speakers – the vast majority of them use inches to measure things.
So here are your options:
1. convert 8.17″ into cm (use Google) you’ll get 20.75 cm.
2. convert decimal to inch fractions (use this site https://www.inchcalculator.com/inch-fraction-calculator/ or another) 8.17″ = 8 11/64″ (this 11/64 fraction still confuses me…)
Hope this helps! 🙂
Violet
It is only Americans who are English speaking and imperial using… Do everything in CM, it makes more sense 🙂
Canada went metric in 1975. As far as sewing is concerned, I can do both. I’m 72 and sometimes I forget that anyone born 1975 and later have no idea what an inch is. Of course, you can really confuse them by asking to get a “yard”.
I made a bag with this pattern back in January (before I even got the dice I made it for) and it was great to work with! I’m planning on making another (or a few) soon. Thank you for sharing the pattern!
I thought I might suggest a 1” square on the pdf for scale. The circle I printed was 4.5”. I broke out the compass and made one that was 5”. though.
Also, my fabric is sideways because I cut it with the pattern facing up along the length of it. But then you sew the sides of the width so everything is on it’s side.
Hi Katrina,
Thank you for your feedback and sorry for the late reply! I checked the circle pattern and indeed it was a bit off. I revised it and it should be fine now. Unfortunately, I don’t know how to add a 1” square on the pdf for scale… I also use the compass on a plain A4 sheet, then scan it & upload it here.
The link doesn’t work to download the circle.
You were right, Nikki, there was a problem with the link. I fixed it, now it works. Thank you!
Mine still prints at 4.5 inches. Can you share the math you used to determine the sides of the rectangles? I don’t have a compass
PSA: don’t use satin fabric. unless you’re very good at sewing.
I’m not exactly a noob, but trying to do this with satin made me give up.
also, note to self. DO measure PROPERLY.
Hi Niky,
Your comment is so funny. :)) I’m not a noob either, but I will still fail at this and that from time to time.
Yes, sewing this drawstring bag with satin is harder – but if you add fusible interfacing to the satin outer layer, it gets much much easier.
Have a nice day! 🙂
the tutorial for the free drawstring bag does not show the photographs.
Hi Violet,
I don’t know why, but half of your pictures won’t load for me here, so I’m having trouble making sense of one thing. For dimensions you specify 4 rectangles measuring 8.17 inches in width by 8 inches in length…then you say if we want to change how short or tall the bag is, just to adjust the height of the rectangles’ length. So the 8” side. However, it seems to me that unless I’m misunderstanding…that’s the side that gets sewn to the circle, so the circle’s diameter would change as well. Because the long side (8.17”) that you call the width seems to me to actually be the HEIGHT of the bag where the length, as you call it, is actually the width.
Again, the pictures are all broken for me so reading comprehension might be to blame. 🙂 I just decided I wanted my bag to be a little squatter, so following your directions, I took an inch off the 8” length…and now that I see that’s the side that’s supposed to match up to my circle, the dimensions are all wonky. So is it possible I should have actually taken an inch of the long side (8.17” that you call the width above), instead of the 8” side you called the length?
Yep! I think you’re right, Courtney. I am pretty meticulous in my cutting and I had a few small puckers in the bottom of my bag because I only read how to cut the rectangles paying close attention to the width/height labels. But I didn’t closely read, “Now, place the lining pieces with the right sides together and sew along the long side (8.17 inches) with a 3/8″ seam allowance.” You are so right!! That is the HEIGHT!! Thank you for your post.
Great pattern, though, Violet!! And thanks for the photos and instructions. I love my little bag!
If I want to make it even bigger than the 7″ diameter circle, how do I determine the size of the rectangles in relationship to the circle?
Hi Marilyn,
Good question. I think it deserves a whole new post rather than just a short reply here. What do you have in mind, what do you need a big round bottom bag for? And how big? As you can see, I’m conducting a mini-research here, lol.
Thank you!
Did you ever make a separate post for this? I wanted to try making bags of various sizes, both bigger and smaller, and wanted to know the math I should do.
Thanks!
Hi Melody,
I haven’t got my hands on that post just yet, but it’s been bouncing around in my mind for a bit now. Once I get all cozy in my new home (in ~2 weeks, I hope), you can bet I’ll put those thoughts into words! I’ll drop another comment here to let you know when it’s live.
Thank you!
Hi Marilyn, so if we go by math, you’d need to find the circumference of whatever sized circle you want. So a 10″ diameter circle’s circumference is 62.83 inches (this is the bare minimum to get around the circle). divide that by 4 for the width of the rectangles and then add your seam allowance (I rounded up by .02″ in my calculations because I thought 16.08″ might be hard to measure). You’d make the rectangles as tall as 62.83″/4 without the added seam allowances and rounded to the nearest whole number I believe. Sooooo your rectangles would be 16.1″W x 16″T for a bag with a 10″ bottom circle. You can find circumferences here: https://www.google.com/search?q=circumference+of+a+circle&oq=circumference+of+a+&aqs=chrome.0.0i457j69i57j0l6.4641j0j7&sourceid=chrome&ie=UTF-8
From the pictures it looks like you leave open for the drawstring opening at 2 1/4 and 2 3/4. Not 2 1/2 and 2 3/4
Good observation, thank you! It looks like a typing mistake, I’m sorry – I already fixed it. Thank you again!
In truth, where you place that drawstring opening can vary a little, depending on how you want the top of the bag to look like and how wide your cords are.
Great! I like sewing. What a great idea. Will surely try as I have got so many left over cloth.
Thank you.