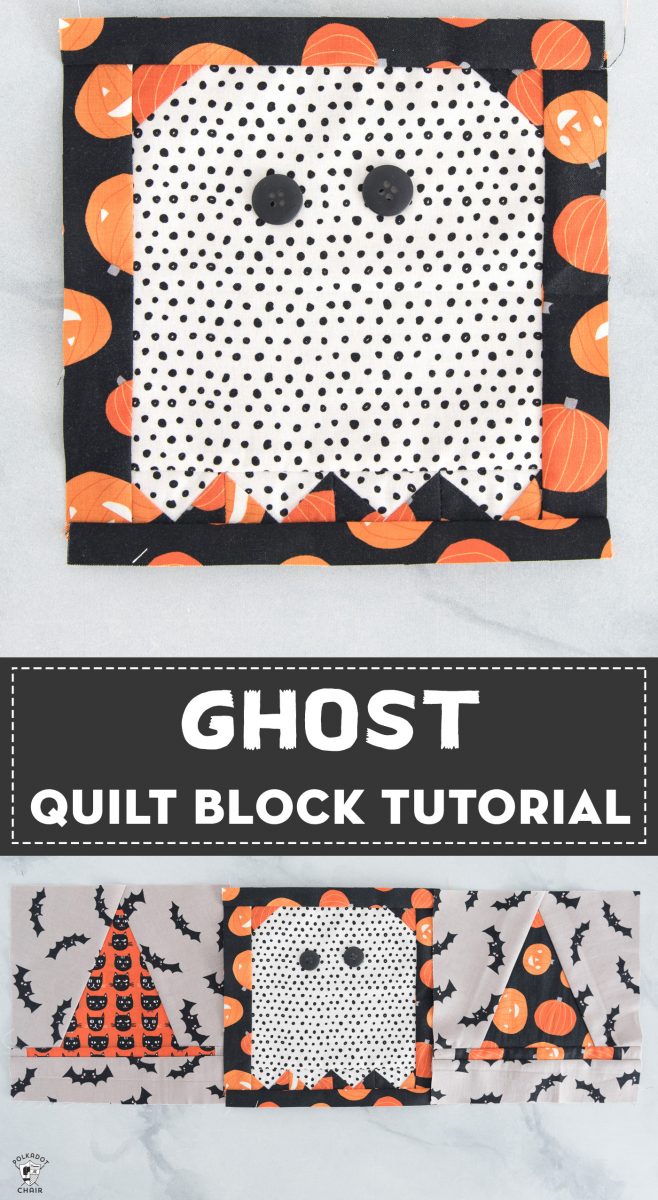
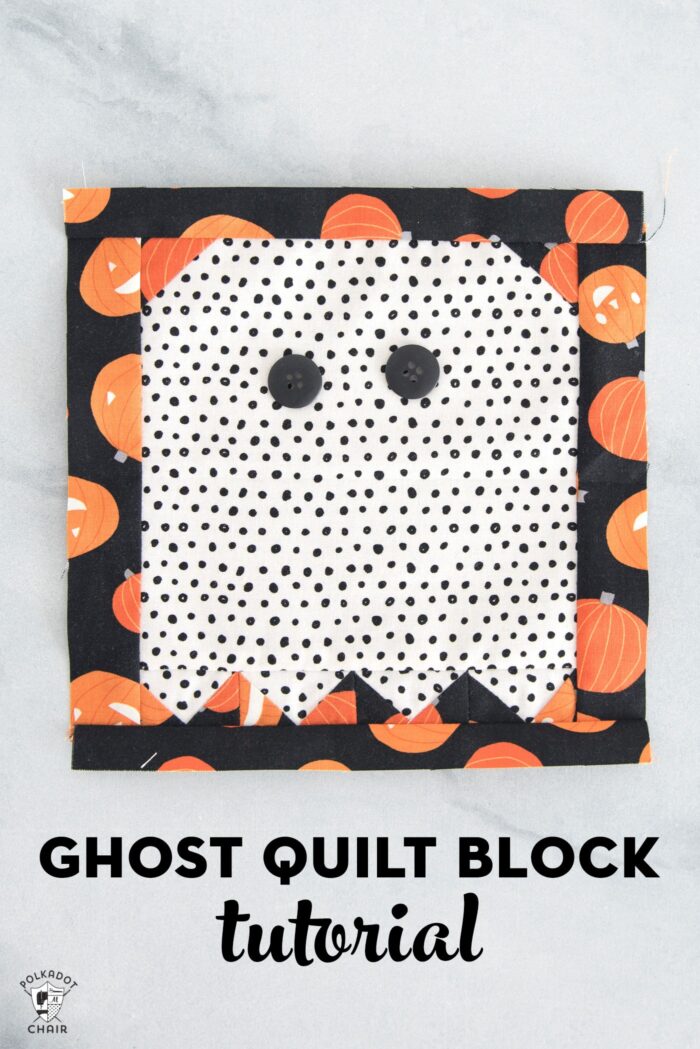
Ghost Quilt Block Tutorial
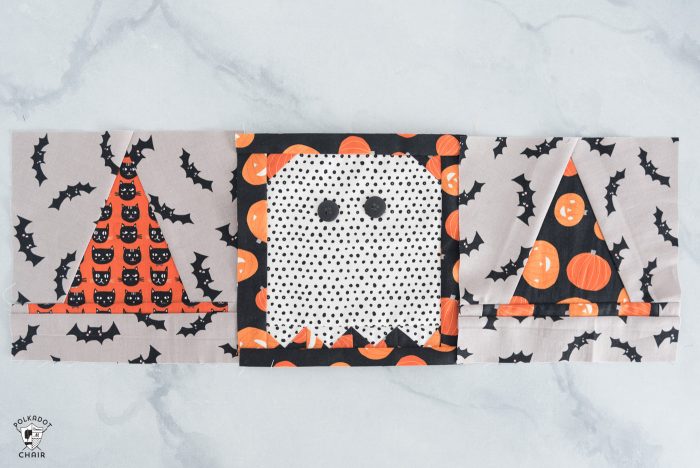
Who’s ready for Halloween? Celebrate the Holiday in a “quilty” way with this fun, and free Ghost Quilt Block Pattern! It’s designed to fit in perfectly with the Witch Hat Quilt Blocks in our Halloween Haberdashery Quilt pattern.
Welcome to week 4 of our Halloween Haberdashery Quilt Along. This week I’m sharing a fun “bonus” quilt block pattern. It’s this cute ghost block that is designed to fit into our Halloween Haberdashery quilt!
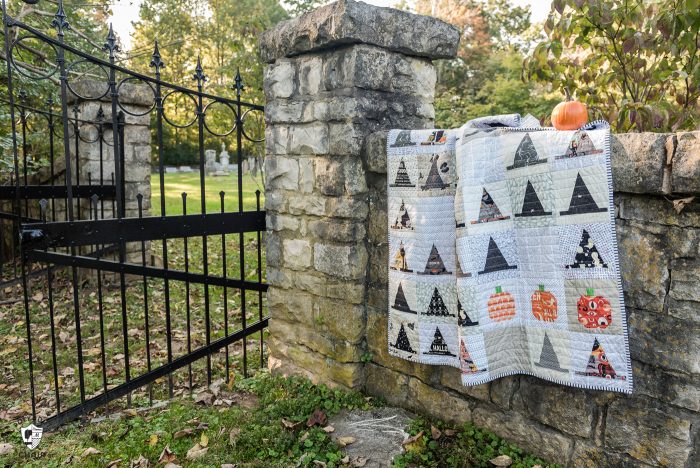
Halloween Quilt – Quilt Along
If you’re landing on this page and wonder what in the world I’m talking about. I’ve been hosting a quilt along for my Witch Hat Halloween quilt, called the Halloween Habersadhery quilt. You can grab the pattern HERE- there is still time to join in!
My goal for the quilt along is to help you create a quilt from start to finish by breaking the construction process up into smaller do-able steps.
So far we’ve covered:
This week is Ghost Quilt Block Week! I love this little ghost. I’m sure you can tell that it’s inspired by the pac-man ghost from the video game. I did grow up in the 80’s after all!
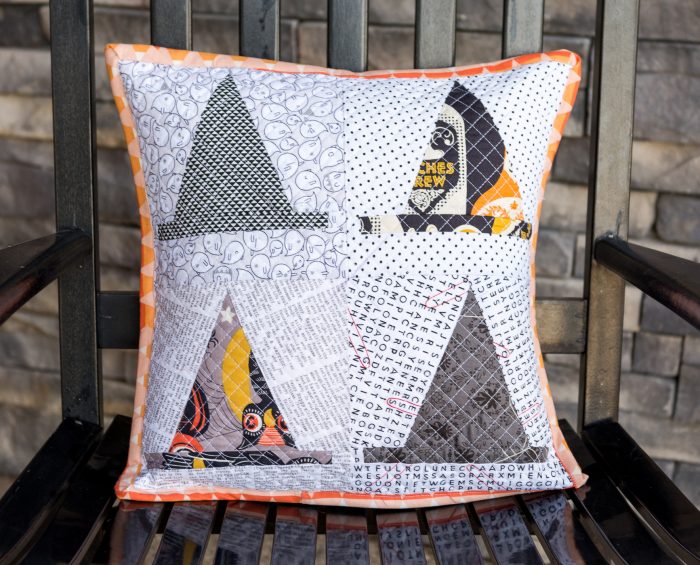
If you’re not making the quilt, you could stitch up 4 of these guys and make a fun Halloween pillow like the one I created for my Witch Hat quilt blocks.
I have “plans” for my ghosts- I’ll be sure to share them when the project is done.
This block is a little bit “fussy” to make, mostly because it’s got some small pieces. If you’re new to quilting, just go slow, and double check your seam allowances and you’ll be fine. Also be careful when pressing that you don’t distort any of your seams.
Here’s a tip to help you out:
If you starch your pieces before you start constructing your block, the extra “weight” the starch adds to the fabric will help you piece the smaller pieces more accurately.
Ok, are you ready for the tutorial?
Ghost Quilt Block Pattern:
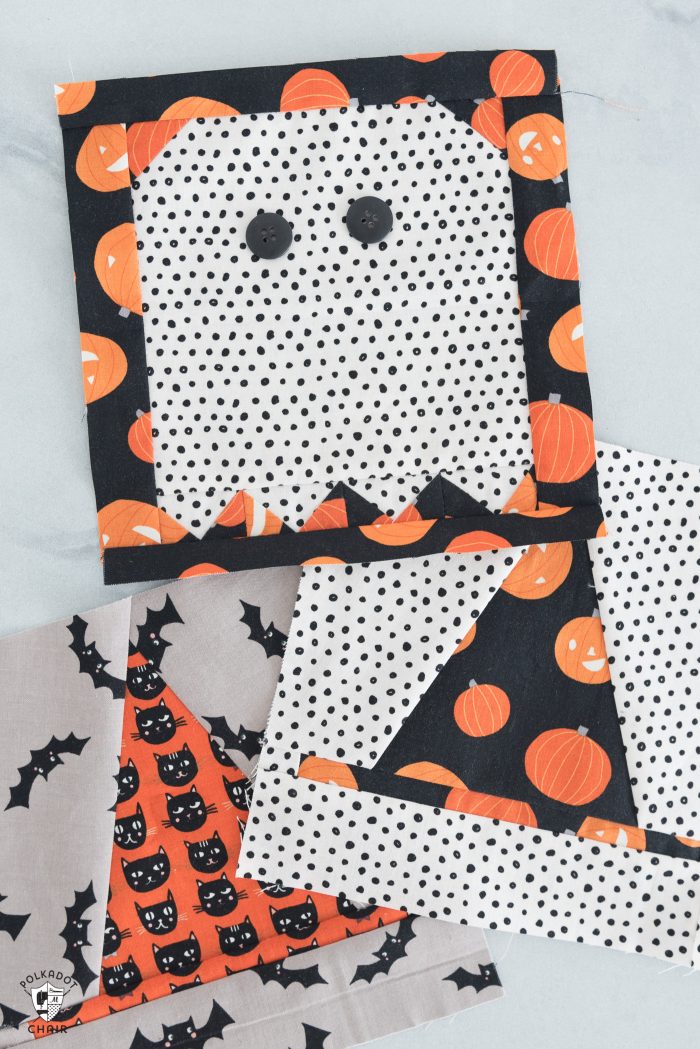
Fabric shown in example block is Cats, Bats & Jacks by Riley Blake Designs (affiliate link)
Block Measures 8″ x 8″ before finishing
Cut:
From Ghost Fabric:
1 piece 6 1/2″ x 6 1/2″
4 pieces 1 1/4″ x 2″
From Background Fabric:
2 pieces 1 1/2″ x 1 1/2″
8 pieces 1 1/4″ x 1 1/4″
2 pieces 1 1/2″ x 7 1/4″
2 pieces 1″ x 8″
Additional Supplies: 2 Buttons for Eyes – mine are 1″
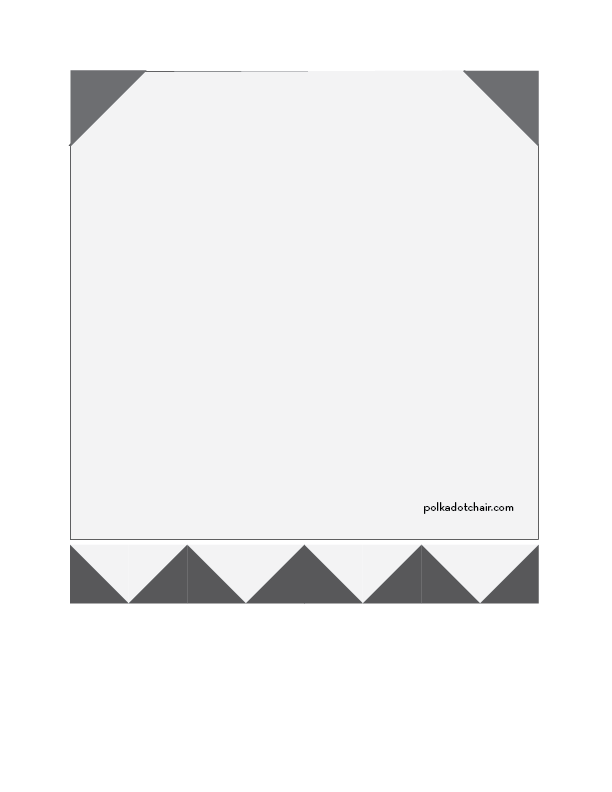
Step One: Create the Ghost
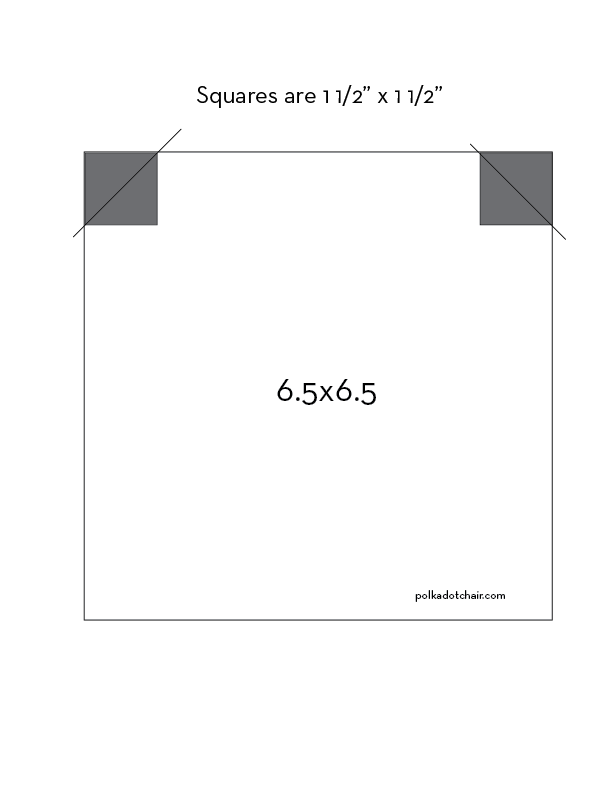
Draw a diagonal line on the wrong side of all of your 1 1/2″ and 1 1/4″ squares of background fabric.
Lay one of the 1 1/2″ squares on top of the 6 1/2″ square of ghost fabric on the upper right corner. The right sides of the fabric will be facing.
Stitch along the line you drew.
Using a ruler, cut 1/4″ diagonally on the OUTSIDE of the line you just stitched.
Flip the square (now a triangle) up and press in place.
Repeat for the left top corner.
Step Two: Construct the Flying Geese
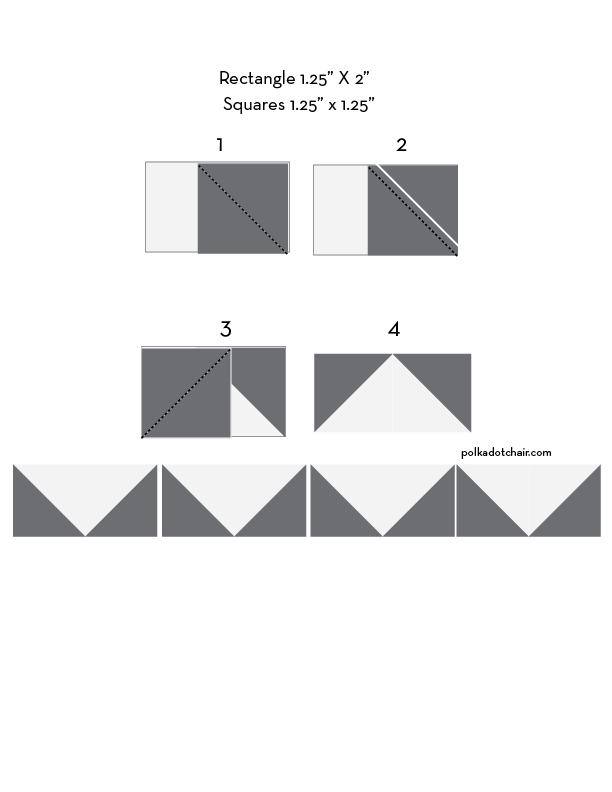
Layer one of the 1 1/4″ squares on top of one 1 1/4″ x 2″ piece of ghost fabric. Right sides facing. Stitch along the line you drew on the back of the 1 1/4″ square. Refer to the diagram above as necessary.
Using a ruler, cut 1/4″ from the stitched line on the OUTSIDE of the stitching line (don’t cut off the seam you just stitched).
Flip the triangle up and press in place.
Repeat with another 1 1/4″ square for the other side of the 1 1/4″ x 2″ ghost piece.
Repeat until you have 4 sewn flying geese blocks.
Step Three:
Stitch all 4 of the flying geese blocks to each other along the short sides, press the seams to one side. (If you prefer, you may also press the seams open to reduce bulk).
Stitch the row of flying geese blocks to the bottom of the ghost piece as shown in the diagram above.
Step Four: Finishing
Note: I’ve rounded up the measurements for the “trim” pieces of the ghost, to give you a bit of wiggle room when it comes to squaring up your block. They won’t fit perfectly the first time and are meant to be larger to allow you to square up your block perfectly.
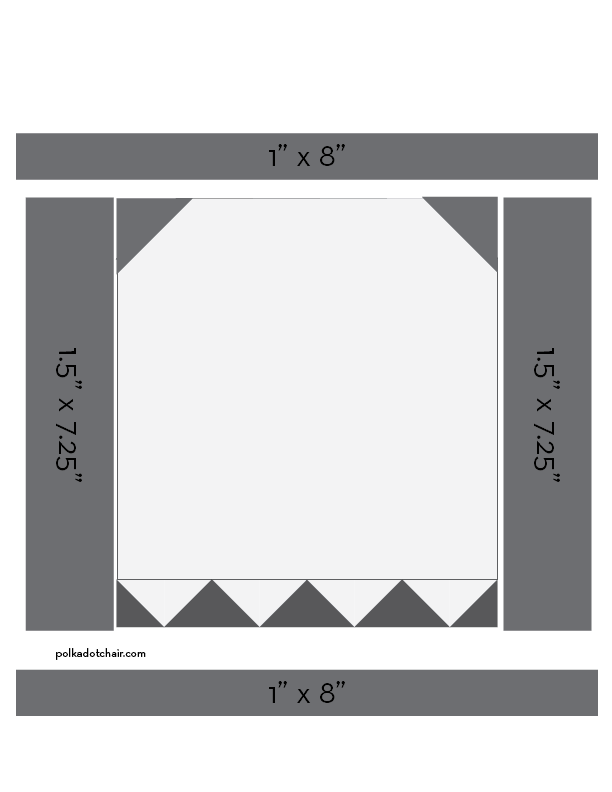
Stitch one 1 1/2″ x 7 1/4″ piece of background fabric to each side of the sewn ghost. Press the seam to one side.
Trim this piece to 8″ wide, ensuring that the ghost remains in the center as you trim.
Stitch one 1″ x 8″ piece of fabric to the top and bottom of the ghost. Press seam to one side.
Trim to 8″ tall, ensuring that the ghost remains in the center of the block.
Sew two buttons to the center of the block for eyes.
That’s it!
You’re done!
If you’re playing around with our quilt along, be sure to use the hashtag #HalloweenHaberdashery if you share it on Instagram, and tag me @polkadotchair (find me on Instagram HERE). I love to see your creations!!