

With Halloween just over the horizon, I thought I’d make a bat for this month’s coffee sleeve. I’ve had the shape in my head for a while now, so executing it should have been no problem. Ack. I went through a lot to make this, so he should be spectacular, but I will admit he’s not. He’s not awful, but he was definitely cuter in my head. If you’re looking for a little Halloween to wrap around your cup though, he’s your guy.

Coffee Sleeve of the Month Halloween Bat - Crafty Staci 1
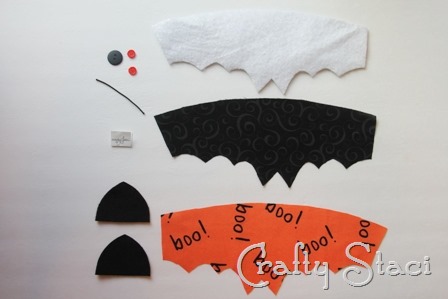
To make this bat, you’ll need
fabric for the front and back
InsulBrite
black felt
3” piece of elastic cord
3/4 – 1” button
two small 3/8” buttons
Coffee Sleeve of the Month Halloween Bat - Crafty Staci 2
Cut out the front fabric and InsulBrite. Turn the pattern over and cut out the back. Cut two ears from the felt. Tie or stitch the two ends of the elastic together to form a loop.
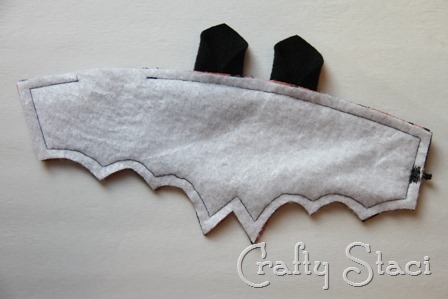
Before we get into the rest of the assembly directions for this, I’m going to tell you about my big dumb mistake. Maybe I won’t need to explain. What is wrong with this photo?
Coffee Sleeve of the Month Halloween Bat - Crafty Staci 3
If you noticed that those ears are facing the wrong direction, you win. They would have been on the inside once it was turned right side out, and facing backwards to boot. I had to rip out all those stitches, including that little black mass on the right, which is how I make sure the elastic is secure. I was close to tossing the whole thing in the trash, but making things is sometimes about making mistakes. Instead of throwing a fit I decided to be a big girl and fix it. It’s kind of like exercising. I hate to do it, but I feel better about myself if I do.
Anyway, let’s start back at the beginning. To make it easier to insert the ears, fold both sides in to meet in the center and stitch very close to the edge to hold.

Coffee Sleeve of the Month Halloween Bat - Crafty Staci 4
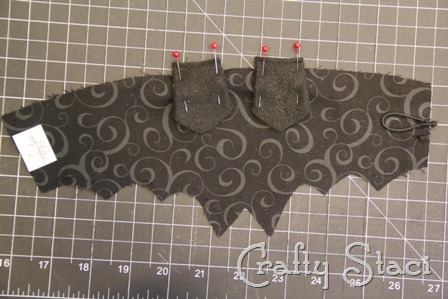
Lay the front piece right side up. Pin the ears with the inside edge at the mark on the pattern and with the ears facing inside. The turned-in edges should be facing the fabric. Place the elastic with the loop end to the inside. I added my tag to the other end.
Coffee Sleeve of the Month Halloween Bat - Crafty Staci 5
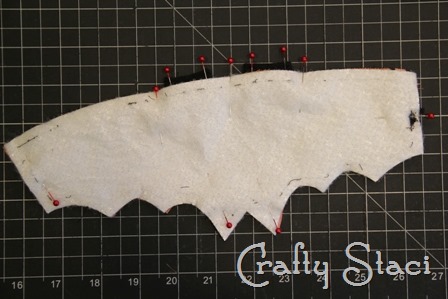
Lay the back fabric over, right side down. The InsulBrite goes on top of that. Pin everything in place.
Coffee Sleeve of the Month Halloween Bat - Crafty Staci 6
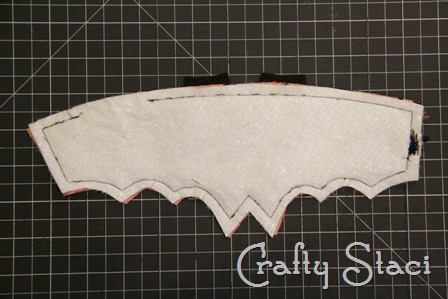
Starting just before the ears, stitch all the way around 1/4” from the edge, stopping 2” before the start point. The curves are a little challenging, so if you’re a new sewer you might want to practice on a scrap first.
Coffee Sleeve of the Month Halloween Bat - Crafty Staci 7
Clip all corners. Turn right side out and press, turning in opening and being careful not to press the felt ears. Top stitch all the way around.

Coffee Sleeve of the Month Halloween Bat - Crafty Staci 8
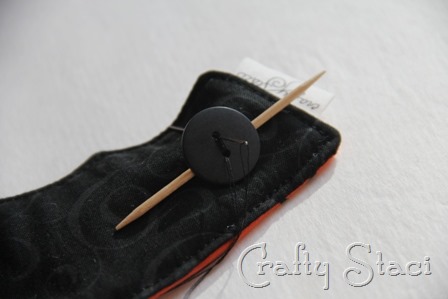
Stitch a button on the end opposite the elastic. Slip a toothpick under the button while stitching so the elastic will slip around it easily.
Coffee Sleeve of the Month Halloween Bat - Crafty Staci 9
Sew the button eyes on where indicated on the pattern.

Coffee Sleeve of the Month Halloween Bat - Crafty Staci 10
Wrap it around a hot cup and you’re ready to welcome Halloween!

Coffee Sleeve of the Month - Halloween Bat - Crafty Staci 11