
Do you know what today is? I didn't either, but let me fill you in. It's officially World Tourism Day. Do you have a bag for your passport?
With my husband and I currently shopping for plane tickets for another Italy trip next spring and our son on his way home for a visit tomorrow (!!!!!), it feels like the perfect day to celebrate.

Touring the world involves a very important little booklet - your passport. When you're in a foreign country it's pretty important to keep track of that thing, and it's smart to keep it on your body. How can you do that easily? With this flexible bag!
You can wear this around your neck, under your shirt, cross-body or around your waist. Let's get started.
I’ve been sharing tutorials on my blog for over a decade, and I’m frequently asked how they can be printed or saved. The answer is here! You can find this printable tutorial in my shop, which contains the instructions, color photos, and templates from the original blog post, without the extra things you don’t need to make the project. The file is in PDF format, so you can either print or save it to your computer.
To make this you'll need:
good quality cotton fabric
two 7” zippers
cord stop
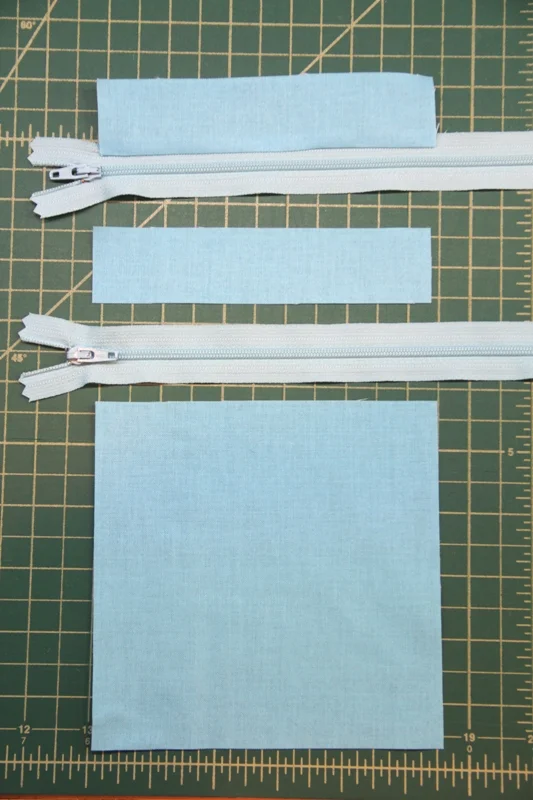
Cut from the fabric (templates are available here):
A 1 ½ x 5 ½” top front
B 1 ¼ x 5 ½” middle front
C 5 ½ x 5 ½” bottom front
D 8 ¼ x 5 ½” back
E 6 x 5 ½” inside pocket
F 1 x 44” strap (or width of fabric if not 44”)

Fold the strap piece (F) in half and press. Fold both edges inside the fold and press again, so it resembles skinny binding. Stitch near the double fold edge.

Lay out the front pieces (A – C) and two zippers as shown below. Lay piece A face down on top of the zipper with the edges even and the left side just under the pull. Stitch using a zipper foot. Press the fabric up and away from the zipper.
Repeat at the bottom of the zipper with piece B.
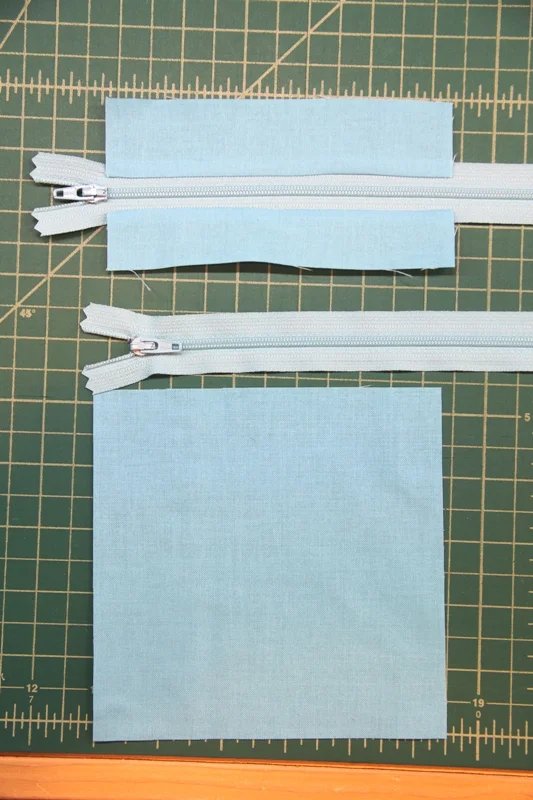
Lay the bottom edge of piece B (with the first zipper attached) face down over the upper edge of the second zipper. At the same time, line up the top of piece E (inside pocket) with the top edge of the zipper with the right side of the fabric facing the back of the zipper. Stitch.
Fold piece B back up and press, leaving piece E in place.

Temporarily fold piece E up and out of the way. Line up the top edge of piece C with the bottom edge of the second zipper with right sides together. Stitch. Fold down and press, placing piece E back down behind it.

Zigzag stitch over the edge of each seam you’ve created so far.

Partially unzip both zippers. Pin the two ends of the strap 3/8” from each upper corner.
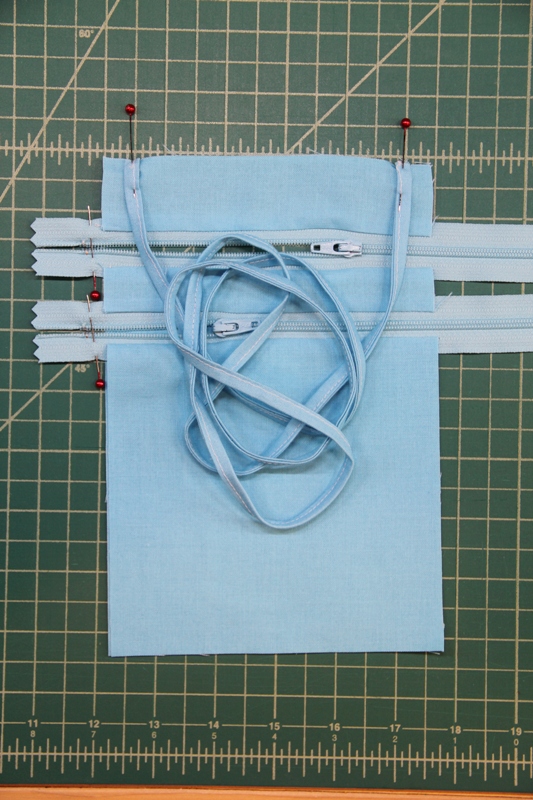
Lay piece D on top, face down. Stitch all the way around, back-stitching over the zipper ends.
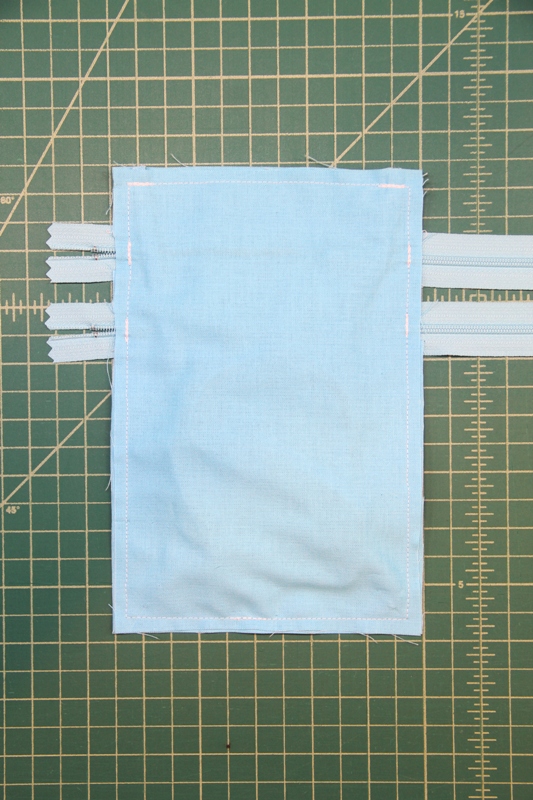
Cut away the excess zipper ends. Zigzag stitch over the edge of the seam.

Turn the bag right side out through the zipper. Press. Top stitch just above top zipper and again near the top edge of the bag.

Slide the cord stop onto the strap.

With that stop you can adjust the length of the strap to wear the bag in a variety of ways. It's lightweight and comfortable, and has an extra pocket to hold your phone or other small necessities.

These would also make great gifts for the travelers on your list!

Where will your passport bag take you?
