
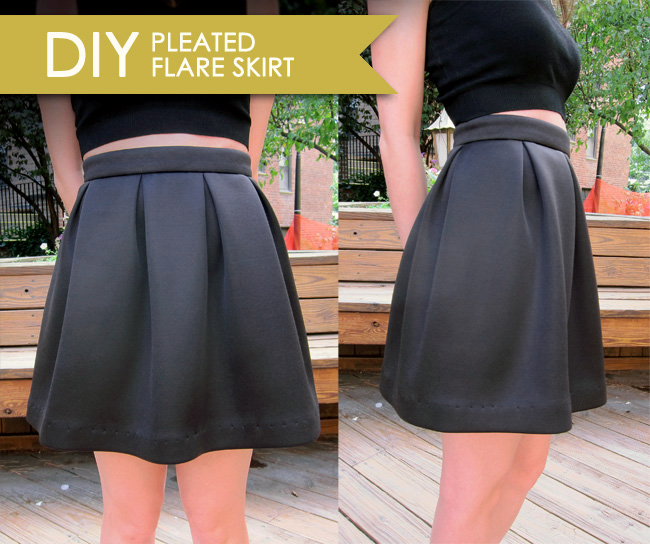
This post was inspired by two major trends happening right now. For the past two or three years, I’ve been obsessed with the “fit and flare” look and with high waisted full skirts. Also, neoprene fabric really huge right now and is great for achieving that wrinkle free, sculptural, minimalistic look that is so popular. So, I decided to make a neoprene flare skirt! This project was SO easy and simple, I decided to make this a step by step DIY tutorial post, instead of my usual vague documentation of my process.
First, to prove my point about how in this is, I’ve compiled a few cute neoprene items that are out on the market right now. I just love anything Alexander Wang.
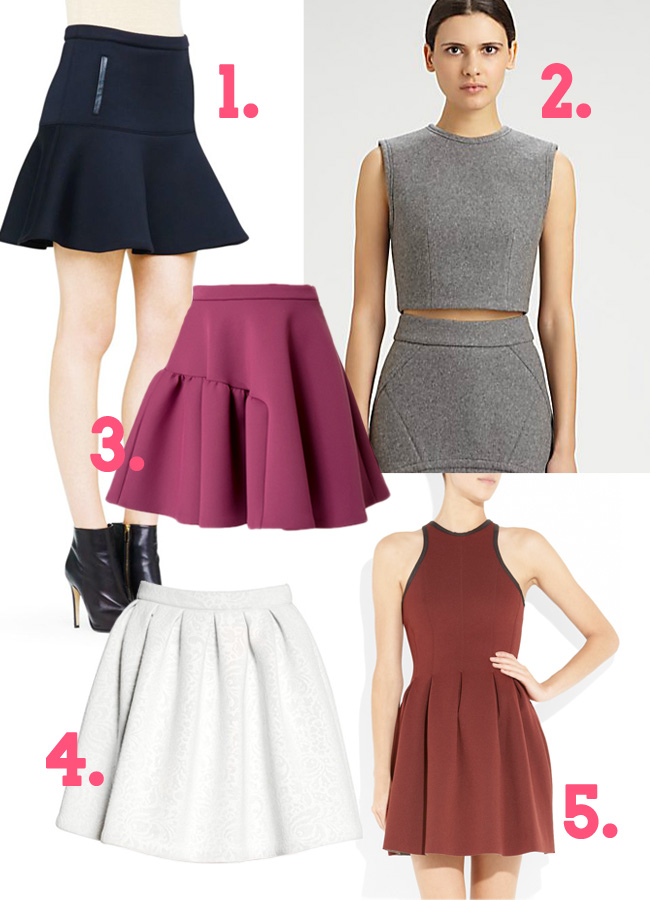
1. Christy Neoprene Skirt from Club Monaco
2. Cropped Neoprene Shell Top by T by Alexander Wang
3. Neoprene Skirt by MSGM
4. Neoprene Flared Skirt by MSGM
5. Pleated neoprene dress by T by Alexander Wang
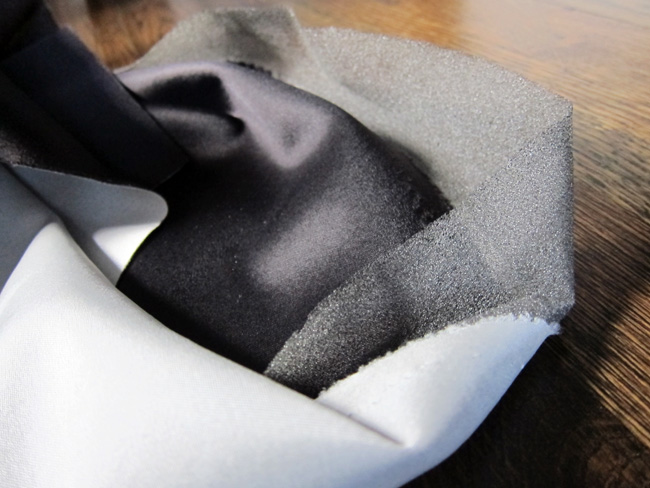
In case you don’t already know, fashion neoprene (also called scuba) is usually two pieces of synthetic knit bonded to a foam core. Sometimes its simply a heavy synthetic double knit jersey. My neoprene was black on one side and white on the other. Hopefully that will help differentiate the facing side of the fabric from the back side of the fabric during this tutorial.
So back to the project at hand. I chose to use neoprene for my skirt, but you can use almost any fabric to make this. Here’s what you’ll need.
SUPPLIES:
1. 1 yard of fabric (possibly more depending on the width of what you buy)
2. a small amount of lining fabric
3. fusible interfacing
4. an invisible zipper
5. the usual sewing supplies – thread, scissors, straight pins, etc.
6. a sewing machine!
7. an overlock machine (optional)
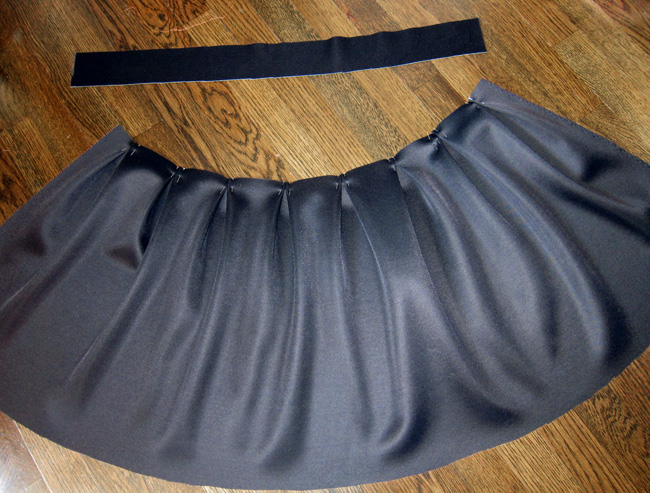
Here’s a photo of all the pieces of fabric cut and ready for the skirt.

Super simple! just a bunch of rectangles! Here’s what each piece is for:
1. main piece for the skirt
2. the waist band
3. the waist band lining
4. invisible zipper
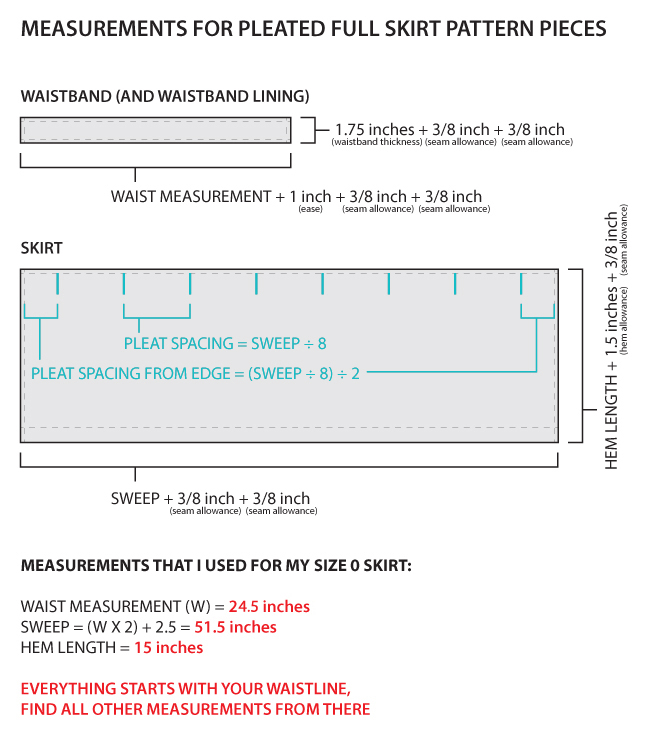
And here’s how to create your pattern. It may seem like a lot of math, but its pretty simple. It appears complicated because this is the best way I could think of to make this project accessible to people with a large range of body sizes. I personally tend to wear a size zero, but I wanted any person with any size to be able to attempt this. Also, keep in mind that my skirt is super duper mini and this is for a size zero…and I am very short. I recommend adding inches to the hem length if you are making a larger size. Also, if you prefer not having it so mini, more hem length would be a good idea too.
For my skirt, both the waistband and the skirt pieces are cut from neoprene fabric. The waistband lining is some spare silk lining that I had in my fabric box, but you can use any light weight thinner woven fabric. For the neoprene waistband piece, I fused interfacing to it to reinforce the shape/appearance of the nice crisp band, but also to remove any stretch from the neoprene. I actually prefer non-stretch fabric for this project.
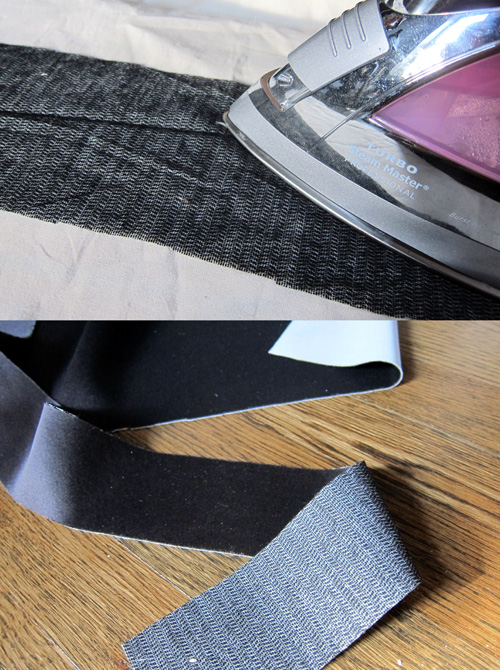
I also added a 1.5 inch strip of heavy fusible interfacing to the bottom edge of my skirt. Interfacing comes in many different weights and qualities. This one is very starchy and stiff. I added it to allow the skirt to flare out more from the stiffness. This is totally optional. One of those little details no one will really notice, but will help with your silhouette.
Next, pin the pleats into place on the skirt. A note on using straight pins: always pin perpendicularly to the direction of your stitch. This allows the machine needle to just hop over the pin, with less likelihood that the needle will strike the pin.
Box pleating will reduce the length of one edge of the skirt so that it is the exact same length as the waist band piece. Here’s a little guide to help you with how to make and measure your box pleats:
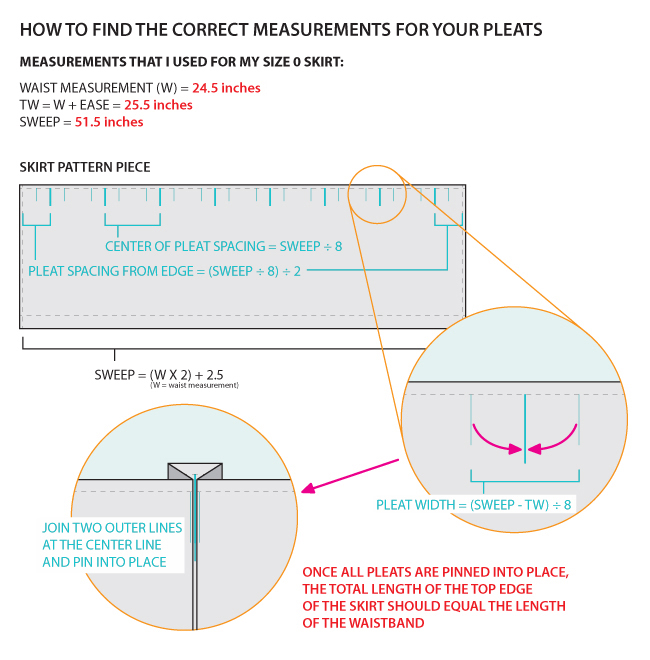
Again, the math is really simple for this. Hopefully my diagram communicates it effectively! Anyway, once you’ve pinned your pleats in place, you can pin the pleated edge to the waistband piece. Make sure that the correct side (called the “facing” side) of the two pieces of fabric are facing inwards towards each other. Then sew them together with a straight stitch. I tend to like to use a 3/8 inch seam allowance. After the straight stitch, finish off the edge with an overlock stitch (also called a serge stitch or merrow). You’ll need an overlock machine to do this, and I know not every novice owns one. If you don’t have one, a zig-zag stitch on your regular machine can substitute, but it will not look quite as clean and professional. No worries though, you’ll never be able to tell from the outside of the skirt! While you are at it, go ahead and finish all of the raw edges with the overlock stitch (or zig zag). You’ll see that I have done so on all of the photos from this point onward.

Straight stitch and overlock stitch. Please excuse those sloppy skipped stitches on the overlock. A setting was off on my machine and I didn’t feel like re-doing it.
Next, attach the lining piece to the other edge of the waistband in the same way – note the overlock stitch here also.

The only difference is that I added a top stitch to the lining. this attaches the lining to the seam allowance and will make it lie more flat and crisp. I do not do any top stitching on the neoprene because I want to maintain that minimalist look.

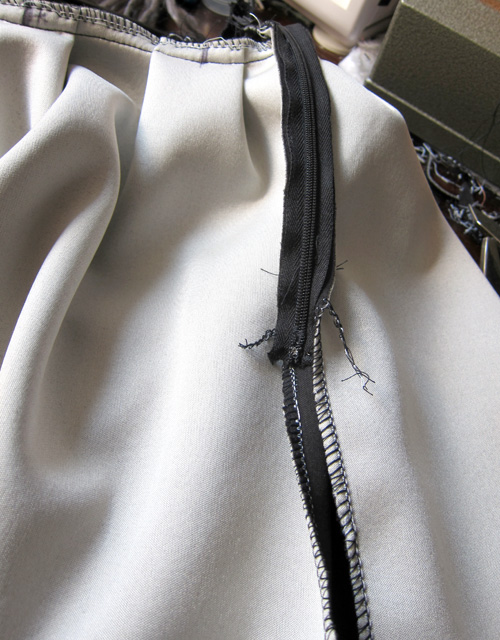
Your skirt should already be looking a lot like a skirt at this point. Now you can add the zipper! If you don’t know how, a friend of mine posted this great tutorial link on her pinterest recently. I’d say the zipper should go half of the length of the skirt.
Then then sew the seam for the rest of the length of the skirt that does not have the zipper.
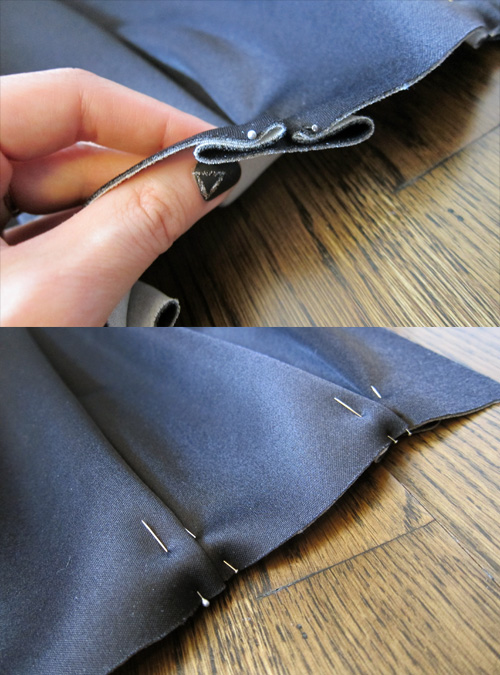
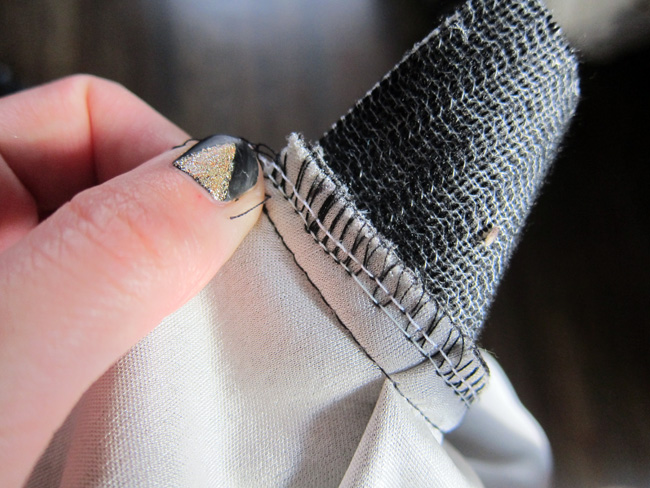
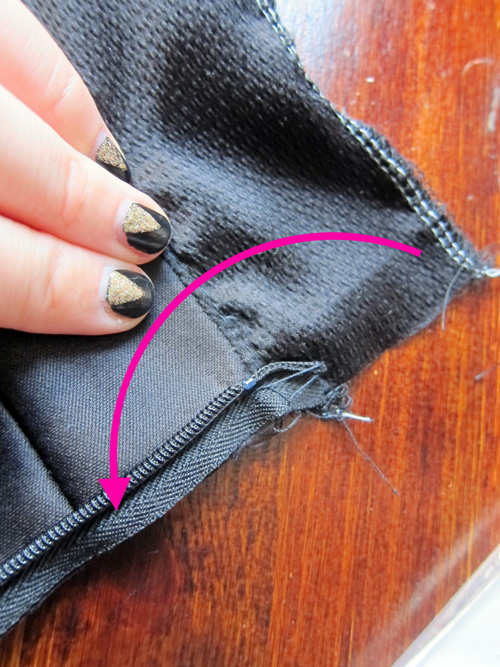
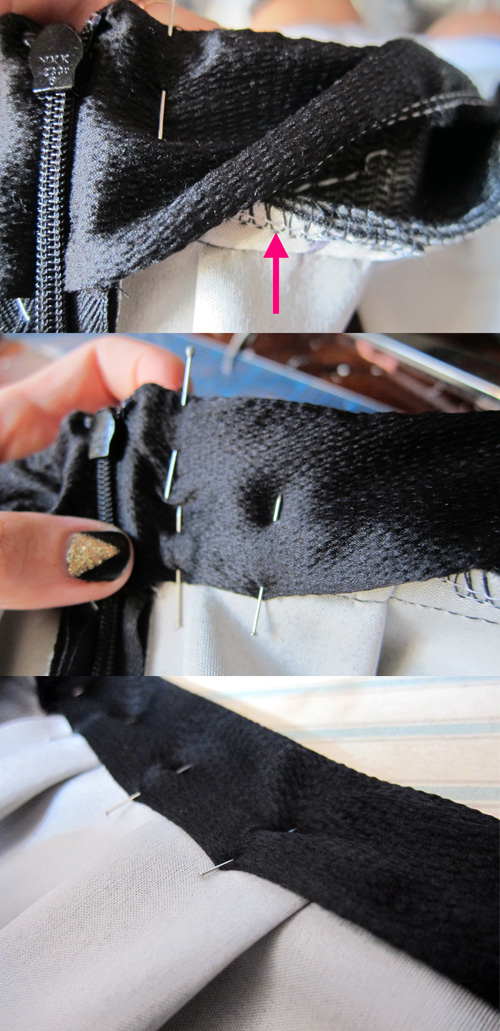
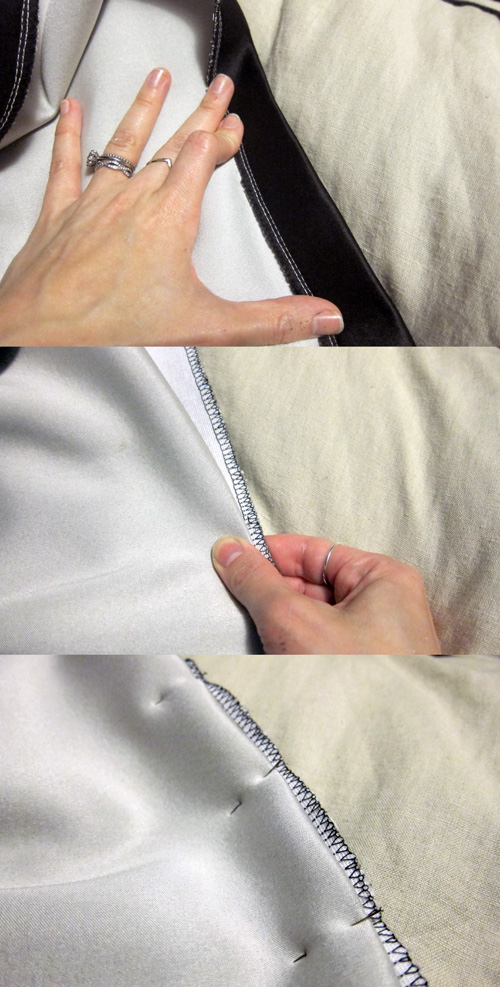
Now, lets return to the waistband. We are going to finish off the top edge of the zipper so that its nice and neat and clean, with no visible loose ends from the outside. First, flip the lining inside out, so that it is covering the zipper, as pictured below. And then pin into place.
Then with the bottom 3/8 inch of the bottom edge, fold and flip it upwards. Pin this into place also.
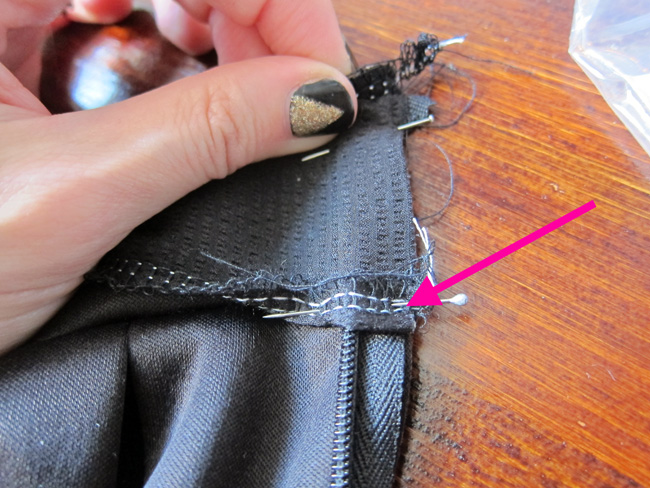
Stitch this together with a straight stitch like so.
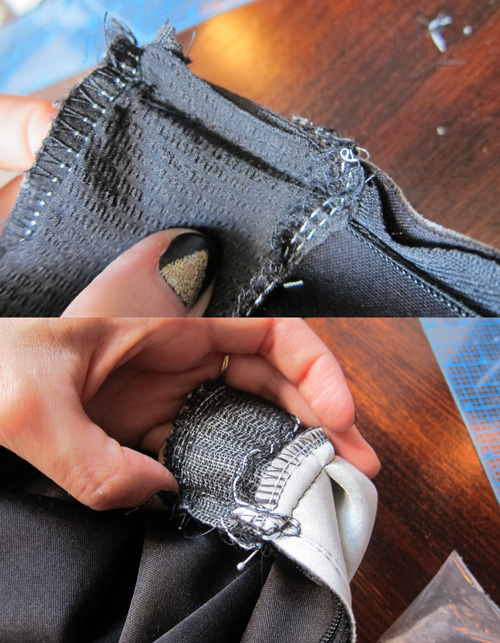
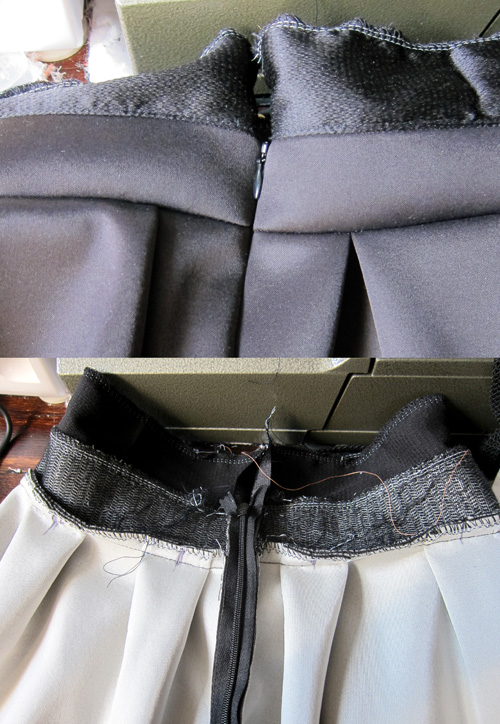
Then flip the whole thing inside out. See? All ugly loose ends are tucked neatly inside. Also, see how flipping that bottom edge upwards allows it to be tucked neatly inward?
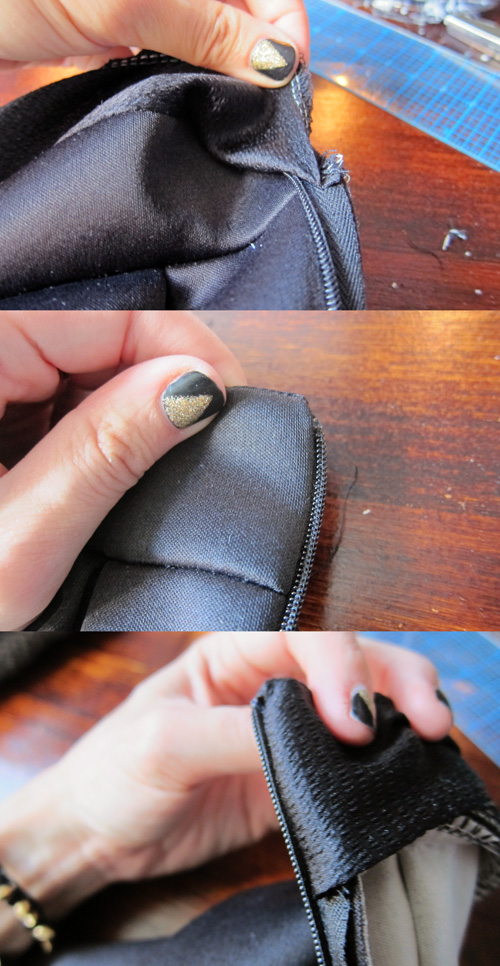
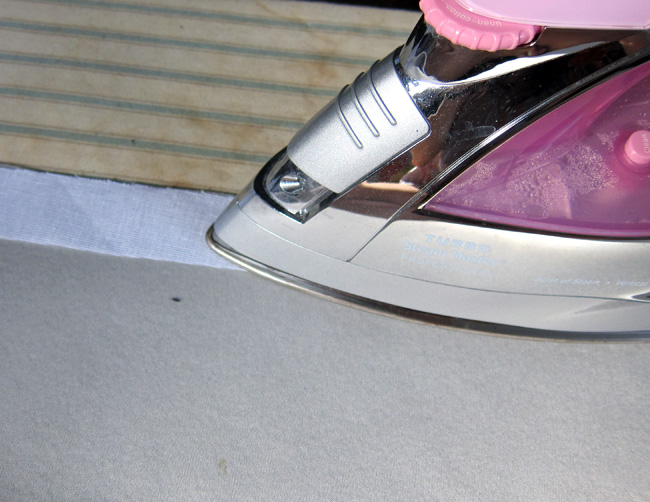
now we want to finish off the rest of that tucked in 3/8 inch edge. Its easiest if you press the edge for the rest of the waistband lining. Again, we’ll be keeping it about 3/8 inch. You can also press the rest of the waistband flat. It just helps keep everything in place when you are sewing it.
Next, pin the folded side of the lining right below the inside of seam where the skirt meets the waistband. Make sure the seam allowance folds upward into the lining as pictured below.
Now straight stitch the neoprene to the lining. Again, I did not want any top stitching to be visible from the outside of the skirt, so I sewed as close as I could to the crevice of the seam to hide my stitches.
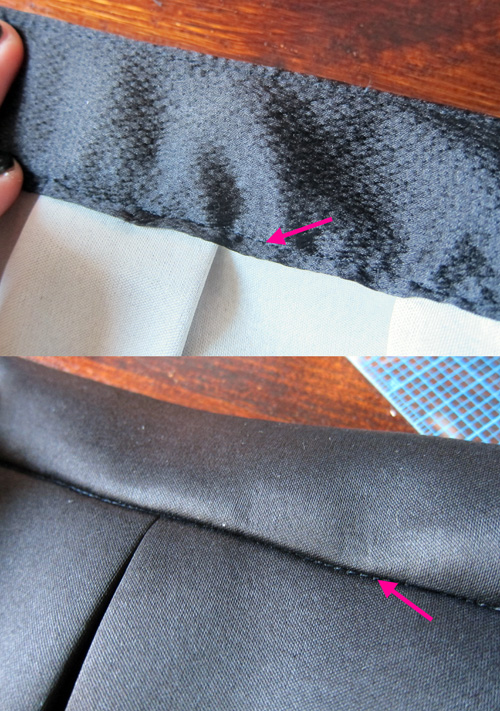
You can see the stitches if you look closely, but from a normal distance, you don’t notice them at all. You can go ahead and press this flat again.
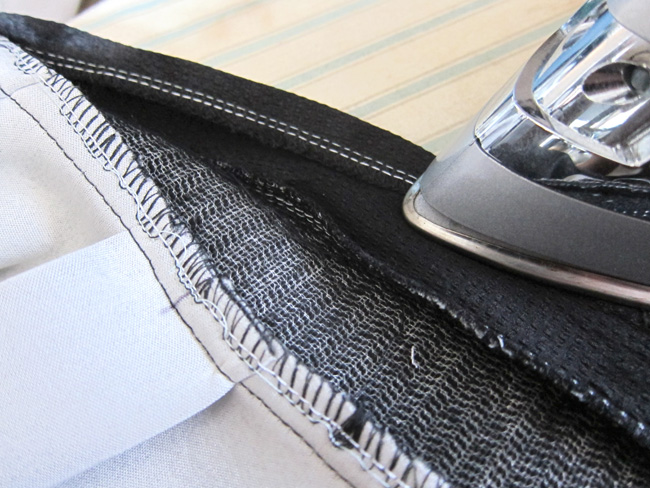
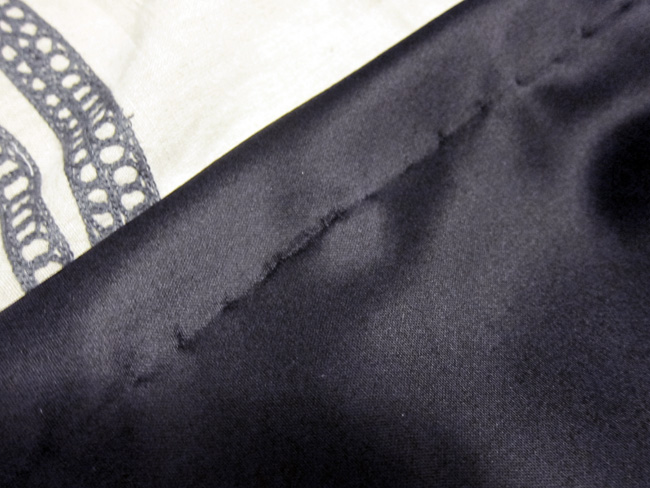
And finally, the last bit of sewing! The last step is sewing the hem. In order not to show any top stitching, I decided to go with a blind stitch.

Start off by pinning the bottom edge of the skirt. This was easy for me because my stiff, pre-measured interfacing allowed me to fold the fabric with no measuring or anything. But if you did not use the interfacing, it might be a good idea to measure and press it flat. Setting up the hem for blind stitching goes like this: Fold (and press) the edge the way you want it to look in the end (mine was 1.5 inches). Then fold it backwards again, so that your cut edge is sticking out just farther than your second fold (about 1/4 – 3/8 inch). Pin into place!
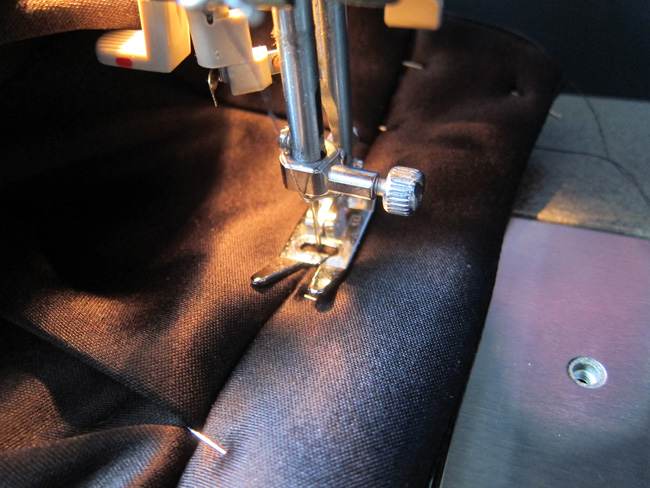
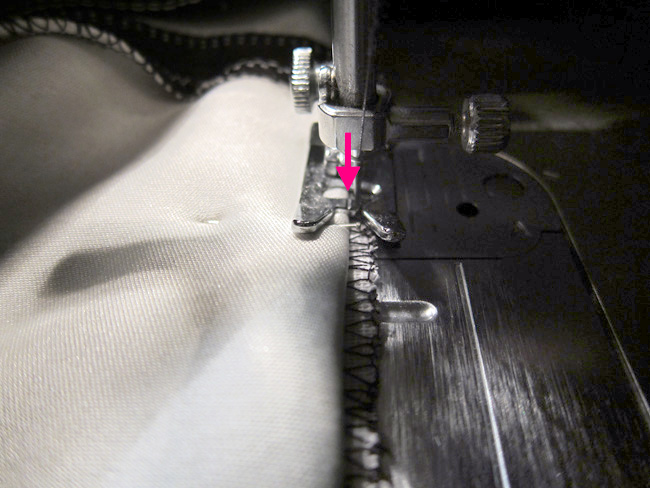
When you set up the blind stitch on your machine settings, you’ll notice the needle shift to the right slightly. This is important and you’ll want to line up the fabric appropriately. Keep your eye on the center guide of the machine foot. That should always line up with that second fold you made, and most of the stitches will take place very close to the cut edge. Every 3 stitches, the needle with jump to the left and catch your folded edge.
This is how it will look in the end:
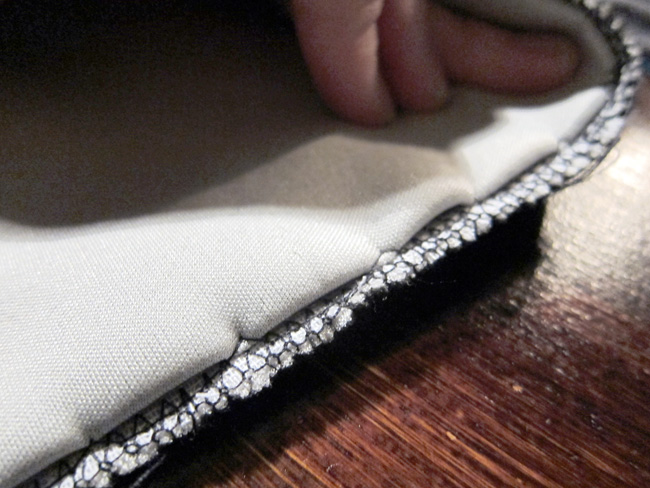
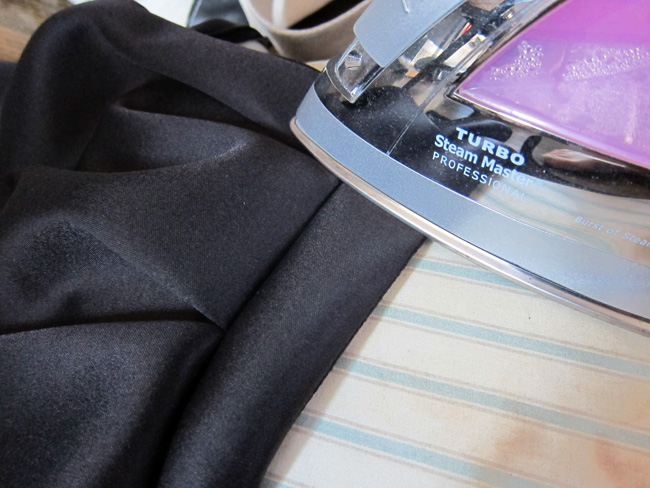
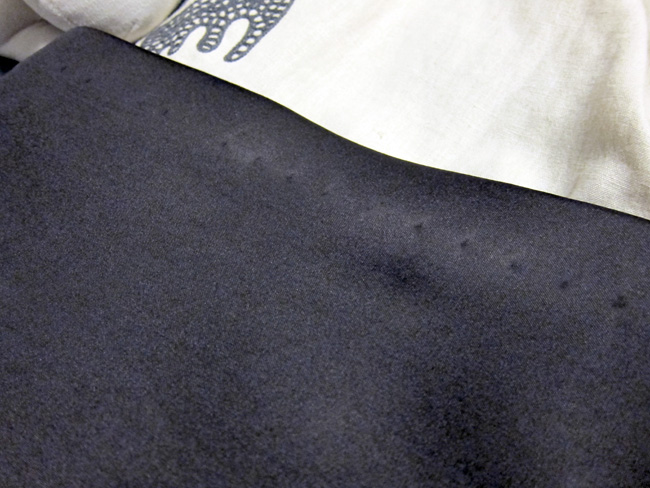
Now you can unfold the whole thing after removing the pins.
At first it might appear a little wonky and puckered in places. Fear not! Ironing will fix all of this and you’ll end up with a nice clean crisp edge. You do see the little dimples from the stitch because of the squishy nature of neoprene, but you notice this much less with other woven fabrics.
And that’s it! You are all done!! There are SO many variations to this very basic skirt and I use it ALL the time for my sewing projects. You can attach it to a bodice to make a dress. You can add side seams so that you can create pockets. You can use shirring instead of pleating or add more pleats! You can make your original pattern piece longer for more fullness. The skirt can be long or short. There are so many possibilities!


Amazing. Great job!!
Awesome job ! I get more and more impressed at what you can do. Next on the list is an outfit for your husband…. or a robot !
Ditto what Joe said! Minus the outfit. But okay with the robot <3
Joe, you are very good at verbally affirming your wife via blog comments.
he’s my number one fan =)
wow, lots of steps! but.. like I said, I will test out your tutorial and will report back!
Wow, I finally understand how to do a blind stitch. & I really like all of your graphics. They are so helpful with understanding the math& logistics of creating your own pattern.
Mae
Very cool…I can’t pretend that I followed the tutorial, but I love the pleated design, and the neoprene looks good on you! Very cool how you make actual clothes for yourself.
Random asides: I also like wherever you were when taking the modeling photos. I wish I could sew. And that I had a sewing machine. Alas.
Where did you purchase your neoprene fabric from?
hi, what kind of fabric do you use? and what is lining fabric? thank you
Hi there,
Out of curiosity, how much did this project cost?
awesome job – in construction and tutorial! Thanks very much!! I am especially appreciative of your thoughtfulness in wanting any size to be able to make this. I just subscribed to your blog. Thanks again!
[…] is a lot easier than, say, the “perfect” pair of pants. This DIY pleated flare skirt by Joe & Cheryl is high on style, easy to sew and quick to […]
Thanks a lot! Now I have a new skirt 🙂
This is a great tutorial, it was very easy to follow. I’m a teen and I made myself a beautiful skirt without an adults help using this. Thanks so much!
I’m new to sewing and trying desperately to follow your formulas because my pleats come out terrible. But what does TW mean
TW = Total Waist, the same measurement as your waist band pattern piece. Its your waist measurement plus the ease. your waist band can not be equal to your actual waste measurement because it will fit too tightly. you have to add extra inch or so (called “ease”) to the measurement. you must divide the total sweep into the pleats so that it equals the same measurement as the waist band, which is your waist measurement plus ease.
[…] Find the Pleated flare skirt pattern here. […]
Wooh..!! So damn Awsome.
If I want more pleats, can I use the number 10 or 11 instead of 8 in the measurements? Will the length of my fabric still only need to be the sweep and extra?
[…] and spacing of pleats for your waist and length of fabric, I highly recommend a tutorial from Joe and Cheryl. They have beautiful diagrams and easy formulas. Everything starts from your waist line […]
Many thanks for the easy to understand summary on the measurements. I found the key of making skirts:-
Top edge length = waistband length.
Thanks again! xx
[…] and spacing of pleats for your waist and length of fabric, I highly recommend a tutorial from Joe and Cheryl. They have beautiful diagrams and easy formulas. Everything starts from your waistline […]