
Quilted Pet Bed Tutorial
This tutorial is a guest post by Megan of Cartella Studio. Megan is a talented designer and quilter, and when she talked about turning my Crystalline pattern into a dog bed I was so excited! Read on to learn exactly how she did it.
INTRO

I’m so excited to be sharing with you my pet bed tutorial! Back in March I tested the Crystalline Quilt, and I knew this would be the perfect quilt top to be made into a bed for my black Labrador, Midnight. Before we start, let’s go over some details. This tutorial is somewhat high-level, with the expectation that the reader is already familiar with the processes of quilting (piecing, sandwiching, binding). If you’re comfortable with these processes, this tutorial will be a breeze! The bed is made of three primary pieces: a pieced and quilted top, a quilted gusset, and a quilted bottom. I won’t be providing fabric requirements as this will depend on the size of your pet. However, I will provide instructions on how to accurately dimension each piece. Lastly, if you want to get super fancy, you can install a zipper on one side of your bed on the gusset piece so that you can remove the filling and wash the bed periodically rather than simply spot treating it. I don’t give instructions for that here, but a quick search of the web can provide further instructions. Let’s get started!
MATERIALS
The following items will be needed to make this bed (shown below):
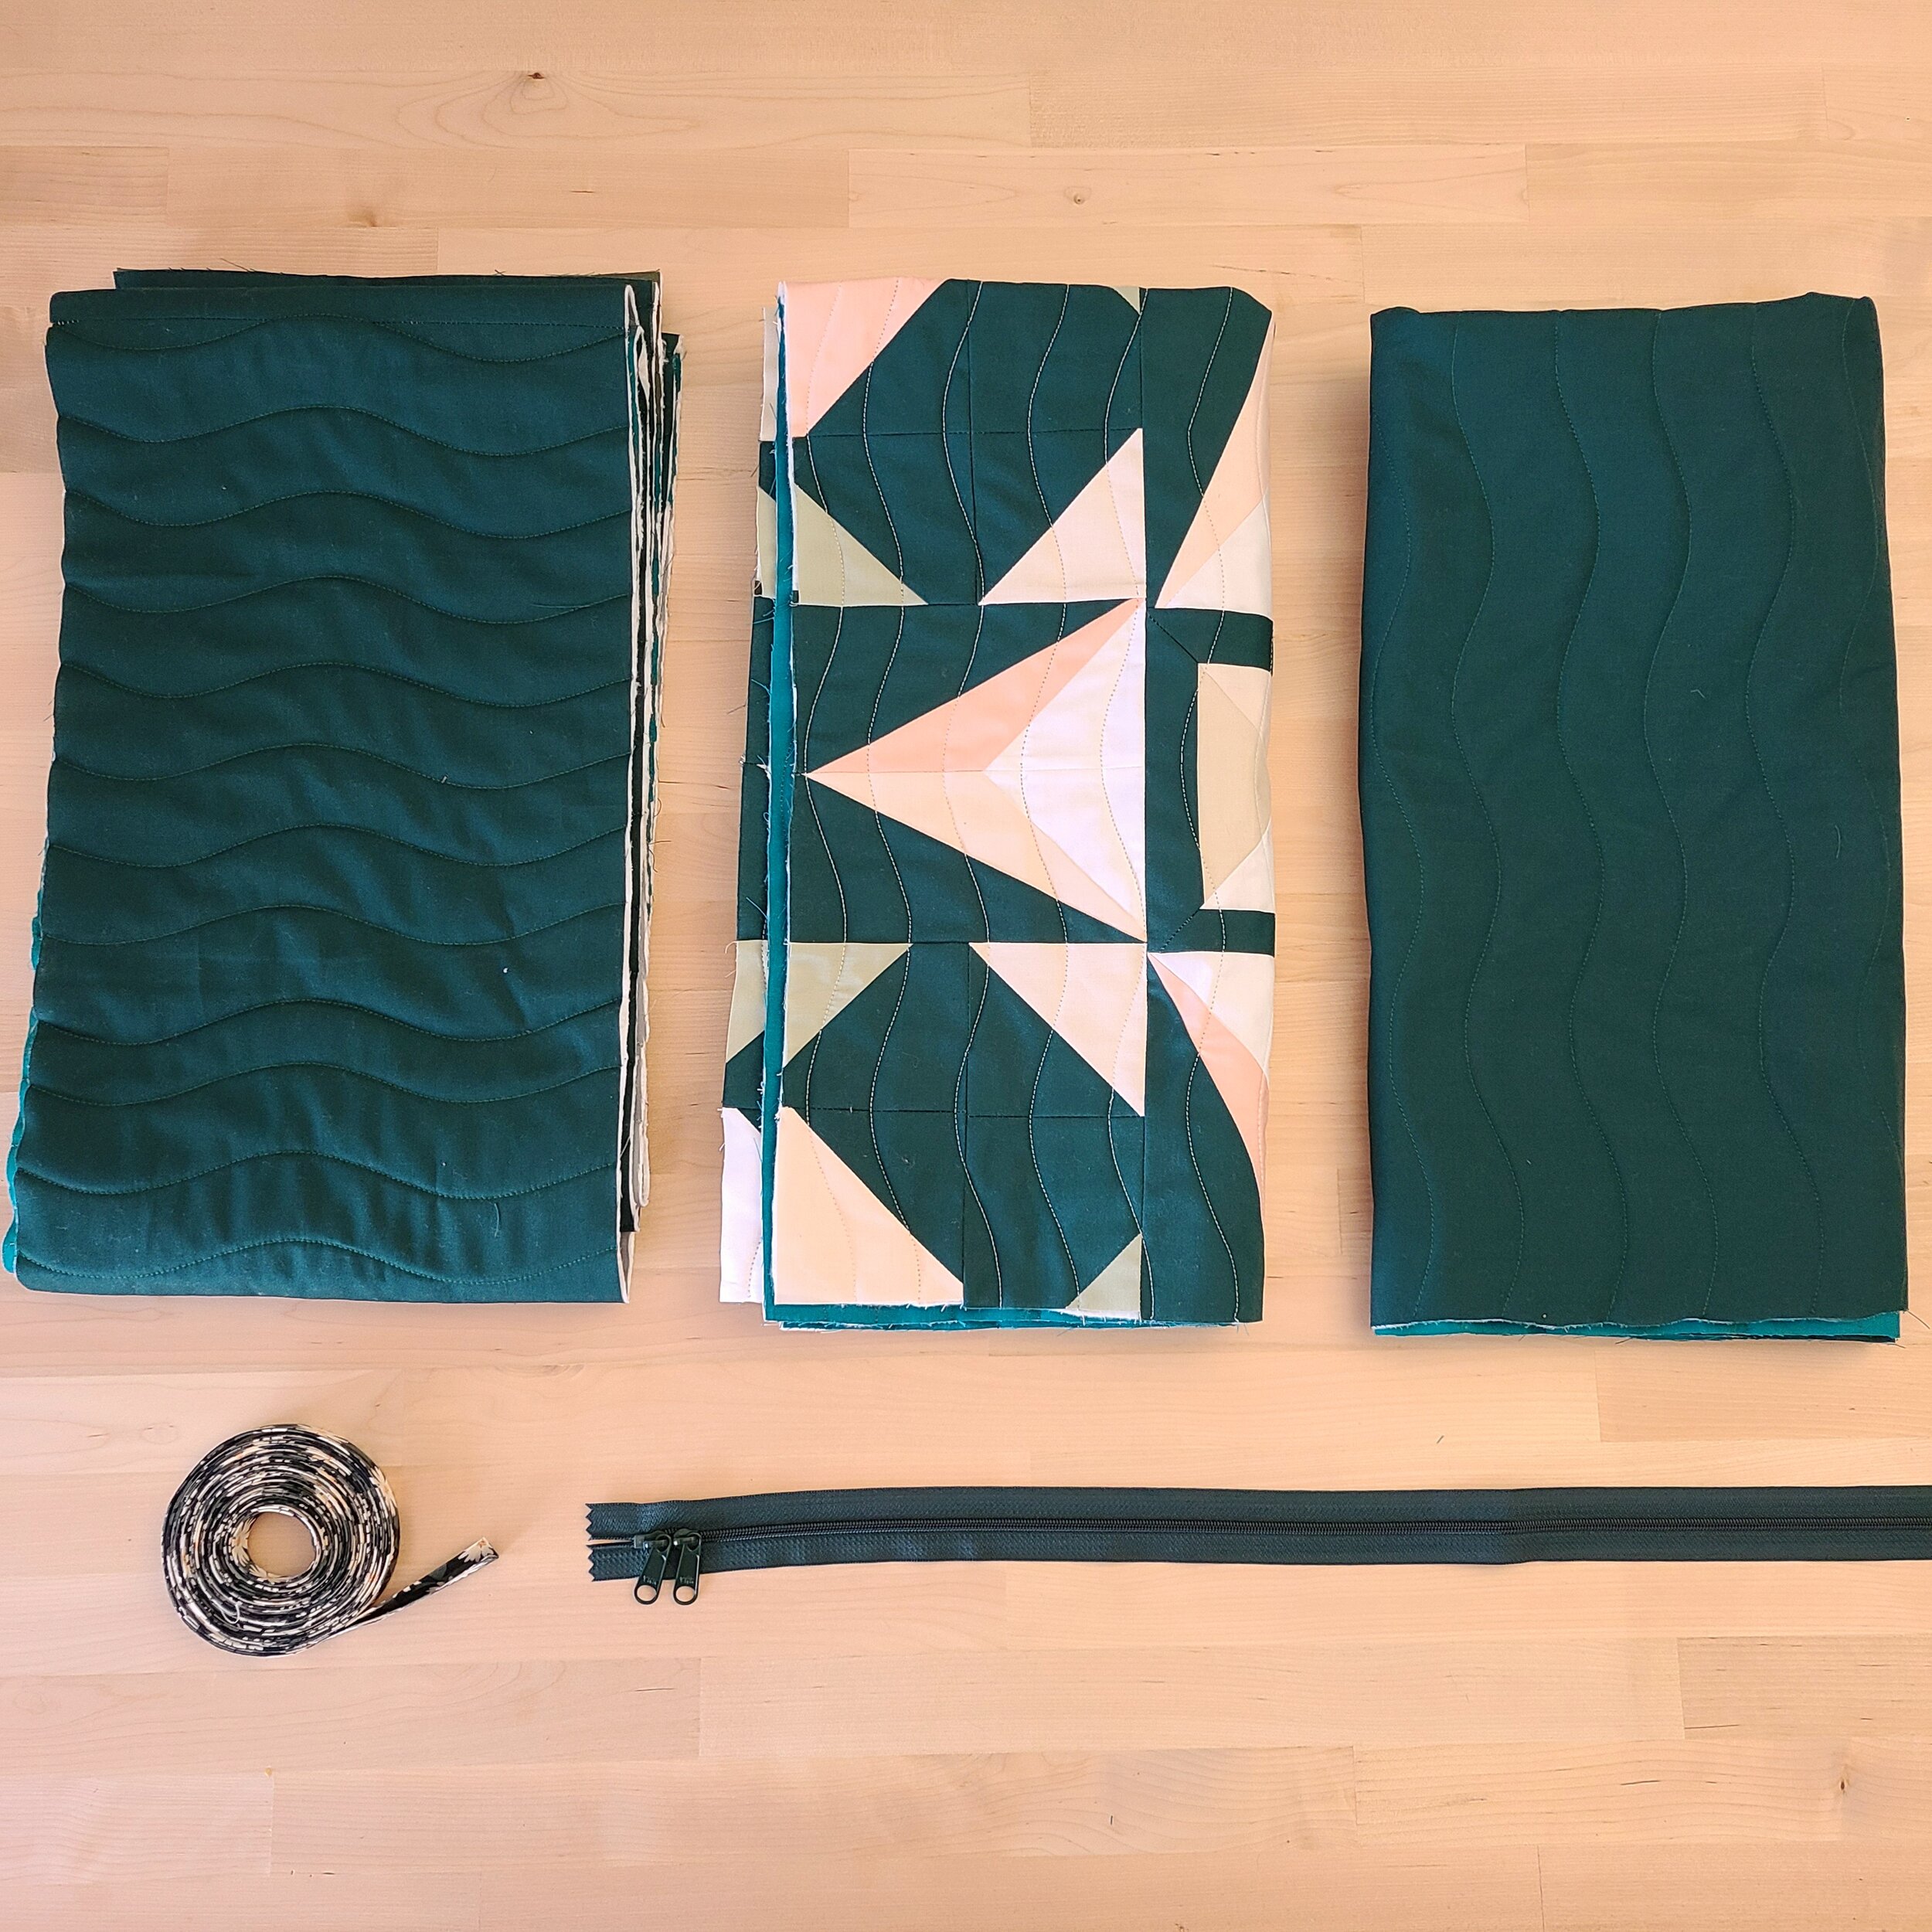
· Bed Top Piece (pieced and quilted per instructions in pattern of choice)
· Bed Bottom Piece (sized and quilted to match Bed Top Piece)
· Gusset (Instructions to Follow)
· Zipper (Optional)
· Binding (twice length called for in pattern of choice)
Now, you’re going to also need something to fill your bed with. One nice surprise about this project is that it’s an excellent way to get rid of some of those otherwise unusable fabric scraps! I’ve been saving tiny scraps for AGES, specifically for the purpose of stuffing this dog bed! I suggest using a mix of Polyfill or foam pieces with fabric. Fabric alone can make the surprisingly heavy!

Lastly, you may also want to consider rounding up the following items to assist you with construction:
· Bowl for Rounded Corners (Optional)
· Mini Wonder Clips
· Washable Marker/Chalk
SIZING THE BED
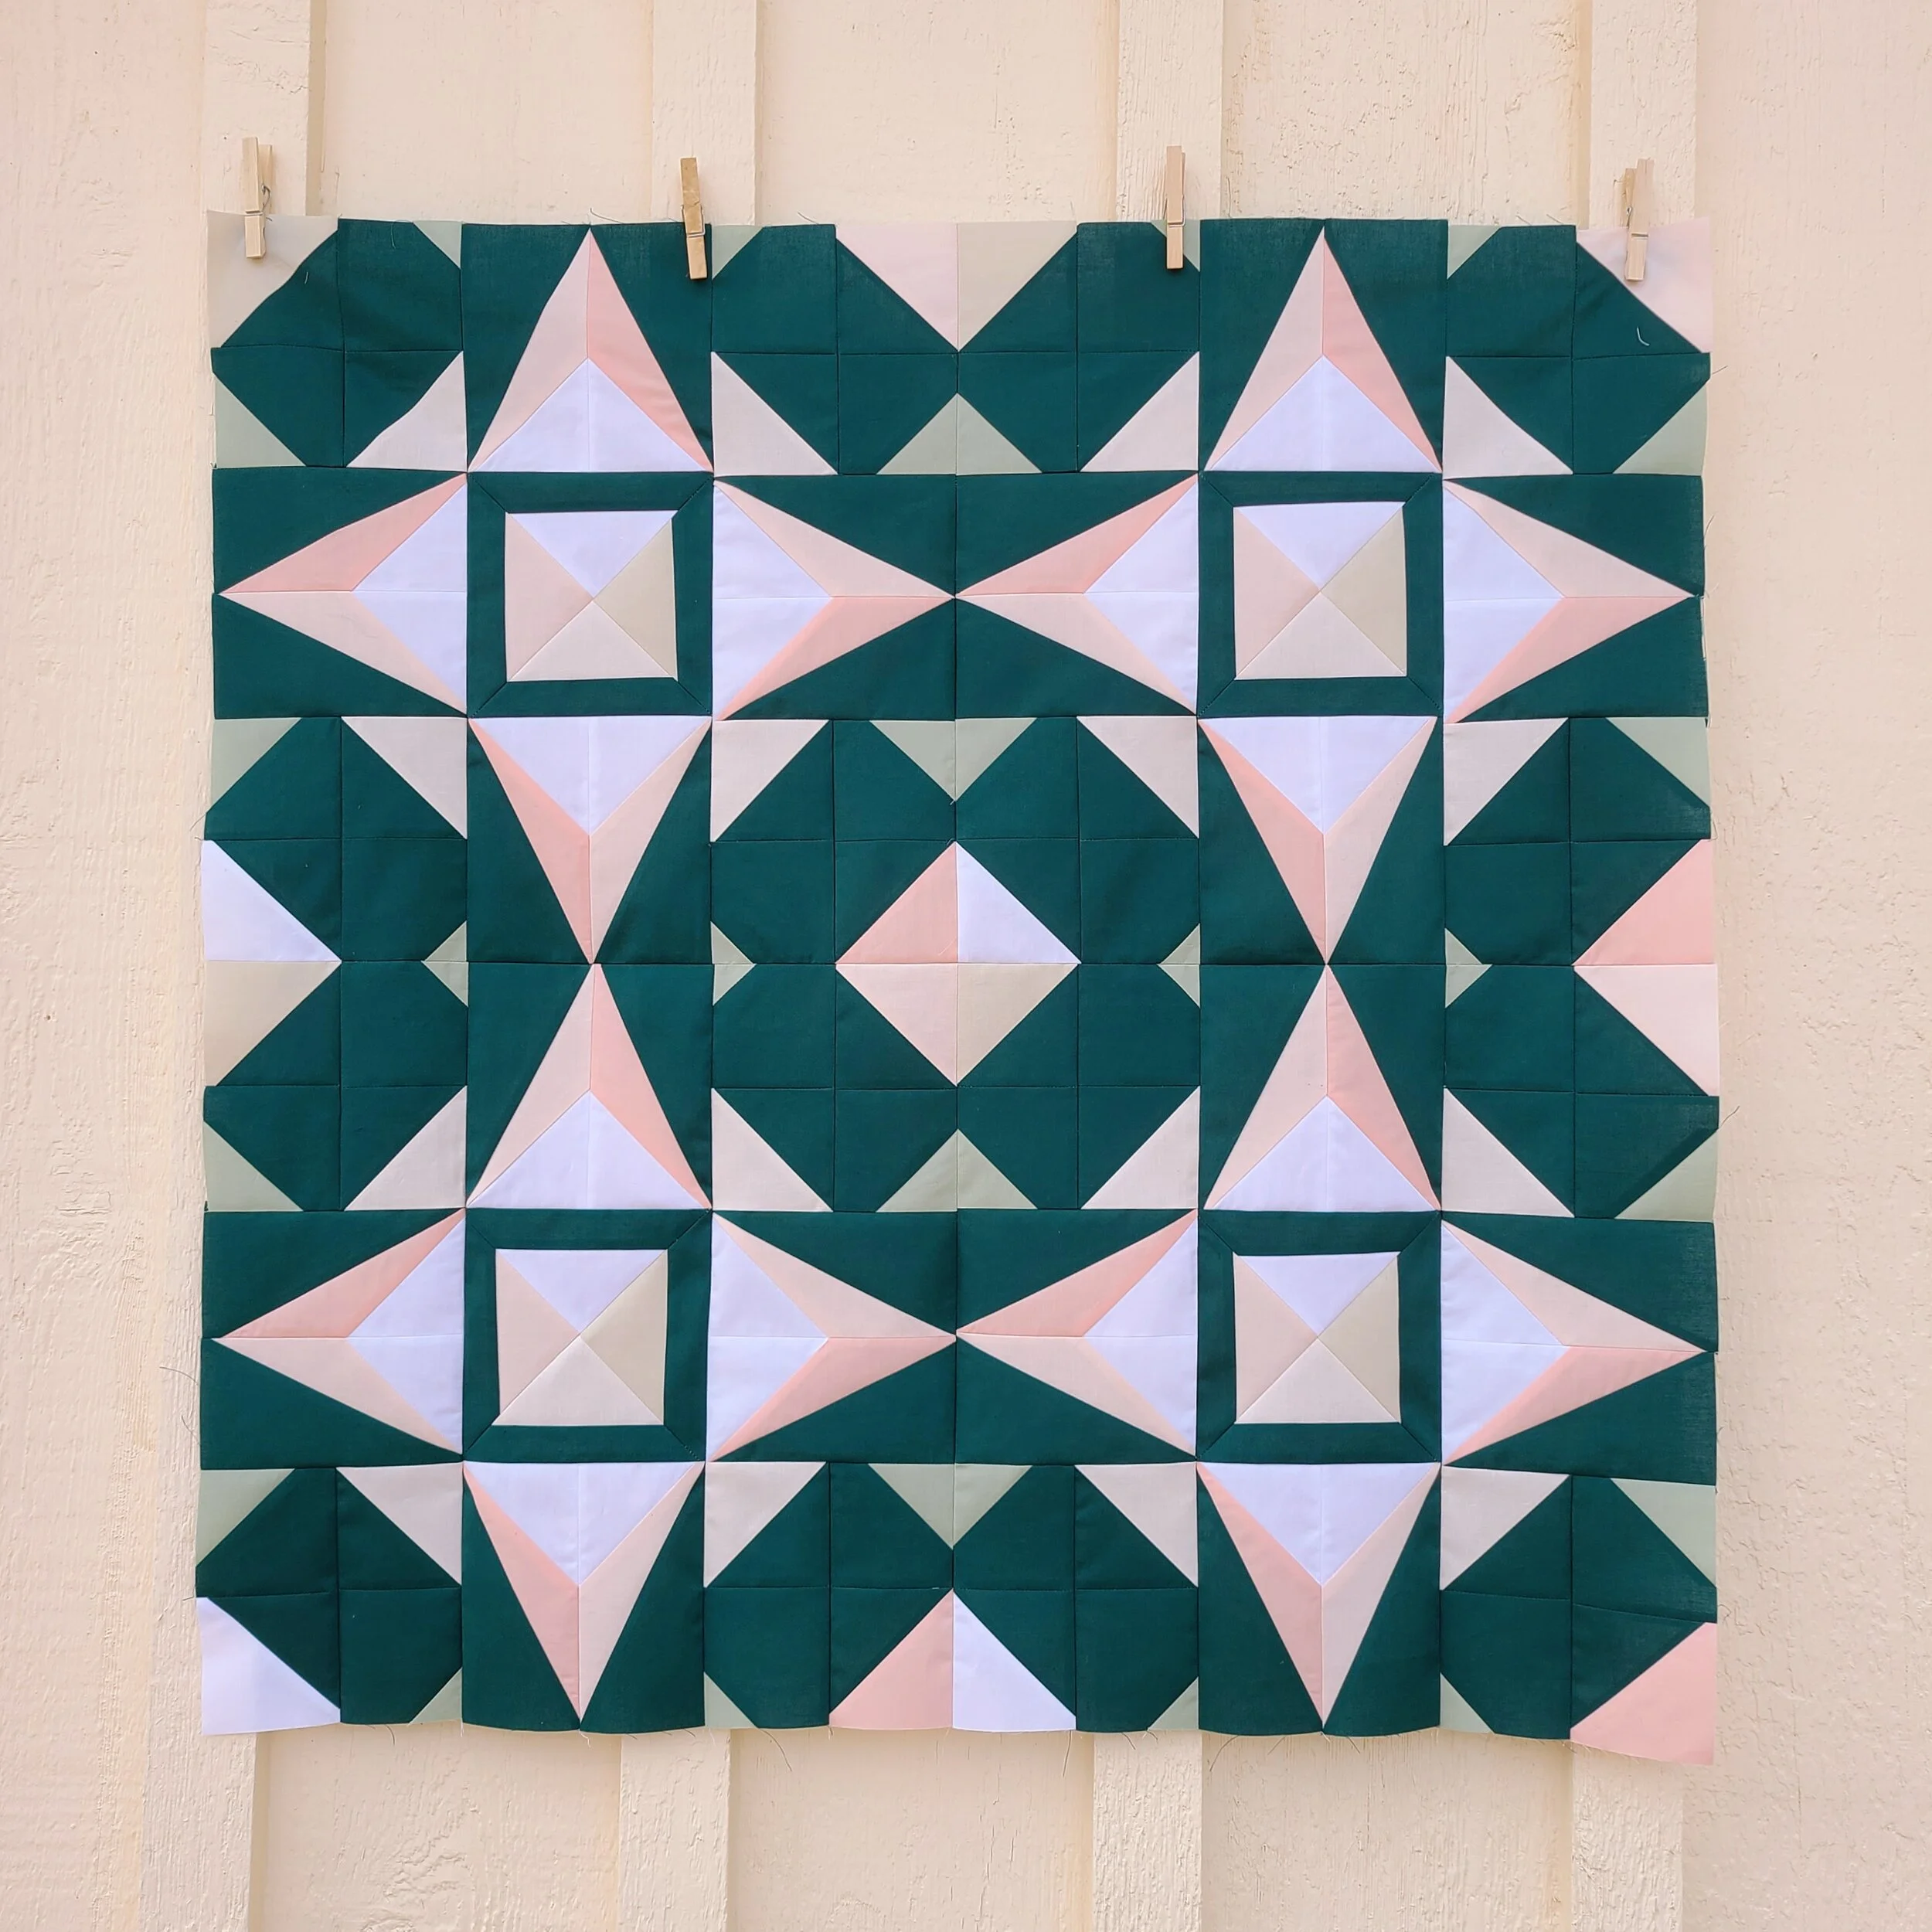
Almost any quilt top pattern can be used for this project, although I do suggest a block-based pattern which can be better scaled to the size of your pet. My black Labrador, Midnight, is about 65 pounds and on the smaller side for a Lab. The 36” x 36” baby-size Crystalline quilt shown below turned out to be just slightly bigger than her regular store-bought beds. Quilt patterns that have a block size of 12”x12” may serve well for cats or smaller, terrier-sized dogs. I suggest measuring your current pet bed to give you an idea of what you’ll need.
MAKING THE BED TOP PIECE
If you’re a quilter or have experience quilting, this part is easy! Follow your pattern instructions to make the quilt top. You’re going to sandwich and quilt the top per the pattern instructions, but don’t bind it. We’ll take care of that in a bit!
MAKING THE BED BOTTOM
Your bed bottom is going to be quilted and sized identical to your bed top. If you want to have a double-sided bed, you could piece your bottom using the same pattern as your top, that way you could flip over the bed depending on what side you want your pet to lay on. I decided to make my bed bottom whole-cloth (one whole piece of fabric without piece-work). I suggest using 2x your pattern backing requirements as an estimate for how much additional yardage you’ll need to for the Bed Bottom Piece if you decide to go the whole-cloth route. Regardless of what you choose, you’ll sandwich and quilt the Bed Bottom Piece in the same manner as the top. Again, don’t bind the bed bottom; leave your edges raw as you did for the top. Your top and bottom should be the same size.
OPTIONAL ROUNDED CORNERS
Personally, I prefer rounded corners on my pet bed. I find the easiest way to do this is to use a bowl to trace the curve. Any size will do, although the larger the bowl, the larger the curve. Start by stacking your top and bottom bed pieces on top of one another, wrong sides together. Then, line the bowl up so the side edge and bottom edge of the Bed Top Piece each touch a point on the bowl (indicated by the red dots in the picture below).

Draw the curve with a washable marker or chalk and cut both pieces at once with scissors or a rotary cutter. Repeat on all four corners.

MAKING THE GUSSET
The gusset joins the Top and Bottom Bed Pieces together and goes around all four sides of the bed. You’ll start by quilting one large strip, then joining it at the ends to make a loop. To begin, first determine the dimensions of your gusset. The width of the gusset will determine the thickness of the bed. I wanted Midnight’s bed to be at least six inches thick once sewn. Therefore, I cut the gusset piece 6 ½” wide. Determining the length of the gusset is done in the same manner as determining how much binding you’ll need for a quilt. My quilt top is 36” square, so I’ll need (36” x 4 sides) = 144 inches plus a ½” for the single seam joining the two ends of the gusset together. For safety, I made my gusset 150” long incase it shrinks a bit when I quilt it. Because I’m going to quilt my gusset, I needed two 7” x 150” pieces (one for the top piece and one for the backing piece). I made these pieces by cutting multiple 7” by width-of-fabric strips and sewing them together until I had the necessary length. Then, I sandwiched and quilted the gusset. Once quilted, I cut the gusset length down to 144 ½”. Finally, I sewed the two short edges of the gusset, right sides together so that the raw edge will be on the inside of the bed. In my picture below, the blue arrow is along the short edges that I sew together (7”). The gusset is folded in half, but it’s too long to fit into the entire frame of the picture. You may notice that the backside of the gusset you’re seeing has multiple fabrics – since it’s going to be on the inside of the bed, I decided to make my backing up of scrap pieces – another scrap buster bonus!

ATTACHING THE GUSSET
Now it’s time to join the top and bottom pieces to the gusset. You’ll want to use some mini clips for this part of the tutorial. We’ll start with the top piece first. Essentially, you’re going to clip one long edge of the gusset around the perimeter of the bed’s top piece. With wrong sides together, start clipping the long edge of the gusset to the edges of the quilt top, working your way around until you end at your starting place. It really doesn’t matter where your gusset seam from the earlier step ends up, but feel free to position it strategically in a corner if you’d like.

Once you have all sides clipped, sew a ¼” seam around all four edges of the top, removing clips as you go. You may find it easiest to do this with the gusset side up. Once you’re done, you should have raw edges showing from the right side of the bed as shown below– that’s okay! We’ll end up binding these.

Next, we’ll attach the Bottom Bed Piece to the gusset. To do this, start by taking your already assembled gusset and top, and fold the top in half (right sides together and gusset out) and mark the folded unsewn long edge of the gusset with a washable marker, as shown below with the red dot.

Then, take your Bottom Bed Piece and fold it in half, marking the fold on the right side of the fabric. The marking point is shown below with the red dot.

Lining up the two marked points wrong sides together, attach the unsewn edge of the gusset to the Bottom Bed Piece with clips.

Sew the Gusset and Bottom Bed Piece in the same manner as you did the top, BUT! Don’t sew all the way around the perimeter this time. You’ll need to leave a hole to add the stuffing. Leave a gap of 8-12 inches to stuff the bed, which we’ll do shortly! (Note: If you choose to install a zipper, you won’t need to worry about leaving a hole because you can use the zipper to add the stuffing).

ATTACH BINDING TO TOP OF BED
You’ll notice that your bed is right-side-out, but you can see the raw edges still. Well, we’re about to fix that - Binding to the rescue! Start by binding your Top Bed Piece in the same manner as you would a regular quilt or as your pattern instructs. Start by lining up the raw edge of the binding with the raw edge of your bed with your Top Bed Piece facing up, as shown below. Sew around the entire perimeter and join the two binding ends (remember, the Top Bed Piece is not the side with the hole left to add stuffing, so the whole perimeter should be sewn on this piece).

Next, turn over your folded edge of binding onto the Gusset side of the bed and either hand or machine sew to finish attaching the binding.
ATTACH BINDING TO BOTTOM OF BED
Sew the binding onto the bottom side of the bed in the same manner as you did the top side of the bed. Start at one side of the hole left for stuffing and end at the other side. Do not join the pieces just yet, however, I do suggest folding over the binding onto the Gusset side and finishing the binding attachment (hand stitch or machine stitch) on all sides except for where the hole is. You should be left with two ends of binding not joined and the hole still open. If this sounds confusing, you can always add the binding after you’ve stuffed and closed the hole in the bed, but it may be more difficult to maneuver the bed on your machine when it’s fully stuffed.
STUFF THE BED
This part is easy! Fill your bed with Polyfill, foam, and/or scraps! Reach in and move the stuffing around to the corners of the bed as needed.
CLOSE THE HOLE AND FINISH BINDING
Now that the bed has been stuffed, sew the hole shut and finish joining and attaching the binding.
Ta-da! Your pet bed is complete. Stand back and admire your work!
