


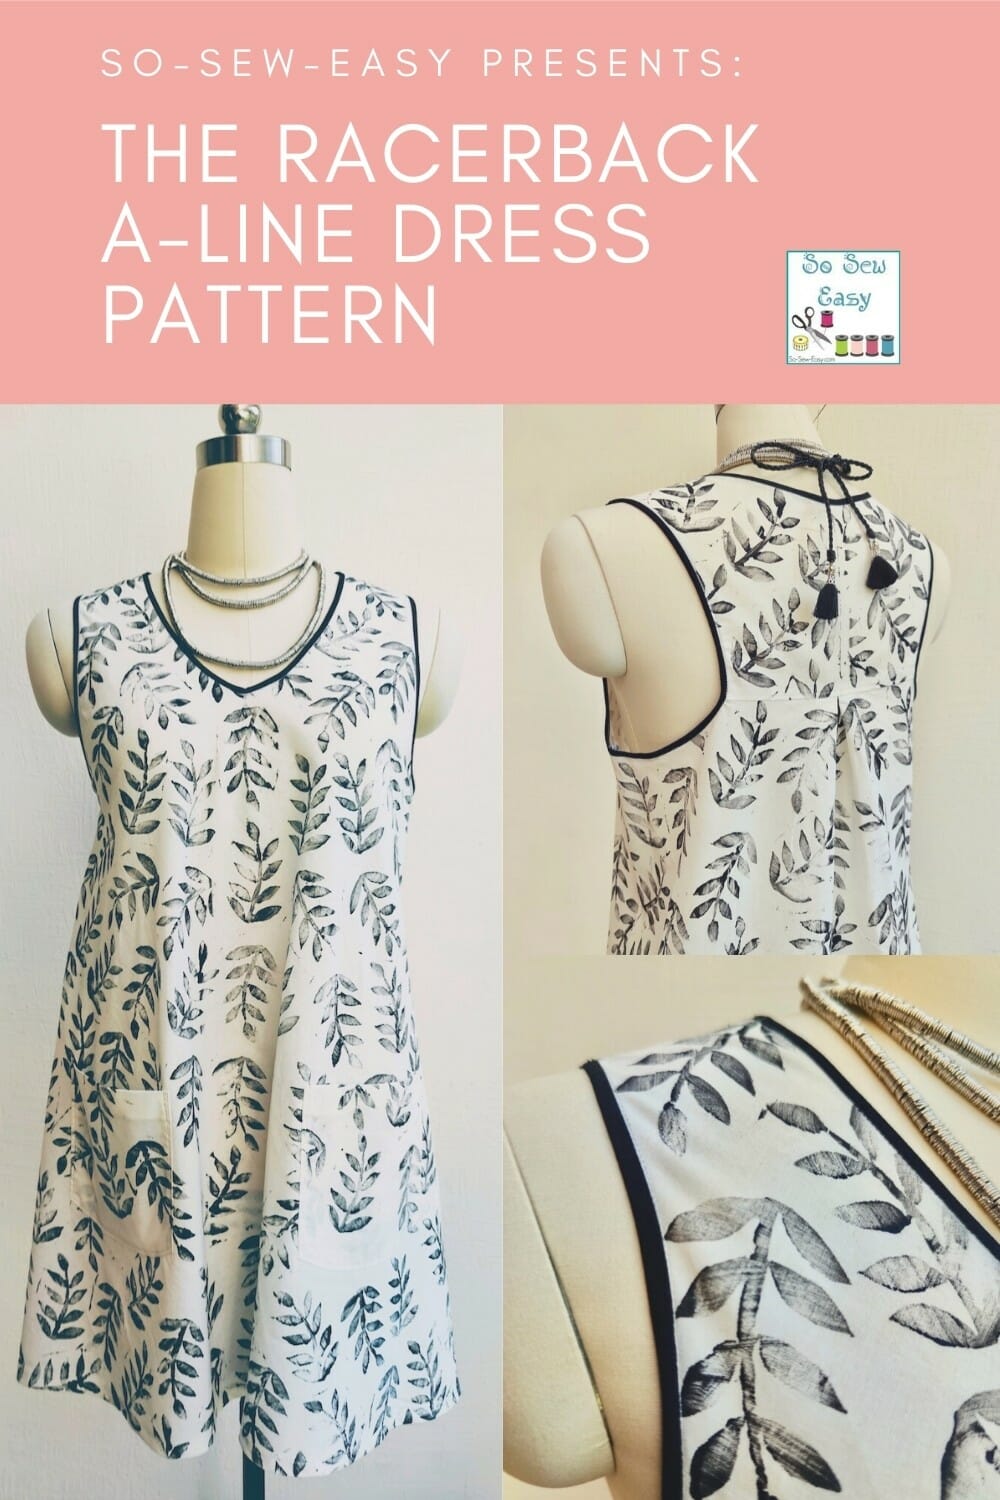
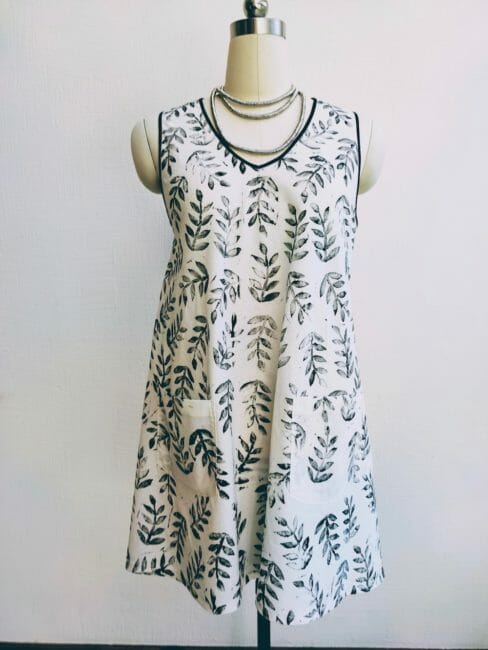
 This racerback A-line dress is called NINA and is the second project in a small line that I'm sharing with you. My goal is to show you how to make beautiful garments with simple material all the way from the print to the finished product.
Why is it called NINA? This is a curious name, but in fact, you can find someone named NINA in more than 122 countries across the world. The same goes for the shape of this dress. A racerback A-line dress can be found in just about every designer's portfolio.
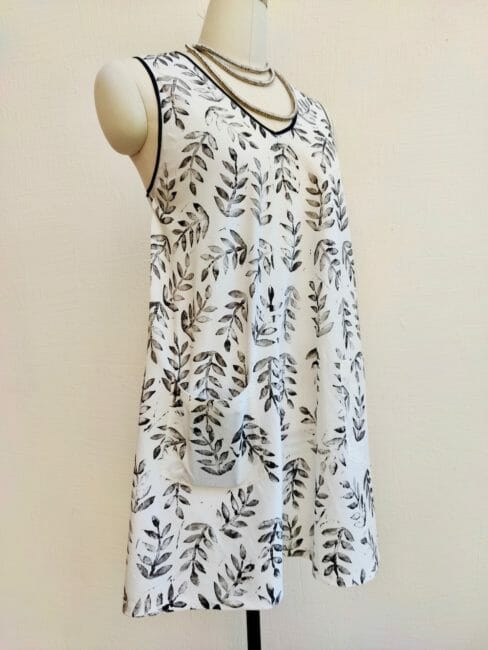
Why is that? Made with bias tape, it is perfect for woven fabrics (like the very lightweight linen that I chose). Cut on a straight grain-line it can be sewn on a knit fabric. Cut on a jacquard knit it will make a perfect dress for midseason wear in the spring or autumn. And, made on heavy jacquard knit or wool, it will make an excellent dress for the wintertime.
This dress has two pockets in the front to carry your phone. A soft V-neck to elongated your neckline. An A-line shape to give you freedom of movement. It ends above the knee so it's suitable for a pair of boots, sneakers, or sandals. Additionally, you can choose to make it slightly shorter in the front than the back so you can use it as a top with your favorite pair of leggings.
Material
- 2 1/2 yards of lightweight linen or silk
- 2 1/2 yards of bias tape 3/8″ wide
- Thread to match
Tools
- Sewing Machine
- Serger
- Stitch in the ditch presser foot. I am using Foot #5 on my Bernina 350
Sewing Level: Advanced Beginner
Technically speaking anyone could make this pattern, however, you need to know how to cut fabric on a bias and sew bias tape around a neckline. You must know how to fold a box pleat. I will add the tutorial in the video but I am not adding it here simply because I forgot to take a picture when I did it. Uppsss…
I suggest you read the following articles before you decided to purchase fabric for this project. Read all the instructions and if you do not understand them do not try this project alone. To help you further your knowledge read the following articles:
Five mistakes to avoid when cutting fabric.
Sewing a bias tape around a neckline.
Fabric Suggestions From Fabric.com
How To Download Your PDF Pattern
We're going to continue to use the new PayHip Webstore to distribute our patterns. As most readers know, Craftsy (Bluprint now) is closing and they have stopped designers like us from publishing new patterns on their site, so we've had to move to another service.
Our patterns are still free, but now you now have the option of making a small contribution if you like our work! We'd really appreciate it and it will help is keep going with new and fun designs like this. Even a dollar or two really goes a long way. Maybe you don't know it takes an average of 26 hours of work to make a post and that does not include a video.
Thanks so much in advance for helping us out. You can use any credit card and you don't need to have a PayPal account, although you can certainly use one if you have one.
The instructions are free on this site and will be for as long as we can remain online. So I thank you for your support over on KoFi, your kind donations mean the world to me.
Pattern Download
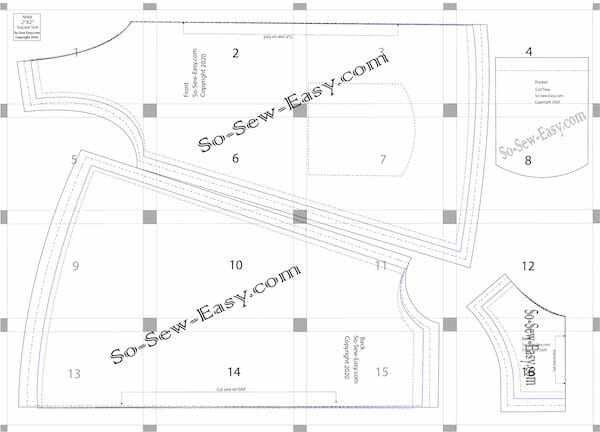
How To Print Your Racerback A-line Dress
Use Adobe Reader to download and print the pattern. Print on Landscape and use the Actual Size setting. Do not scale at all.
Pattern Layout
Body Measurements
| Bust | Waist | Hips | |
| S | 33-35″ | 27-29″ | 33-36″ |
| M | 35-37″ | 29-31″ | 36-38″ |
| L | 37-39″ | 31-33″ | 38-41″ |
| XL | 39-41″ | 33-35″ | 41-43″ |
| 2XL | 41-42″ | 35-37″ | 43-45″ |
The most important measurement on this dress is the bust measurement.
How To Sew Your Racerback A-line Dress
You need to add a 3/8″ seam allowance to the pattern. Use a 5/8″ if you do not have a serger and want to use a french seam. Add 1/2″ for the hem.
How to sew a French Seam, the best seam for delicate fabrics
If you are beginner sew the bias tape to the collar and armhole separately. If you are an advanced seamstress or want to improve your sewing skills, sew the pockets first then sew the dress at the shoulders then add the bias tape.
Sew the sides then add the bias tape. Finally, hem the dress.
Below are the easiest instructions for a beginner.
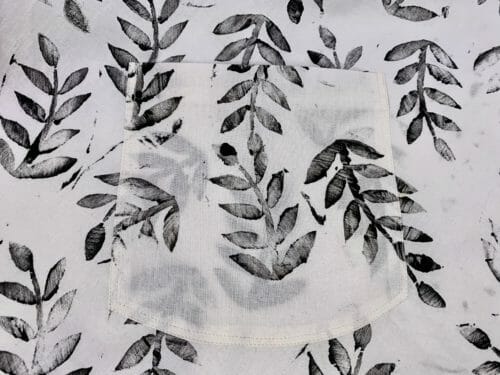
Step One: Sew The Pockets
These are unlined patch pockets. The easiest way to sew them is to follow the tutorial I have already made.
Unlined patch pocket tutorial – how to make the perfect pocket
I did double stitching around the pocket mainly because I like the looks of it and it is a very strong way to sew a pocket down. It is also the perfect seam for a very casual dress which is what I'm intending racerback A-line dress to be.
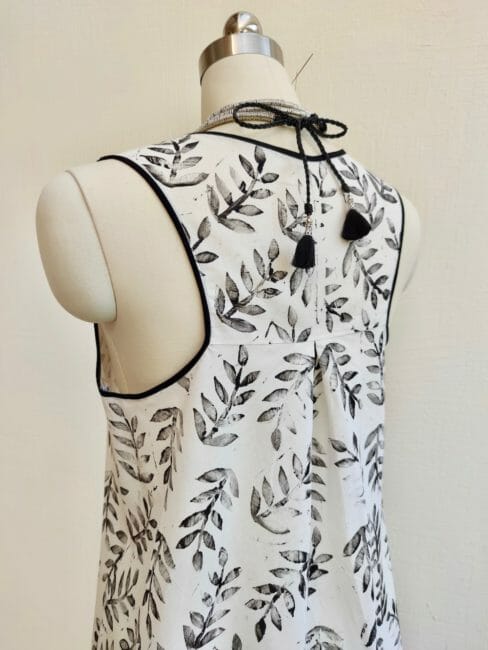
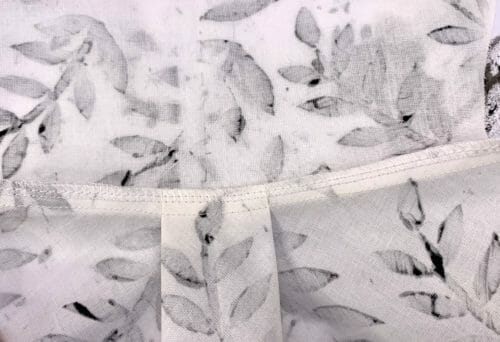
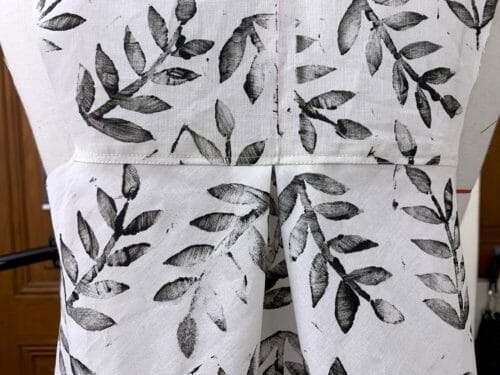
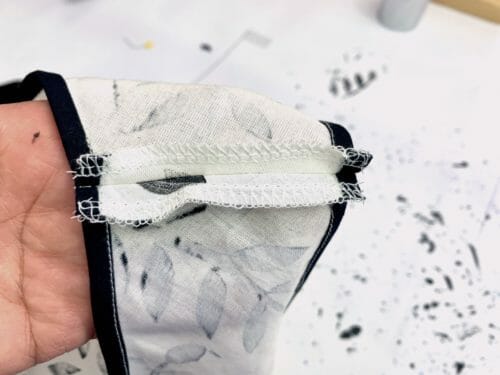
Step Two: Sewing The Back Together
Join the top part of the back with bottom, right sides together sew at your chosen seam allowance and serge.
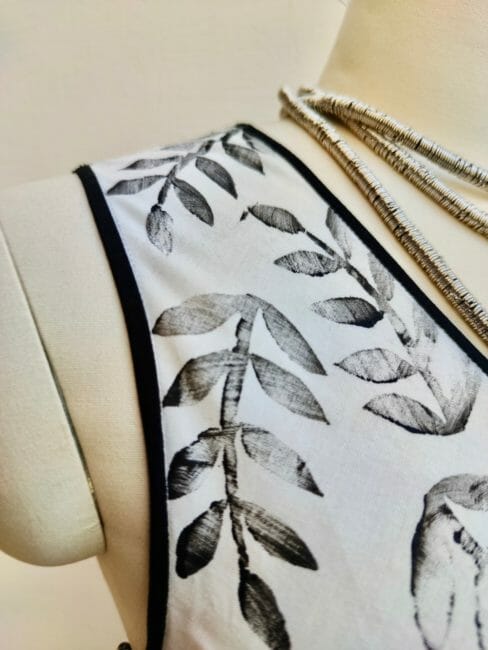
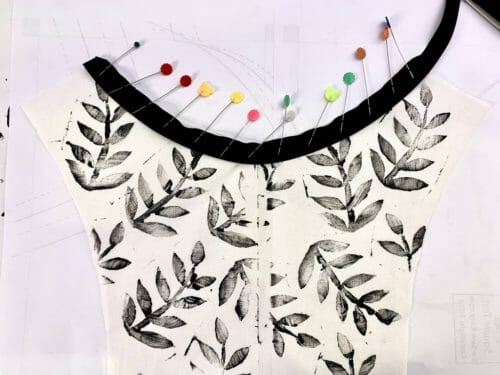
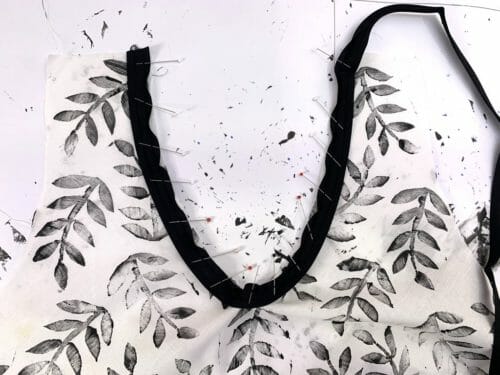
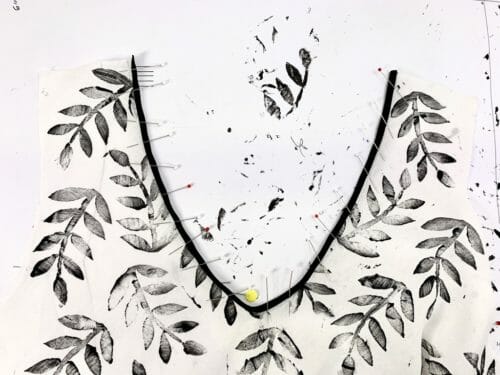
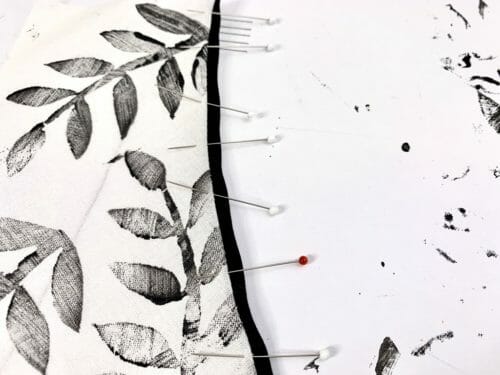
Step Three: Add The Bias Tape
Add the bias tape sewing the smaller side of the tape to the right side of the fabric.
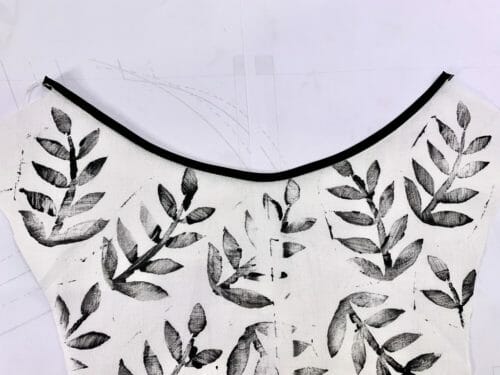
Turn the tape and sew the tape down using either the stitch in the ditch technique or sew very closed to the edge with a matching thread.


Step Three: Sew The Shoulders
Rights sides together sew the shoulders.
Step Four: Sew The Sides
Step Five: Sew The Hem
Serge the hem and turn the hem 1/2″.
I hope you have enjoyed the second project on our series from print to finished product. Join me next week and I will be sharing a top with the same print but we will be mixing it with embroidery. I'm sure you'll love it.
See you next week and happy sewing! In case you missed the first project here is below.
As always, please feel free to leave your questions, comments, and suggestions in the comment section below.


This site is very beautiful to me! Thank you https://so-sew-easy.com/
My pleasure!
just finished my dress with matching mask and purse! Went by bust measurement and the chest and armpits VERY tight. looks cute but next time will go with large and make the armholes significantly bigger. added 10 inches to the length. looks very cute 🙂 thanks!
My pleasure Julie! if you have an Instagram account use #soseweasyoffical so I can see your dress and follow your account.
I’m so excited to make this dress, but I’m having trouble getting the pattern to line up. I measured my square before printing and it measured 2”x2” can’t figure out what I did wrong
HI Ginger, did you use adobe reader and Landscape mode on Actual Size? Do let me know, please. Kind Regards,
I just reprinted the pattern using the adobe reader and landscape mode
but still can’t seem to get the pattern to line up. I’ve made about three attempts
You have to trim or overlap the horizontal rows, remember this pattern is for A4 and US letter so there is no way to make them both fit without either trim some on the page or overlapping. The squares measure 1″ X 1″. The distance between thin lines between pages also measure 1 X 1 “. Hope that helps. Do let me know ig you manage to put the dress together. Kind Regards,
When I have this trouble it’s because I didn’t download it to my computer and then print from there.
I like it, thanks
My pleasure Carmen. Love the name.
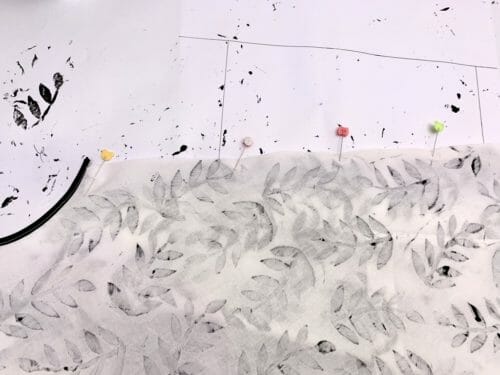
Hi Mayra. There appears to be a definite pleat on the back where you stitch the top to the bottom. I do not see any indication on the pattern where and how large to make this pleat. What should the finished length be? Should I lengthen it for someone 5’8″ to be worn as a dress?
Hi Marnie, do pin at each side of the back and fold the pleat that will give you the exact amount, just make sure you pin at the center. I forgot to mark the pleats, so I thank you for your comment otherwise I would have never found out, I will add your comment on the video so people know that is missing. Do measure the front against your body and see how short it turns out on you. If you need help lengthening the pattern do let me know. I will also make a note for that on the video. Kind Regards,
I had the same question but, being an experienced sewer, I figured it out by looking at the pictures. I have not watched the video yet but may I suggest a pattern marking showing the pleat? Thank you for the cute pattern!
My pleasure Donna, thank you for the suggestion.
Is it me or there is an instruction step missing for the “middle pleat” on the main back piece…seen on picture
Hi Sophia, yes it is missing I just forgot to take the picture by the time I realised the mistake I have already sewn it together. I will try to see if I can take a frame from the video and add it as photo. Thank you for your patience and time to comment. Kind Regards,
Lovely dress! Thank you!
My pleasure! Enjoy!
Thank you for this! I’m looking forward to making it. I have printed it out and the lines don’t match up. Particularly pieces 6, 7 and the arm holes/top for the back piece – the green line just ends. I printed it to actual size and measured the squares so I’m sure i did that right. What am i missing? Also, I assumed that the green line is small- is that right? Thanks!
HI N have you used Adobe Reader? Sound like you printed as a portrait, am I wrong?
Hi — I’ve read the instructions several times and I’m having a hard time determining if it’s a bias-cut dress. I don’t see grain lines on the pattern pieces, but given the tutorials you’ve listed and the mention of using knit fabrics cut on the grain it seems like this dress is bias cut for woven fabrics. If you have said that explicitly, apologies! Please let me know where.
Yes it is a bias cut for grain fabrics and use the fold line for knits.
What if you don’t have a serger?
Great questions Tina, this is the perfect dress to finish with a Honk Kong seam, a bias bound seam or a fold over seam. Any of these three seams will make this dress very beautiful inside and out.
Mayra, Can I use you Racer back T Shirt pattern and make it A line? Love your fabric where did you find it. Thank you. Laurie
HI Laurie, yes of course, I saw someone do it on Instagram, if you use #soseweasy you will find her and she looks cool and happy. Let me now if you need help. The fabric I got in a local market but the print I did myself, I will show how to do it in the video which I am editing (takes me for ever sadly). I am trying to find a way not to be so critical with myself and post videos that are not so intense but good enough to ceover all the important points.
Thank you so much, look forward to making this.
Hi Mayra,
I just downloaded the pattern and I noticed a few typo mistakes. The heading on the first page you still have as the elastic shorts. On the pattern itself you have lease instead of please.
Hope this helps.
Wendy Cookson
Thank you Wendy, I am hoping all the people that doenloaded the pattern can read your comment.
Lovely dress pattern! Looks quick and easy to make. Thank you for sharing with us!
My pleasure Linda, enjoy!
Hi Mayra–Love you and what you do, by the way! Cute dress, but, I miss sewing it on YOU. On a real person it’s much easier to picture how it will hang, where the armholes hit, etc.
Thank you for everything!
Ahh dearest Peggy what you ask is indeed very hard for me, I am camera shy, very shy…but I will try.
looks lovely. CAn I just check, are seam allowances included in the pattern, or do I physically need to add them myself?
You have to add them, depending on the way you are planing to sew the dress, I go over this on how to sew the dress section. Kind Regards,
Thanks! It’s a beautiful project!
Very interesting. Do you think seersucker fabric could be used?
Yes, as long as it is not too think any fabric can be used.
Hello, I love this pattern but I’d need to wear a bra with it. The armholes look low and the back would expose normal bra straps. I don’t see a shape I could make to insert a shelf bra inside. I’m not opposed to being braless except that when I get cold . . . . well, it’s obvious I’m not wearing one! Suggestions?
Hi Laura, could make a bralette https://so-sew-easy.com/bralette-perfect-garment-summer/ and crossover the straps or ma sports bra in a bamboo or lace fabric which is what I did.