
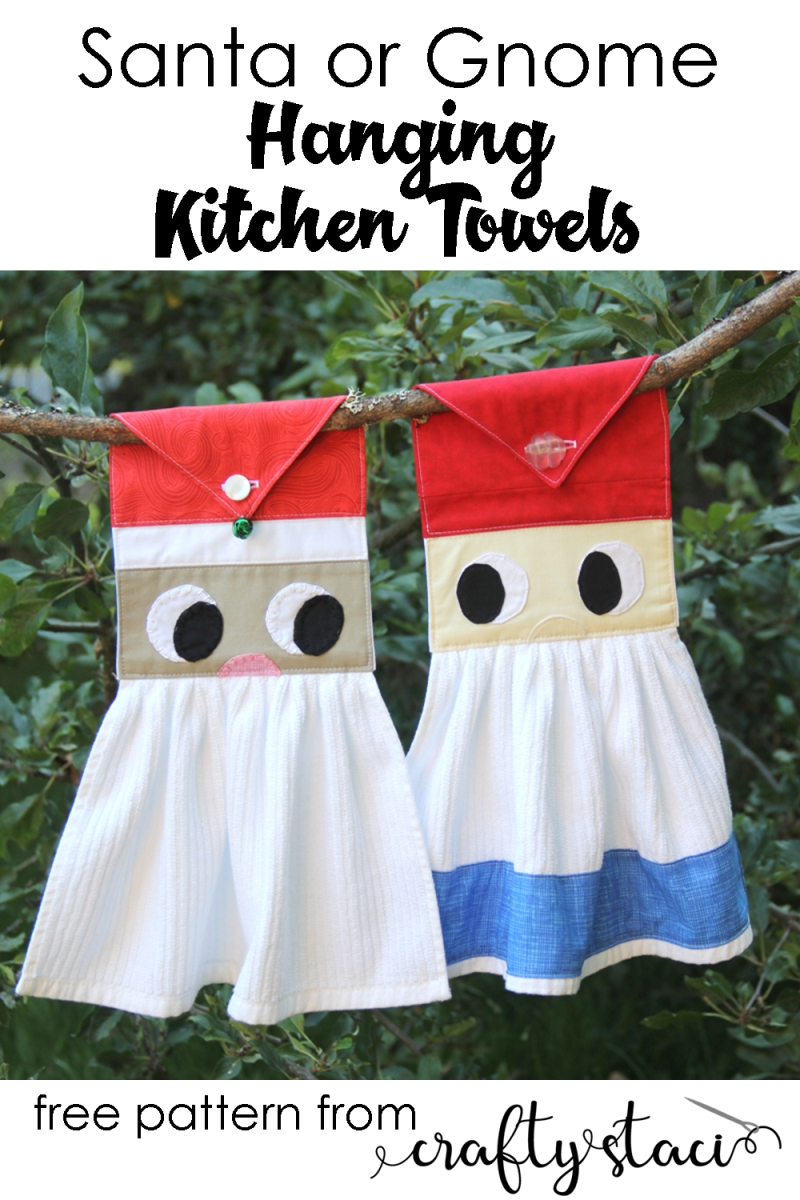
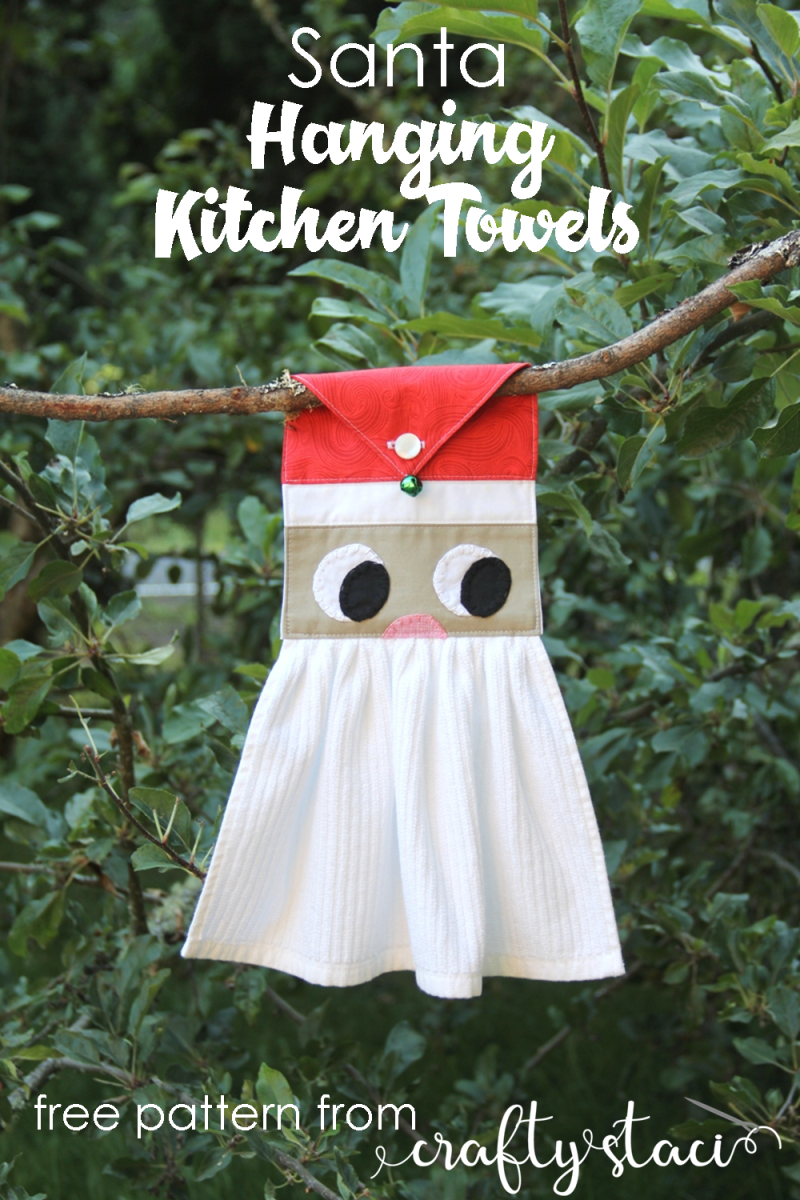
Last day of Christmas in July! I couldn’t let it go by without one last holiday project. This hanging towel, like the reversible mini mat and the dress form ornament, will work year round with the right fabric and color choices. Did you notice all three were flexible like that? It wasn’t an accident. Apparently I’m only stepping into Christmas in July with one foot! 😂

This post contains affiliate links. For my full disclosure policy, click here.
I’ll show you how to make the Santa version, then explain the differences for the gnome. They’re minor.
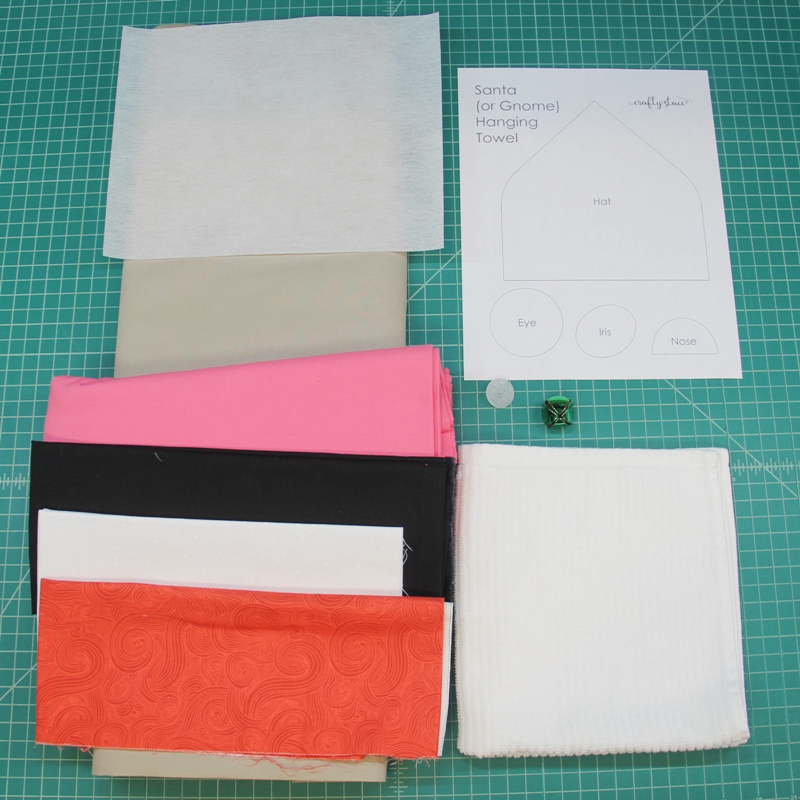
To make this you’ll need:
white kitchen towel
fabric in red, white, skin tone, pink, and black (skip pink and add blue if you’re making the gnome)
5/8 - 1” button
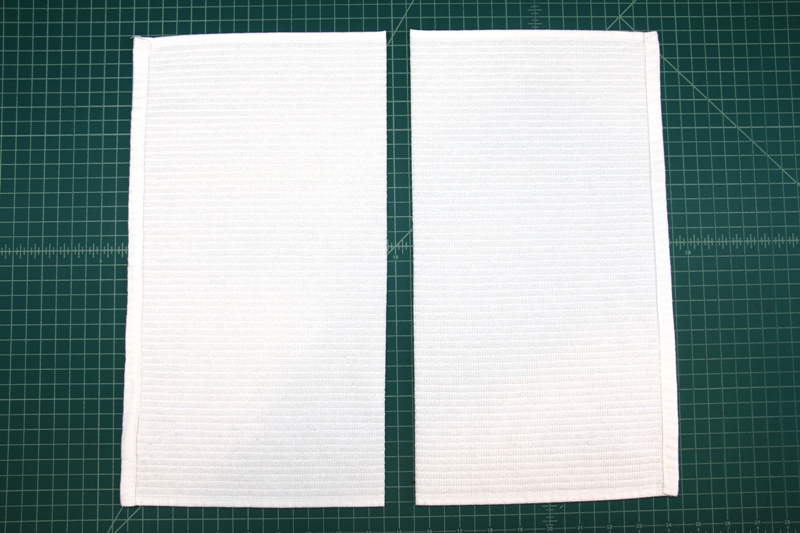
Before you do anything else, wash your towel! Mine started 16 3/4 x 19”, and ended up 16 x 17 1/4” after one wash. If you’re worried, you can wash it twice, but it will lose the most size in the first.
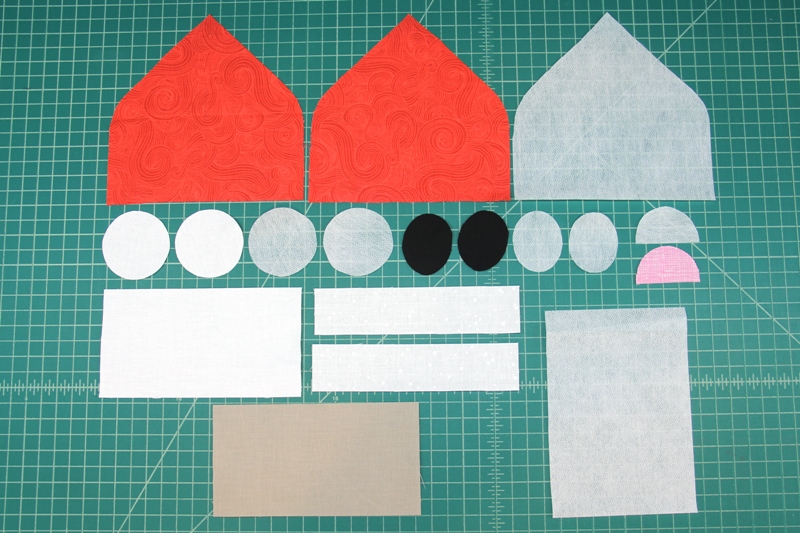
Print the pattern. Cut:
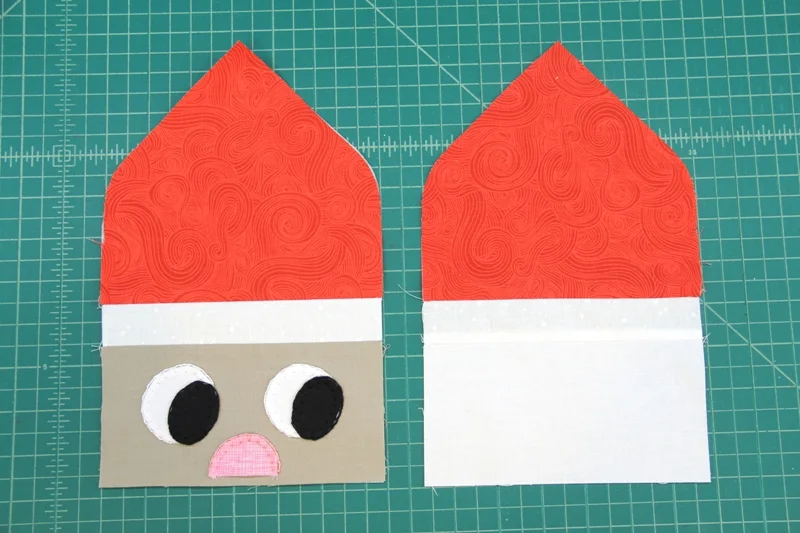
two hats from red fabric
one hat from interfacing
two eyes from white fabric
two eyes from interfacing
two irises from black fabric
two irises from interfacing
one nose from pink fabric
one nose from interfacing
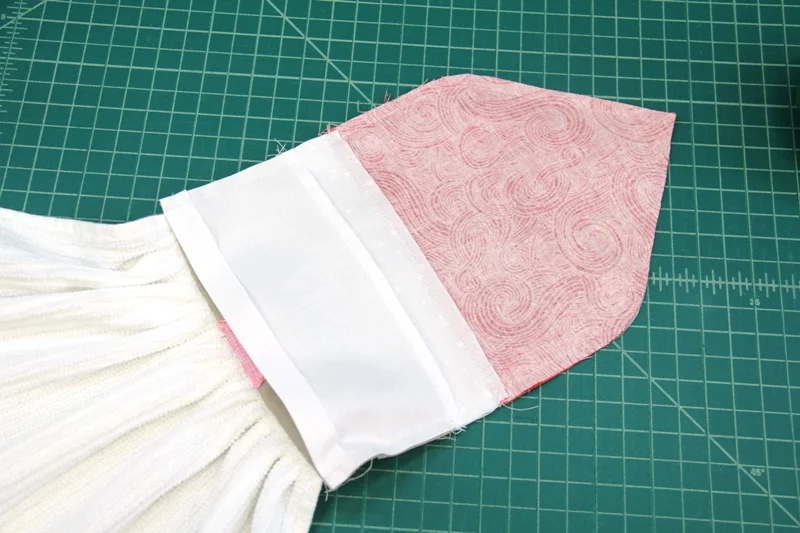
two 1 1/2 x 6 1/2” from white fabric for hat brim
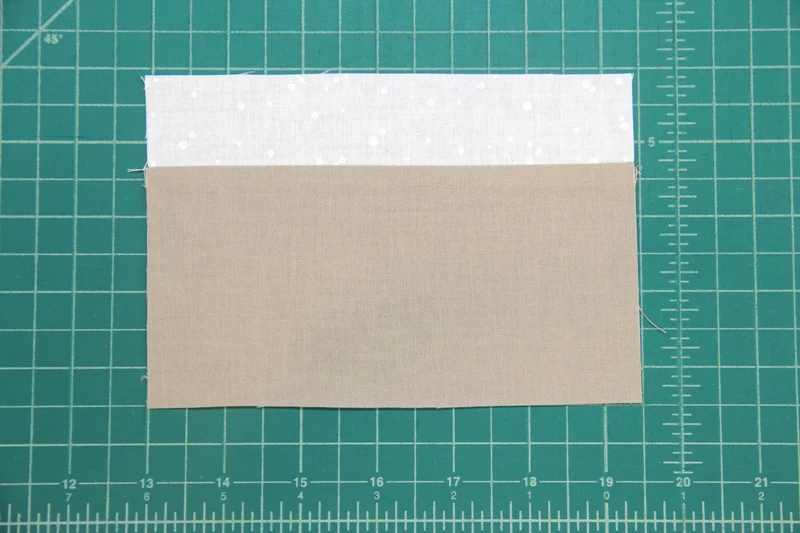
one 3 1/2 x 6 1/2” from white for back of head
one 3 1/2 x 6 1/2” from skin tone for face
one 4 1/2 x 6 1/2 from interfacing
Depending on the size of your towel, you may want to cut it in half horizontally, so it doesn’t hang down too far. It made mine a little on the short side, but let’s be honest, he was always going to be decorative to me!
Sew the long edge of the face to the hat brim. Press the seam toward the brim.
Apply the 4 1/2 x 6 1/2” interfacing to the wrong side. Set that aside.
Grab the eyes and irises. Pin one interfacing piece to one eye, with the fabric right side up and the fusible side of the interfacing down. Stitch around 1/4” from the edge. Trim the seam to 1/8”.
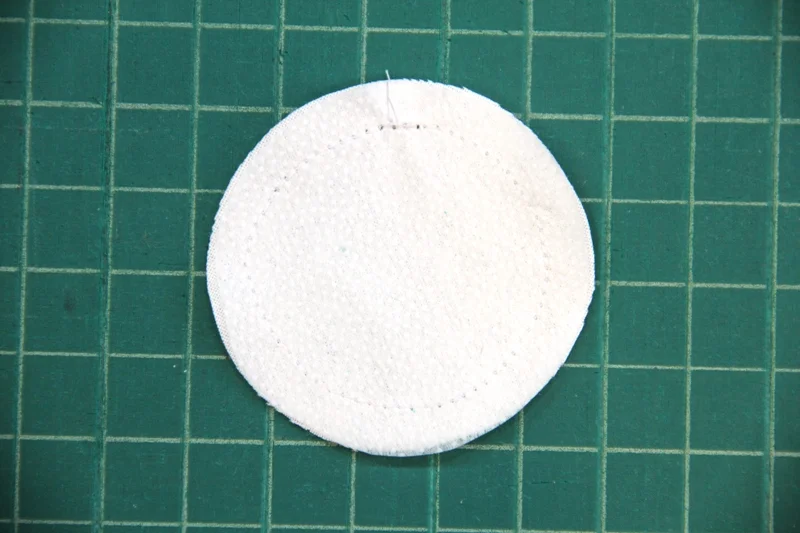
Very carefully, cut a slit in the center of the interfacing only. Messy is okay.
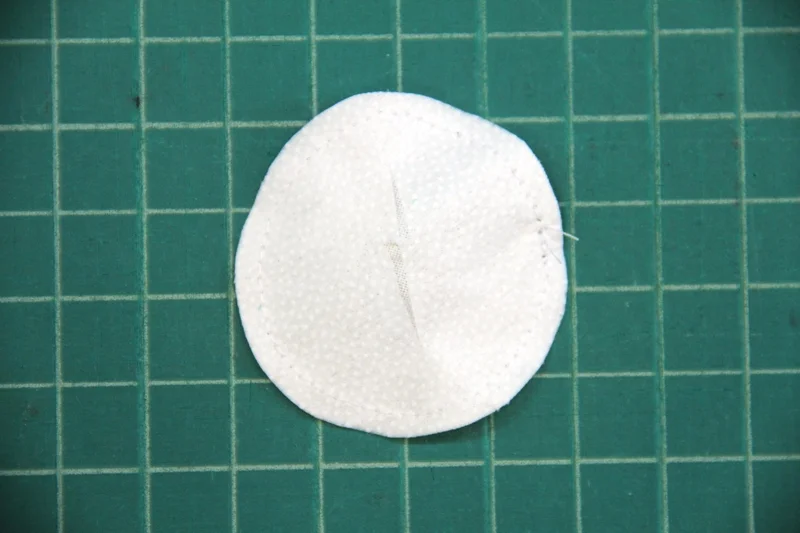
Turn the eye right side out through the slit. Try not to tear the interfacing. Do not press yet.
Repeat with the remaining eye and both irises.

For the nose, pin the fabric and interfacing together in the same manner, but only stitch the curved edge. Turn right side out through the straight edge.

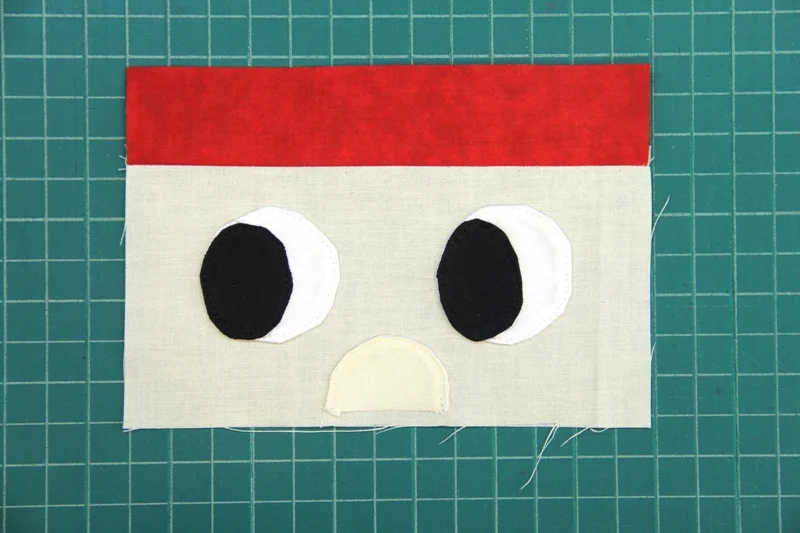
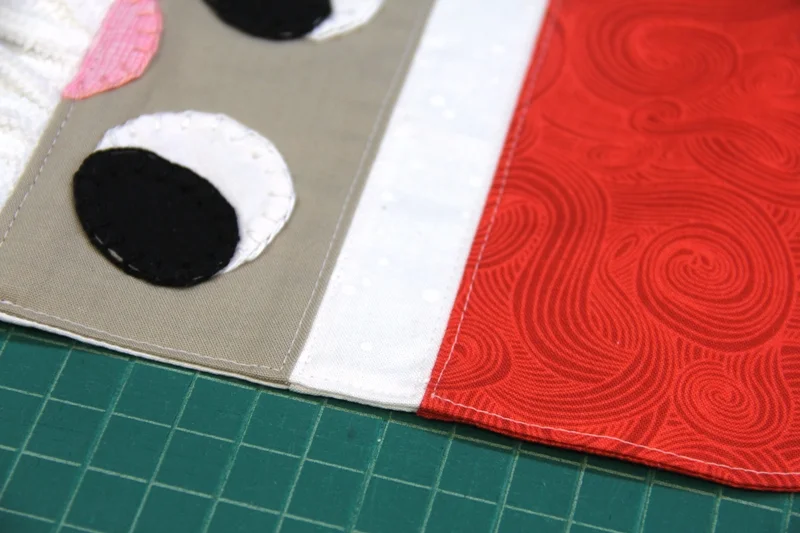
Position the eyes on the face 1” from each side and 1/2” from the top. Press in place. Lay the irises over the eyes wherever you like them, and press those as well.
Place the nose at bottom center, 1/4” from the edge. Press.

I intended to sew these all in place on the machine, which I recommend you do if you intend to use this as a regular towel. However, my curves were extra wonky, so I decided to cover them with some blanket stitching. If you try this, just know that some areas are very thick, so it’s rough going.
On a side note, I figured out later what the problem was - I’d been sewing with a denim needle up to this point! It did NOT make for smooth curves. Ugh.

Just so this doesn’t become a “do as I say, not as I do” moment, here’s what the gnome looks like sewn on the machine.
Fuse the interfacing to the wrong side of the hat front. Sew the bottom edge of the hat to the top edge of the brim, right sides together. Press the seam toward the hat.
Sew the back three pieces together to match the front.
Stitch a long basting stitch 1/4” from the top (or cut) edge of the towel. Leave long tails on the thread. Stitch again 1/8” away.
Pull the two top threads gently from each side to gather the towel. Keep gathering until the towel is 1/2” narrower than the bottom of the face. Tie off the threads.
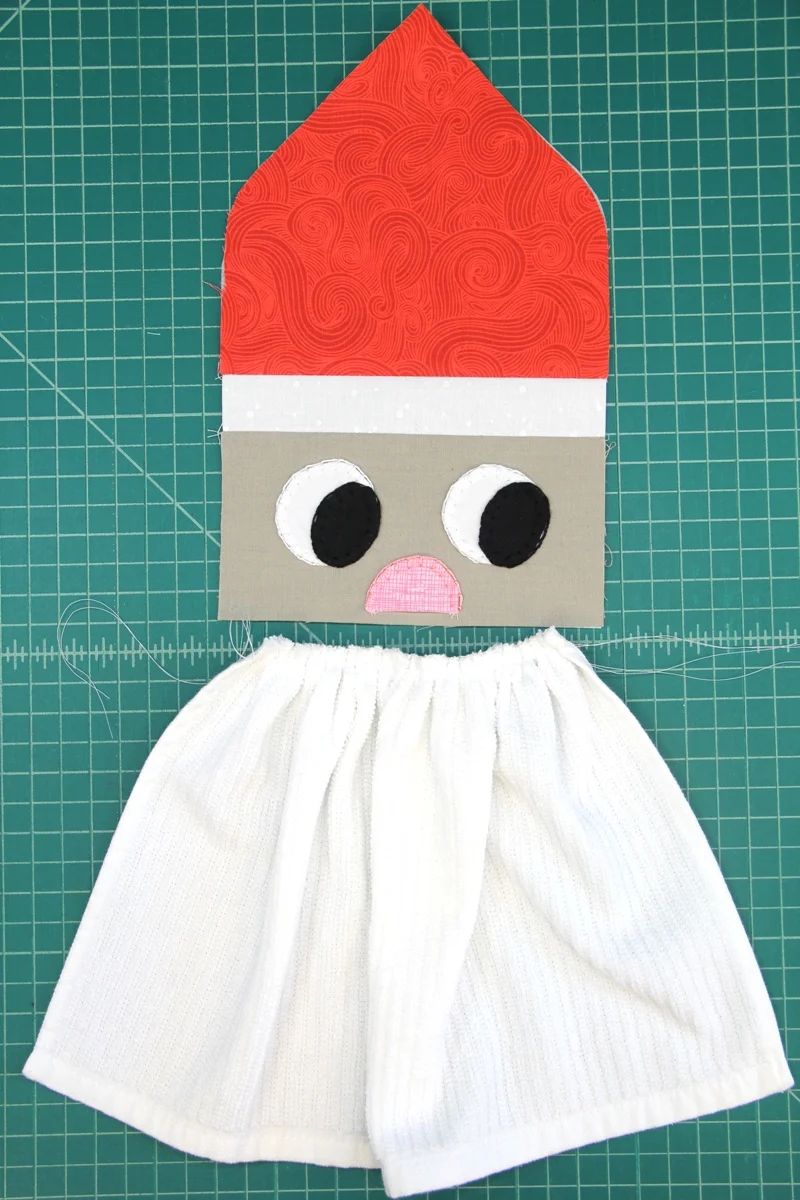
Lay the towel, right side down, over the face, with the gathered edge even with the bottom edge of the face. Pin well.
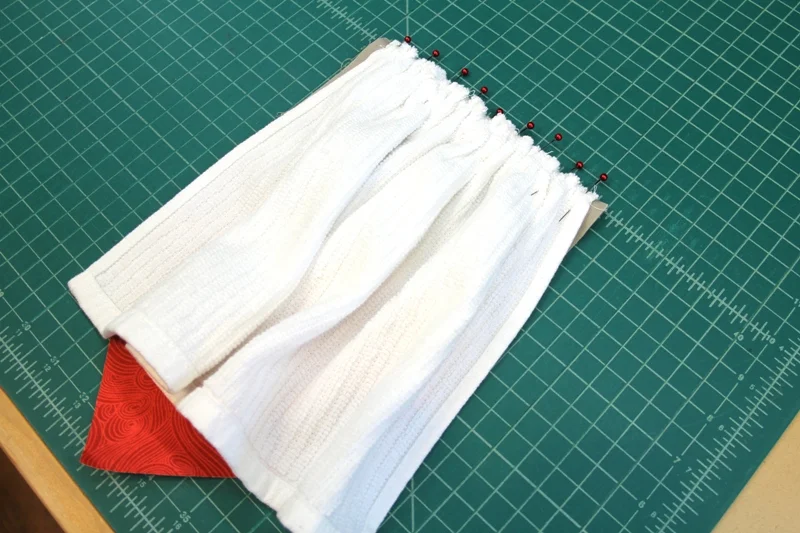
Stitch 1/2” from the edge. Press the seam toward the head.
Press the bottom edge of the back of the head under 1/2”. This needs to match the front, so measure that last seam to verify it’s 1/2”. If it’s a little over or under, adjust the amount you’re pressing to match.
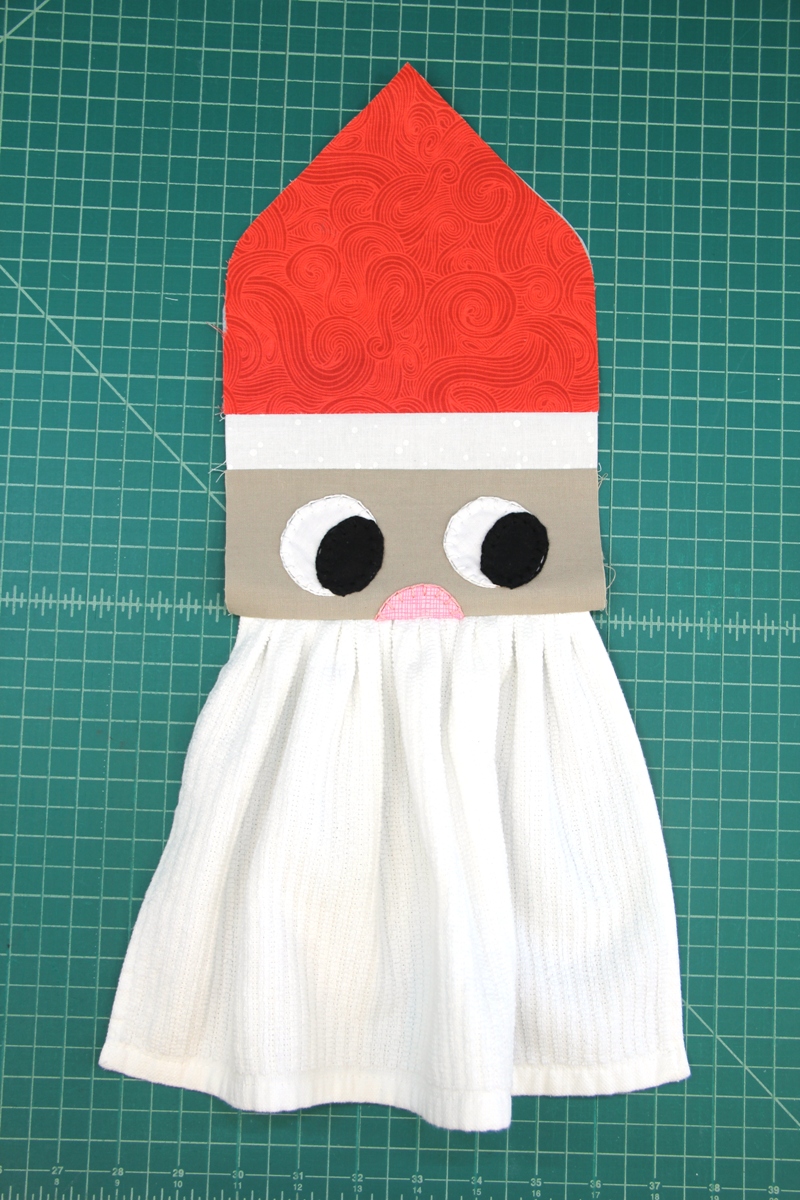
Pin the back of the head over the face, right sides together, matching edges and seams. Stitch with a 1/4” seam, leaving the bottom edge open.
Clip the corner. Turn right side out and press.
Pin the opening closed and top stitch around the face and hat.
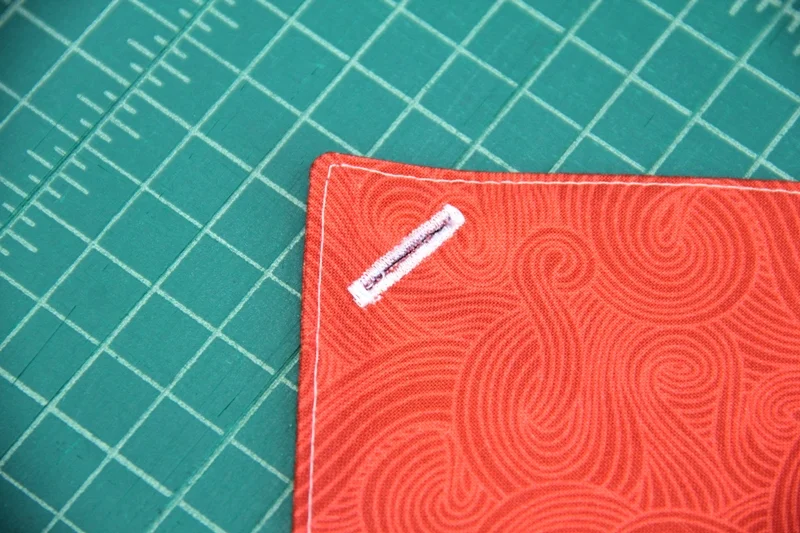
Make a horizontal buttonhole to fit your button, 3/4” from the hat tip. Move it down as needed if your buttonhole is too large to fit.
Sew the button onto the hat, about 3/4” above the brim.
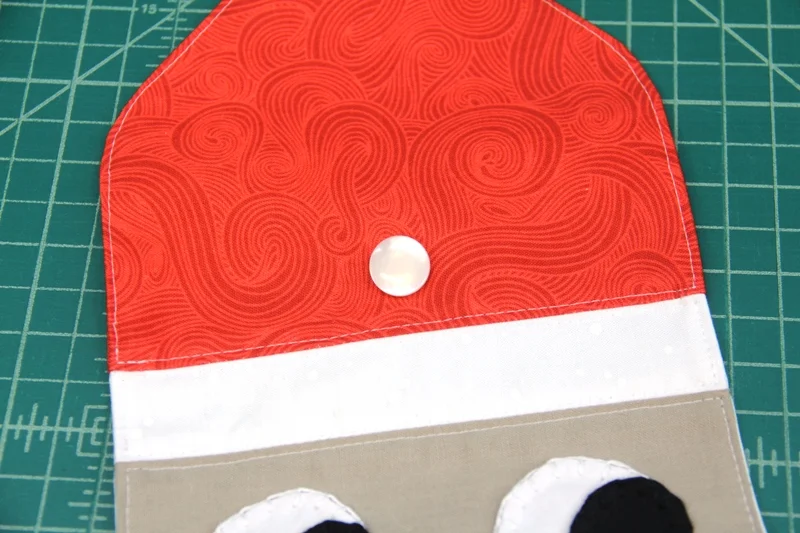
To hang, just wrap Santa’s hat behind and over, then button in place!

I added a little green jingle bell to up the holidayness a bit. I’ll look forward to putting him back up in November!
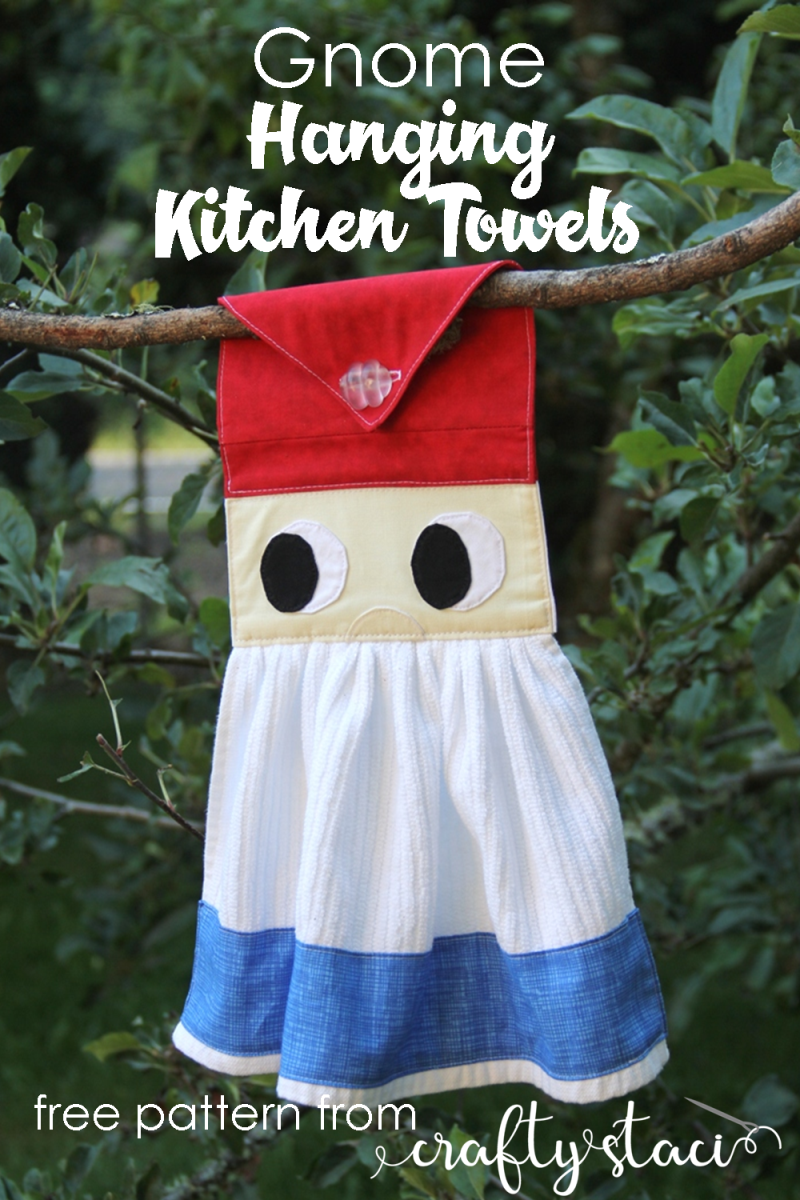
So, how do you make the gnome? When you’re cutting out his nose, use the skin tone instead of pink. Gnomes are not that jolly.
Cut his hat brim from red instead of white.
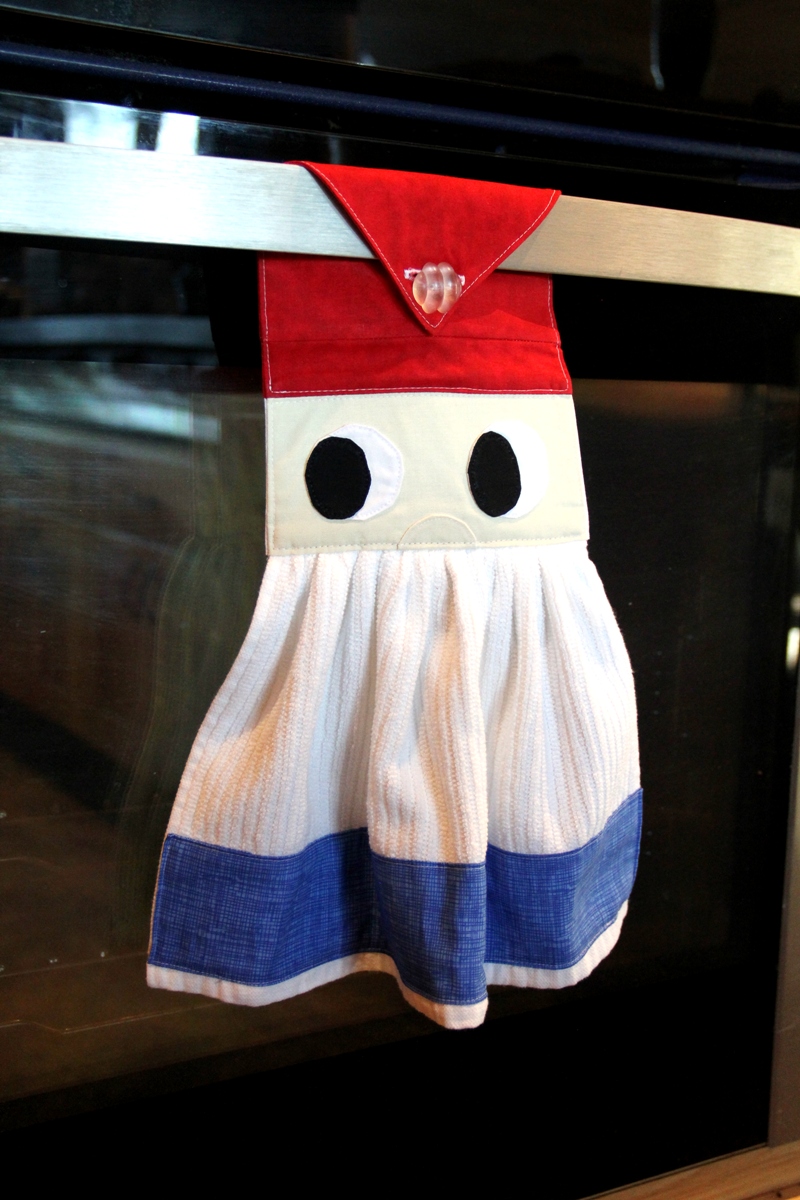
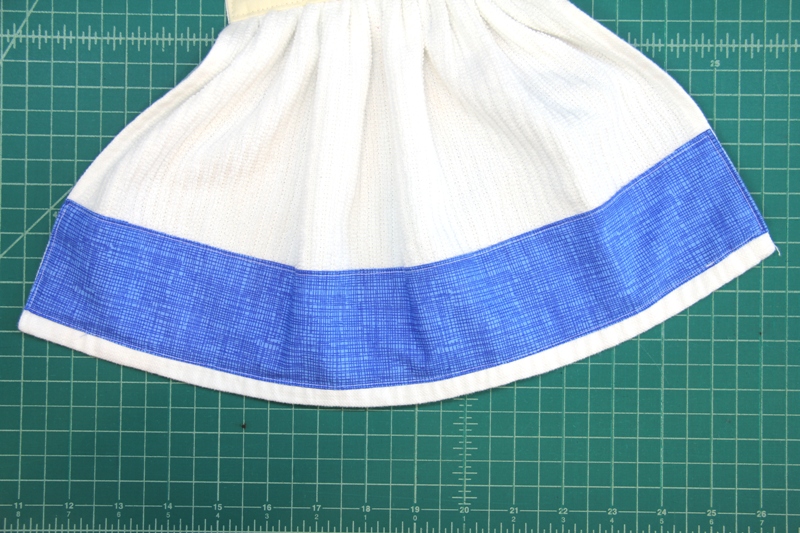
Cut a strip of blue fabric 3" x the width of the towel plus 1”. Fold the long edges under 1/4”. Fold the short ends under to match the width of the towel. Stitch the strip onto the towel, on or near the bottom edge.
The rest of the assembly is just like Santa. I keep picturing this guy as a BBQ towel. Out in the wild, where he’s happy.
That wraps up Christmas in July! I hope you enjoyed it - I sure did. Let me know if this is something you’d like to see again next year!