


Up in the sky, look: It's a bird. It's a plane. It's (your very own) superhero! Learn how to make a fun, super-cute, superhero softie for your favourite little person. Add personalised details for an extra-special gift!
Supplies


- Sewing pattern
- Hair: Wool felt 50cm x 20cm (20in x 8in) in your choice of colour or two pieces 25cm x 20cm (10in x 8in)
- Mask and eyes: black wool felt 25cm x 8cm (10in x 3.25in)
- Mouth: scrap of cherry red wool felt
- Cheeks (optional): scrap of pink wool felt
- Skin: 35cm x 20cm (14in x 10in) cotton fabric, e.g. calico, linen or quilting weight cotton
- Top: 20cm x 15cm (8in x 6in) quilting weight cotton fabric
- Pants: 15cm x 15cm (6in x 6in) quilting weight cotton fabric
- Tights: 30cm x 10cm (12in x 4in) quilting weight cotton fabric
- Cape: two pieces of cotton fabric 33cm x 17cm (13in x 6.5in) - either the same fabric or two different pieces of fabric
- Cape tie: 60cm (24in) co-ordinating ribbon (you'll be able to tie a bow with this length, like on the girl superhero's cape)
- Belt: 25cm (10in) co-ordinating ribbon
- Sewing machine and co-ordinating thread
- Embroidery floss in black, cherry red and pink (if you're adding cheeks)
- Sewing needles and pins
- Fabric scissors
- Iron and ironing board
- Soft toy stuffing (like polyfil)
1. Cut Out the Fabric
Step 1
Download and print out the sewing pattern.
Step 2
Cut out the pattern pieces and fabric. Note: cut out two from the 'tights' pattern piece, then flip the pattern piece over and cut out the other two.


Some pattern pieces are marked to cut on the fabric fold. The example below illustrates this.


2. Assemble the Body
Step 1
A quarter in seam allowance is used throughout this tutorial.
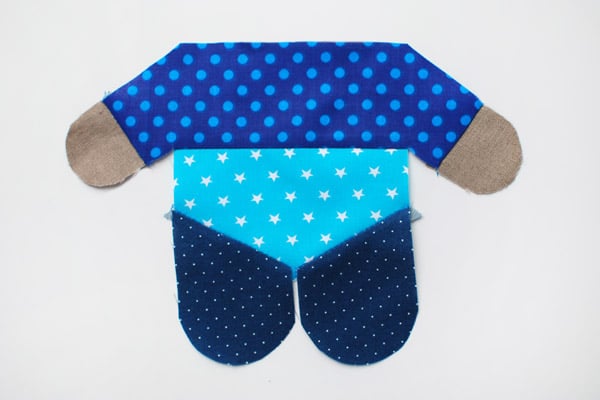
Take the two pieces for the 'top' and the four pieces for the 'hands'. Place two 'hands' and a 'top' right sides together, aligned as shown below. Sew together.
Repeat with the remaining 'top' and 'hands'.
Open the 'hands' out and press the seams flat towards the 'top'.


Step 2
Take a 'pants' piece and place it right sides together on the 'top' piece, aligned as shown below. Sew together.
Repeat with the remaining 'pants' and 'top' pieces.
Open the body out and press the seams flat towards the 'top'.


Step 3
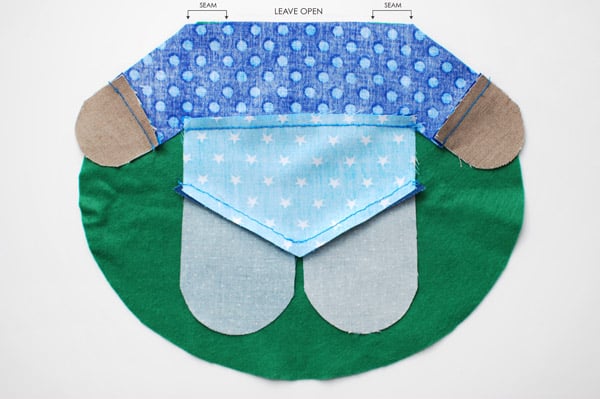
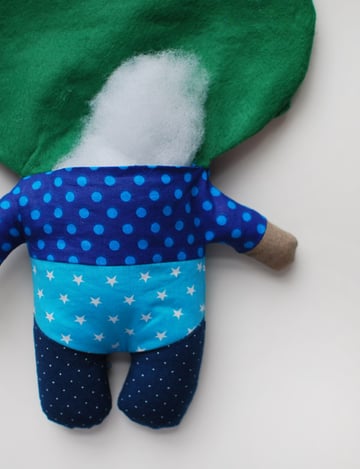
Take the four pieces of the 'tights'. Place one, right sides together, on the body, aligned as shown below. The outer corner of the 'tights' piece extends beyond the left edge of the body. Refer to the second image below and position the tights so that the quarter inch seam bisects the point where the pants and tights meet. Sew together.


Step 4
Take one of the 'tights' pieces that was cut from the flipped pattern piece and sew it to the pants using the same method as step 3.


Step 5
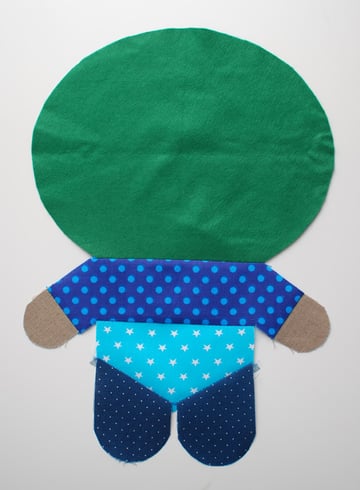
Open out the body, turn it over and press the seams flat.
Repeat steps 4 to 5 with the remaining 'body' and 'tights' pieces.

3. Assemble the Head
Step 1
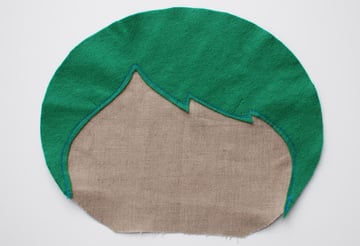
Pin the 'hair' in place on the face, right sides facing up.


Step 2
Sew around the bottom edge of the hair, a couple of millimetres (an eighth of an inch) from the edge.

Step 3
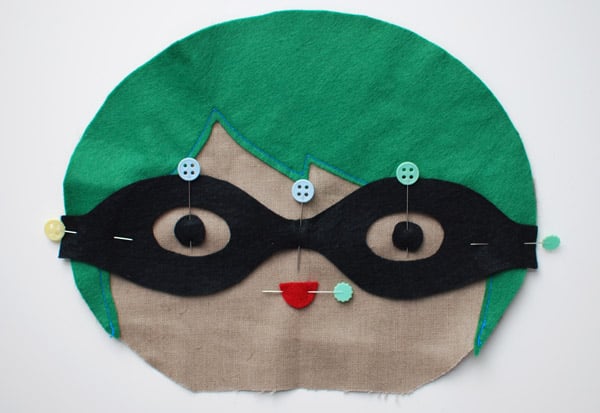
Pin the mask, eyes, mouth (and cheeks if you're using them) in place, making sure they are straight and centered.
Using three strands of embroidery floss, use running stitch to sew the eyes, mouth and cheeks in place.
Secure the mask with a couple of small stitches on each side of the eye holes.

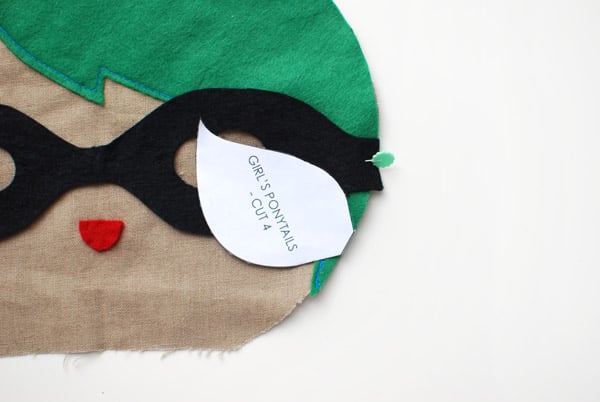
Step 4
If you're making a supergirl, you would have cut out four ponytail pieces from felt. Sew them together close to the edge in sets of two. Pin them on either side of the face, as shown in the photo below.

4. Assemble the Softie
Step 1
Sew the back of the head to the back of the body.
Place the head and the body right sides together, aligning the straight edges. Sew a seam of about 1.5cm (1in) on both ends, leaving the centre open for turning and stuffing.

Open the softie panel flat and press the seam to one side. Press the opening over as well, so you can use the crease as a guide when you sew the opening shut later.

Sew the front of the head to the front of the body.
Step 2
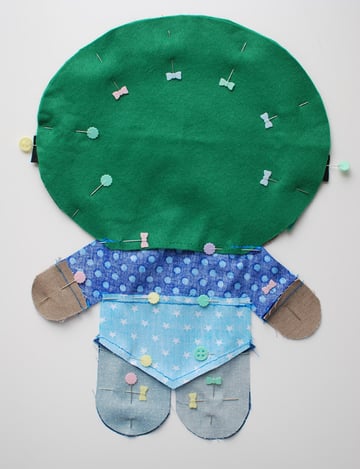
Pin the front and back of the softie together with right sides facing. Make sure you align the seams at the neck, hands, waist, and the top of the tights.

Step 3
Sew together around the whole outside of the softie. We left an opening in the neck in step 1 so there is no need to leave one now.
Sew slowly around the curves. When you come to a corner, stop with the needle in the fully downward position, lift the foot and pivot the fabric around until it's facing the right way to continue sewing. Lower the foot and continue.
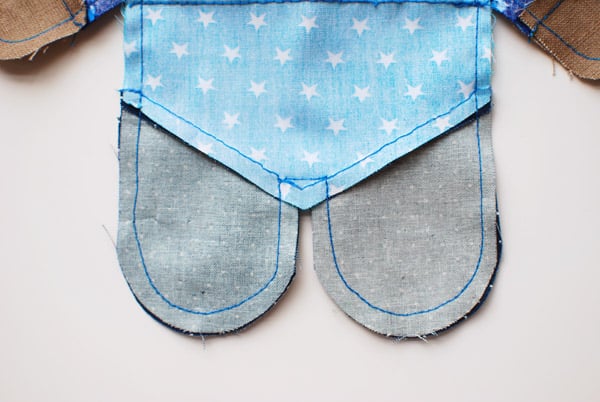
The space between the legs (bottom photo below) is a good example. Sew up the centre of the right leg until you meet the stitching on the pants. With the needle down, lift the foot, pivot the fabric, lower the foot. Sew across until you meet the other row of stitching on the pants: needle down, foot up, pivot fabric, foot down. Then sew down the centre of the left leg.


Step 4
Cut notches around the curves and into the corners. These 'V'-shaped cuts prevent the fabric from pulling and puckering when you turn the softie right way out. Cut into the corners of the neck, under the arms and between the legs. Make your cuts close to the seam, but be careful not to cut the stitches!


5. Stuff the Softie
Step 1
Turn the softie out the right way through the opening in the back of the neck. Start with the arms, then legs and body, followed lastly by the head. Use your finger or a chopstick to make sure the hands and feet are completely turned out.


Step 2
Press with an iron.
Step 3
Take small pieces of stuffing and push them right down into the hands. Continue adding small pieces and stuff the arms firmly. Next, stuff the legs, followed by the body. Using small handfuls of stuffing will ensure your softie isn't lumpy, even though it will be firmly stuffed.
When the body is full, begin stuffing the head. Even though there is a bigger space to fill, don't be tempted to stuff huge chunks of stuffing inside. Turn the softie over from time to time and massage the stuffing around if necessary. Stuff the head firmly.


6. Sew Up the Opening
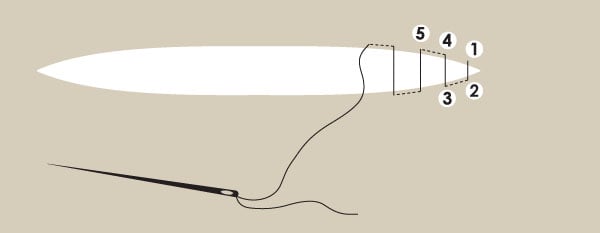
Thread a needle with co-ordinating thread and using small ladder stitches, close the opening at the back of the neck. Ladder stitch is a strong and invisible way to sew up the opening. Stitches go under the top layer of the folded seam and across the opening. This ensures that the needle starts inside the softie and comes up and out of the fabric at position 1. Then move across the opening and down into the fabric at position 2. The dotted line indicates the needle and thread running under the fabric from position 2 to position 3. It comes out at 3, across the opening and down into 4, and so on. Stitches should be 2-3mm (less than an eighth of an inch) long. Pull the thread tight every few stitches to close the opening.
Finish with a double stitch.

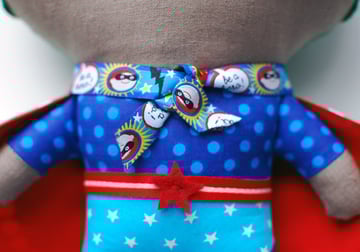
7. Add a Belt
There are two ways you can add a belt to your superhero.
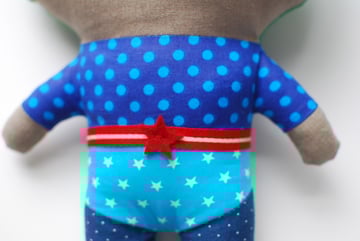
For the boy, I wrapped the ribbon around his waist after the previous step and stitched it together and to his body with a few small hand stitches. Then I sewed on a cut-out felt star.
For the girl, I used the sewing machine to sew a piece of ribbon (the width of the body) onto the front and back body panels at step 5 of section 2 'Assemble the Body'.

8. Make the Cape
No superhero is complete without a cape!
Step 1
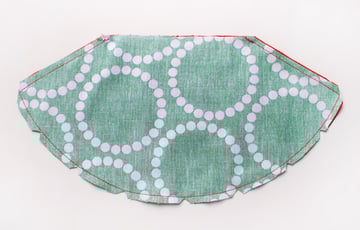
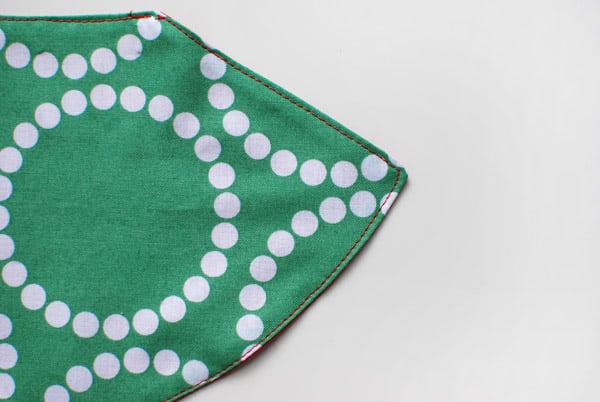
With the right sides facing, sew around three sides of the cape, leaving the top open for turning.
Step 2
Cut 'V' shaped notches around the curves, and cut across the two corners. This will prevent the fabric from pulling and puckering when you turn the cape right way out. Make your cuts close to the seam, but be careful not to cut the stitches!

Step 3
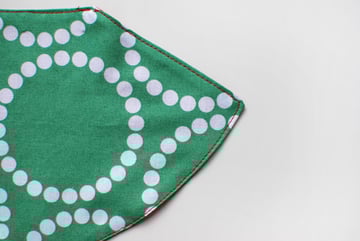
Turn the cape right side out and press. Press the top edges in by a quarter inch and pin the two sides together.


Step 4
Sew around the entire cape, a couple of millimetres (less than an eighth of an inch) from the edge.
Step 5
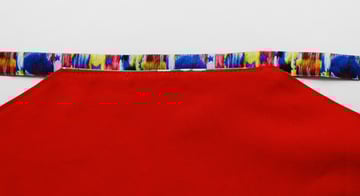
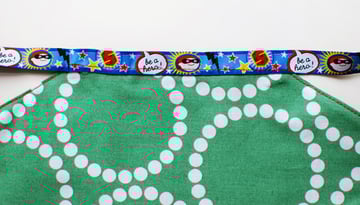
Lay the ribbon right side down and the cape with the inside facing up and overlap them by a quarter inch. Pin and sew together.
Inside:

Outside:

Step 6
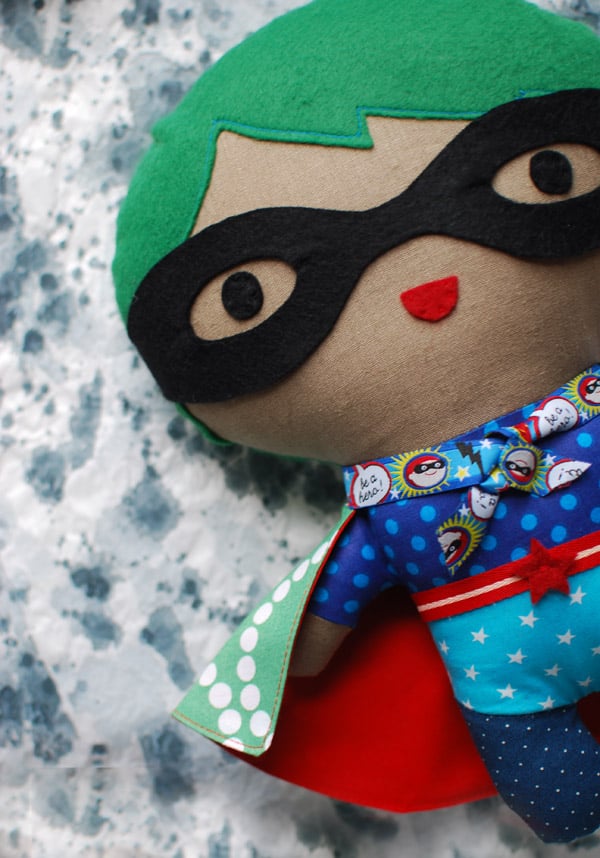
Tie the cape around your superhero's neck.
For the boy, I tied a double knot and used a few small hand stitches to keep the ends down.
For the girl, I tied a bow with long ends.

9. Customise Your Superhero
There are lots of ways to personalise a superhero for a little person in your life. Here are a few ideas to get you started.
Match the child's hair and eye colour, add a dimple or two if they have them, and change the shape of the fringe and hair. You could even add some spikes at the top of their hair, or dress the softie in the child's favourite colours. Create a monogram by cutting out the child's initial in felt and sewing it to the softie's chest, belt buckle, or on the back of the cape.
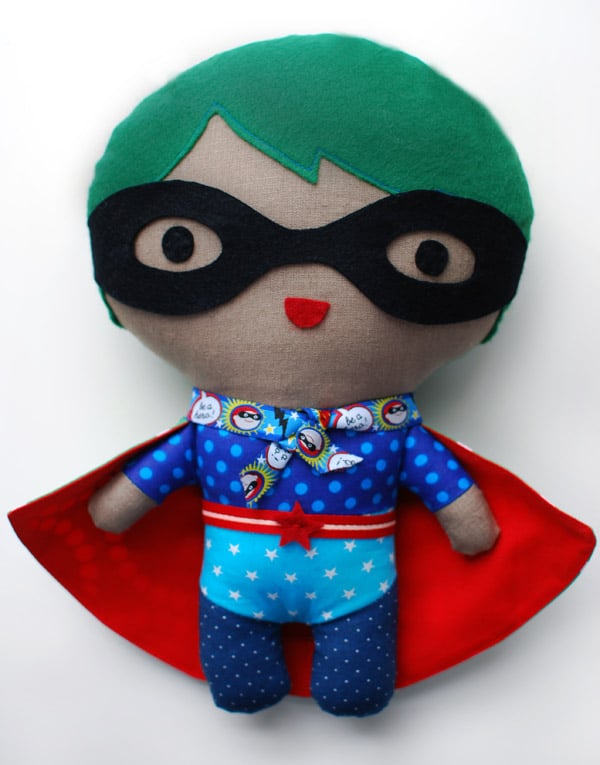

There you go: a fully customised superkid superdoll, a wonderful present, and a childhood keepsake.
Ready to Save the World!
Your superhero is now ready to save the world—or the next playroom!
This pattern gives you loads of scope for personalisation, so let your creativity run free. Perhaps you could give your superhero a miniature sidekick, in the form of the child's pet or favourite toy.

Hope you enjoyed this tutorial and sewing pattern. Do you have any other ideas on how to personalise your superhero softie? Let me know in the comments below.


